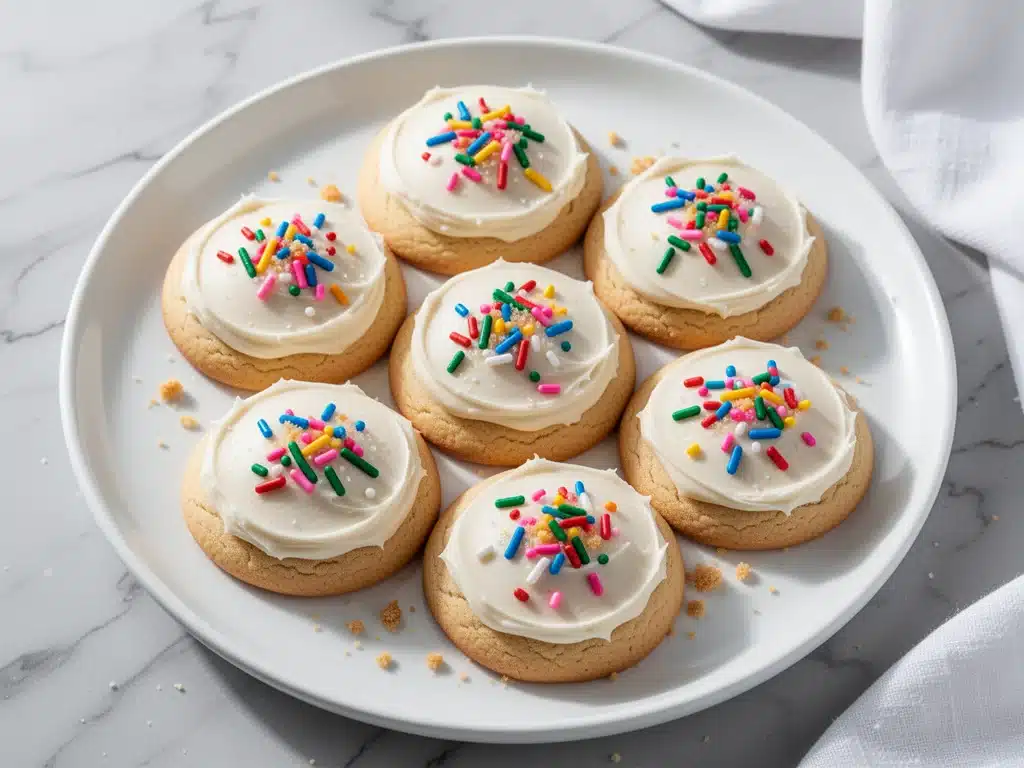
Last Tuesday, I was standing in the kitchen at 6:45 PM, staring at a half-empty pantry and a child who was already whining about tomorrow’s school lunch. You know the look. It’s that specific blend of exhaustion and panic that hits right when you realize you forgot to prep anything. My daughter wanted “fun” cookies. Not protein bars. Not apple slices. She wanted something that looked like it came from a bakery, preferably with sprinkles, because apparently, that’s the current social currency in third grade.
I didn’t have time to bake. I didn’t have time to chill dough. And I certainly didn’t have the energy to wrestle with a rolling pin. So, I did what any desperate, caffeine-deprived parent does: I grabbed a box of sugar cookie mix, a jar of frosting, and a handful of rainbow sprinkles. I mixed them up in a bowl, rolled tiny balls, dipped them, and tossed them with extra sprinkles. It took five minutes. Maybe six if you count the time I spent laughing at how cute they looked.
Those little Back-to-School Frosted Sugar Cookie Bites didn’t just save our evening. They started a revolution. Now, every Sunday night, my kids beg for “sprinkle time.” It’s become our ritual. We put on a podcast, roll the dough, and dip the bites. They taste like pure joy, they’re ready in minutes, and best of all, they fit perfectly in a standard lunchbox container. I’ve made this recipe on repeat so many times that I’ve actually memorized the process. It’s stupid simple, it’s wildly popular, and it’s going to become your new best friend during the busy school year.
Here’s the thing about these bites: they look complicated because they’re so pretty, but the magic is in the shortcuts. We’re leaning on high-quality shortcuts—like good boxed mix or store-bought dough—and elevating them with homemade touches. The result? A cookie that tastes homemade but requires zero advanced baking skills. If you can boil water, you can make these. Seriously.
Why You’ll Love This Recipe
There are about ten reasons I keep coming back to these cookie bites, but here are the big ones that will change your weeknight (or weekend) game.
Stupid Simple — I’ve walked my teenage daughter through this recipe over the phone while I was at work. She didn’t burn the kitchen down. If you can mix and roll, you can make this. No creaming butter, no whipping eggs, no complicated techniques.
Lightning Fast — From start to finish, these take about 5 minutes of active time. No baking required if you use the shortcut method, or just 10 minutes in the oven if you prefer them warm. I make these on weeknights when I get home and need to feed the beast immediately.
Lunchbox Perfect — These are small enough to fit in any container, sturdy enough to survive a backpack toss, and impressive enough to make your kid feel like the cool kid on the playground. My son traded a sandwich for two of these last week. Two. That’s the power of a sprinkle.
Kid-Approved — My kids are picky. Like, “I only eat beige food” picky. But rainbow sprinkles? They don’t say no to rainbow sprinkles. This recipe has turned dessert into a bonding activity. We make a big batch, and they last in the fridge for days.
Budget-Smart — Using a box mix or basic pantry staples keeps the cost per bite incredibly low. You’re feeding a crowd for less than the price of a single cupcake from a fancy bakery. It’s dessert that doesn’t break the bank.
This is my go-to when I need a treat that just works. No stress, no mess, just reliable, delicious food that makes everyone happy. And honestly? It makes me happy because I’m not stressed about cooking.
Ingredients You’ll Need
Here’s the best part: you probably have most of this already. I’m particular about three ingredients here, and I’ll tell you exactly why. The rest is just pantry basics.
Sugar Cookie Dough (1 box mix or 1 lb store-bought) — I usually grab a box of Betty Crocker or a similar brand because it’s consistent. But if you have a favorite homemade dough recipe, use that. The key is that the dough should be soft and pliable. If it’s too cold, let it sit on the counter for 10 minutes. Pro tip: If you’re using store-bought tub dough, make sure it’s not frozen solid.
Vanilla Frosting (1 jar, about 16 oz) — Don’t skimp on the quality here. A cheap, runny frosting will make the cookies soggy. I love the Wilton brand or the tubs from the bakery section of the grocery store. It needs to be thick enough to hold its shape. If your frosting is too thin, chill it in the fridge for 20 minutes before dipping.
Rainbow Sprinkles (1 cup) — The classic jimmies are best for rolling. They stick better and don’t fall off as easily as nonpareils (those tiny balls). I buy the big bag because we go through them fast. If you don’t have rainbow, any color works. I’ve made chocolate sprinkles before, but rainbow is just more fun for back-to-school.
Butter (2 tablespoons, softened) — If you’re making the dough from scratch, you’ll need this. If you’re using a mix or store-bought dough, you might not need it, but a little extra butter in the dough makes them richer. I always add a knob of butter to my homemade dough for that extra melt-in-your-mouth feel.
Vanilla Extract (1 teaspoon) — Just a splash to boost the flavor if you’re using a plain box mix. It makes a huge difference. I use pure vanilla, not imitation, because you can tell the difference in sugar cookies.
Optional: White Chocolate Chips (½ cup) — Melted white chocolate is an alternative to frosting for dipping. It sets harder and stays shiny longer. I use this when I’m packing lunches that will sit in a hot car. The chocolate won’t melt as fast as the frosting.
I always keep a bag of sprinkles in my pantry specifically for this. It’s my “I need to cheer up the kids” ingredient. You can find them in the baking aisle, right next to the cake mix. If you can’t find rainbow, any color works, but rainbow is just more festive.
Equipment Needed
You don’t need fancy equipment for this. Here’s what I actually use.
Large Mixing Bowl — I use a 4-quart bowl. It needs to be big enough to roll the dough balls without them sticking to the sides. I prefer glass or ceramic because it’s heavy and doesn’t slide around.
Baking Sheet — Just one large sheet. I line it with parchment paper because cleanup is easier. I’ve tried silicone mats, but parchment is cheaper and works just as well for this.
Silicone Mat or Parchment Paper — For rolling the dough balls in sprinkles. It keeps the counter clean. I use a separate small plate for the sprinkles so I don’t have to reach over the bowl.
Small Plates — I use three small plates. One for the dough balls, one for the frosting, and one for the sprinkles. This is my “assembly line” setup. It makes the process super fast.
Paring Knife — For trimming any excess frosting or sprinkles if you want them perfectly round. I rarely do this, but it’s nice for presentation.
Airtight Container — To store the finished bites. I use a Tupperware with a tight seal. They stay fresh for up to a week.
Optional: Melting Pot — If you’re using white chocolate, you’ll need a small saucepan or a microwave-safe bowl. I use a microwave-safe bowl and heat in 15-second intervals.
I’m obsessed with my silicone spatulas for mixing the dough. They’re cheap and easy to clean. Don’t overthink the tools here. Just make sure you have enough bowls for your assembly line.
How to Make It: Step-by-Step
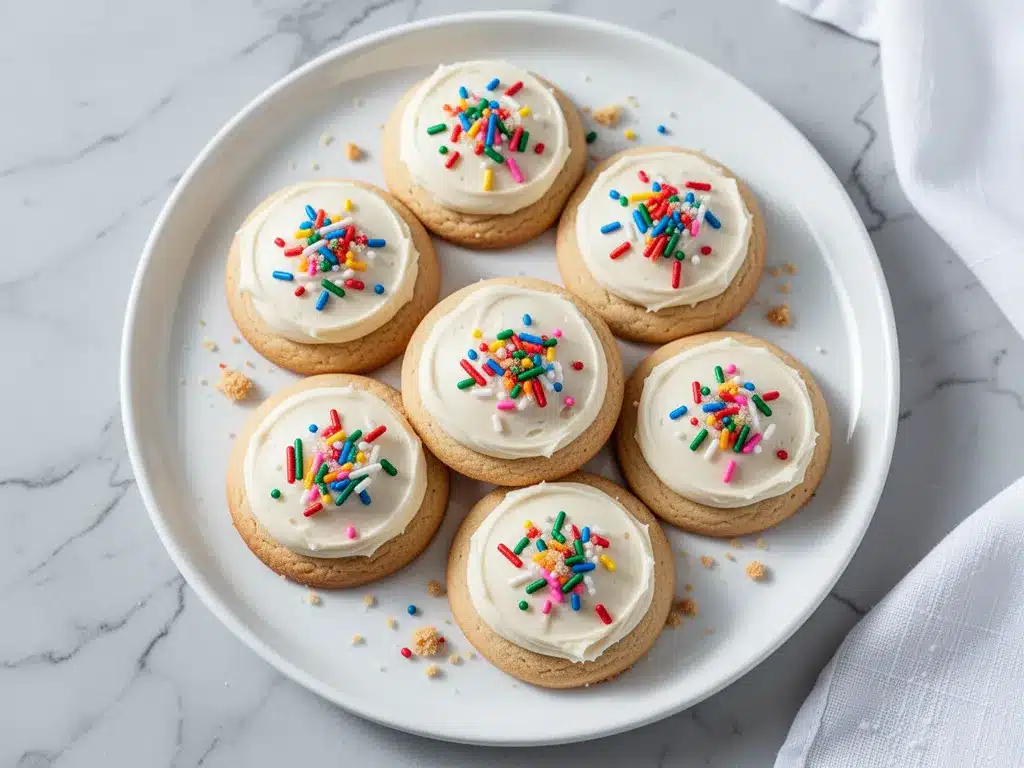
Alright, let’s make this! I’m walking you through exactly how I do it, including the little tricks I’ve picked up.
Step 1: Prep Your Station (2 minutes)
Before you start, get everything out. Line a baking sheet with parchment paper. Put your frosting in a shallow bowl (a pie plate works great). Pour your sprinkles onto a separate plate. If you’re making dough from scratch, mix it now. If you’re using store-bought, let it come to room temperature. Once you start rolling, things move fast, so have everything ready.
Step 2: Roll the Dough (3 minutes)
Take your dough and roll it into small balls. I make them about 1 inch in diameter—bite-sized. Don’t make them too big, or they’ll be overwhelming. Place them on the prepared baking sheet. If the dough is sticky, wet your hands slightly with water. This prevents sticking without drying out the dough. Space them about an inch apart.
Step 3: Dip in Frosting (2 minutes)
Take a dough ball and drop it into the frosting. Use a fork or your fingers to coat it completely. Let the excess drip off for a second. Don’t worry if it’s not perfect; these are rustic and cute. Place the frosted ball back on the baking sheet. If the frosting is too thick, add a tiny drop of milk to thin it out. You want it to flow smoothly.
Step 4: Add Sprinkles (2 minutes)
While the frosting is still wet, roll the ball in the sprinkles. Press gently so they stick. You can also sprinkle them on top with your fingers. I like to make sure the sides are covered too. Place the finished bite back on the sheet. Repeat with the rest. This is the fun part. My kids always try to eat the sprinkles before the cookies are done.
Step 5: Set the Frosting (10 minutes or overnight)
If you’re using store-bought frosting, it will set in about 10-15 minutes at room temperature. If you want them firm for packing, put them in the fridge for 30 minutes. If you’re using white chocolate, let it set at room temperature. Don’t rush this step, or the sprinkles will slide off.
Step 6: Store and Serve
Once set, transfer them to an airtight container. They’re ready to go! Pack them in lunchboxes or serve them at parties. They look professional but are incredibly easy to make.
Total Time: About 5 minutes active, plus setting time.
Built-in Troubleshooting:
- Sprinkles falling off? Your frosting was too thick or dry. Thin it with a drop of milk or cream.
- Dough too sticky? Wet your hands or dust them with a tiny bit of flour.
- Frosting too runny? Chill it in the fridge for 20 minutes before dipping.
Expert Tips & Tricks
Here’s everything I’ve learned from making this dozens of times. These tips will save you from my mistakes.
Keep the Dough Cold
If your dough gets too warm while you’re rolling, it will stick to everything. Put it back in the fridge for 10 minutes if it starts feeling tacky. Cold dough is easier to handle.
Don’t Skip the Parchment
I’ve tried rolling directly on the counter, and it’s a mess. Parchment paper keeps everything clean and makes cleanup instant. It’s worth the extra step.
Use a Pie Plate for Frosting
A shallow bowl is easier to dip into than a deep one. You get full coverage without drowning the cookie. I use a 9-inch pie plate for my batches.
Chill for Crispiness
If you want the cookies to hold their shape in a lunchbox, chill them after dipping. This firms up the frosting and prevents them from squishing.
White Chocolate Hack
For a shinier, harder set, use melted white chocolate instead of frosting. It’s great for humid days. Just melt it in 15-second intervals and stir.
Common Mistakes (and how to avoid them):
- Mistake: Sprinkles sliding off. Fix: Make sure the coating is wet when you add sprinkles. If it’s drying, add more frosting.
- Mistake: Cookies too dense. Fix: Don’t overwork the dough. Mix just until combined.
- Mistake: Frosting too sweet. Fix: Use a high-quality frosting or add a pinch of salt to balance the sugar.
Variations & Substitutions
Once you’ve nailed the basic version, here’s how you can mix it up. I’ve tried all of these.
Chocolate Chip Version
Add ½ cup of mini chocolate chips to the dough before rolling. It’s a classic combo. My kids love this one.
Red Velvet
Swap the sugar cookie mix for red velvet. The color is beautiful with white frosting and rainbow sprinkles. It’s festive for holidays.
Vanilla Bean
Add 1 teaspoon of vanilla bean paste to the frosting. It adds tiny black specks and intense flavor. It’s fancy but easy.
Dairy-Free
Use dairy-free cookie dough and dairy-free frosting. Many brands now make great alternatives. The texture is similar, and the sprinkles are usually dairy-free too.
Gluten-Free
Use a gluten-free sugar cookie mix. The process is the same. I’ve used Bob’s Red Mill mix, and it works well.
Color-Coded
Instead of rainbow, use sprinkles that match a theme. Blue for a sports party, pink for a birthday, green for St. Patrick’s Day. It’s a great way to customize.
Serving & Storage
How to Serve:
I usually serve these straight from the container at parties. They’re easy to grab and eat. But here are other ways I’ve enjoyed them:
Side Dishes:
– Milk (obviously)
– Fruit salad
– Yogurt parfaits
Storage Instructions:
Refrigerator:
Store in an airtight container for up to 5 days. They stay fresh and the frosting holds up well. I keep them in the fridge to prevent melting in warm weather.
Freezing:
Yes, you can freeze them! Place them in a single layer on a baking sheet, freeze until solid, then transfer to a freezer bag. They’ll last for 2 months. Thaw in the fridge overnight. I do this when I make a huge batch.
Pro tip:
If you’re packing them in a lunchbox, put them in a small container with a lid. They’re sturdy and won’t break easily. My kids love pulling them out at lunchtime.
Nutrition Information
I’m not a nutritionist, but here’s the breakdown if you’re tracking.
Per Serving (based on 12 bites):
- Calories: 180
- Protein: 2g
- Carbs: 28g
- Fiber: 0g
- Sugar: 18g
- Fat: 7g
- Saturated Fat: 3g
- Cholesterol: 5mg
- Sodium: 150mg
What’s Good:
– Low protein
– Easy to portion control (they’re small!)
– Fun treat for kids
What to Know:
– High in sugar
– Contains gluten and dairy
– Moderate calories per bite
My Take:
Look, this is a treat. It’s sugar and frosting. It’s not a health food. But it’s way better than store-bought candies, and I know exactly what’s in it. When I want to make it lighter, I use half the frosting and more sprinkles. But usually? I just eat a few and enjoy it. It’s a special occasion cookie, not a daily snack.
Final Thoughts
So that’s my go-to Back-to-School Frosted Sugar Cookie Bites! I’ve probably talked your ear off at this point, but when you make a recipe this often, you have a lot to say about it.
This has saved weeknight dinners more times than I can count. It’s my answer to “what’s for dessert” when I’m tired, don’t want to bake, and still want something that tastes really good. My kids are happy, my husband’s happy, and I’m happy because I’m not stressed about cooking.
Make it yours! Try different sprinkles, swap in your favorite frosting, or add different mix-ins. The best recipes are the ones you adapt to your family’s tastes. And if something doesn’t work, tell me that too—I’m here to help troubleshoot.
If you make this, drop a comment and let me know what you think! I love hearing how recipes turn out in your kitchen. And I hope your kitchen smells half as good as mine does right now.
Frequently Asked Questions
Can I use homemade dough?
Absolutely! Any sugar cookie dough works. Just make sure it’s soft enough to roll into balls. If it’s too stiff, let it warm up a bit. I’ve used my grandmother’s recipe, and it works perfectly. The key is that the dough should be pliable, not crumbly.
Why did my sprinkles fall off?
Usually, this means the frosting was too thick or had started to dry. Make sure the frosting is smooth and wet when you add the sprinkles. If it’s too thick, thin it with a drop of milk. Also, press the sprinkles gently into the frosting to help them stick.
Can I make these ahead of time?
Yes! You can make them up to 3 days ahead and store them in the fridge. Or freeze them for up to 2 months. I make a big batch on Sundays and pack them throughout the week. They stay fresh and delicious.
Can I use different sprinkles?
Any sprinkles work! Jimmies stick best, but nonpareils, sanding sugar, or even crushed candy canes work too. I’ve used gold sprinkles for holidays and red/blue for sports games. Get creative!
How do I store them?
Store in an airtight container at room temperature for up to 3 days, or in the fridge for up to 5 days. If it’s hot, keep them in the fridge to prevent melting. They’ll last longer in the fridge.
Can I dip them in chocolate instead of frosting?
Yes! Melted white chocolate works great. It sets harder and stays shiny longer. Just dip the cookie balls in the melted chocolate and then add sprinkles. It’s a great alternative for humid days.
Why are these called “bites”?
Because they’re bite-sized! They’re small enough to eat in one or two bites, making them perfect for lunchboxes and parties. They’re not full-sized cookies, so they’re less overwhelming and easier to pack.
Pin This Recipe!


Back-to-School Frosted Sugar Cookie Bites
- Total Time: 15 minutes
- Yield: 12 servings 1x
Description
A quick, no-bake (or optional bake) dessert made with sugar cookie mix or dough, dipped in vanilla frosting, and rolled in rainbow sprinkles. Perfect for lunchboxes and busy weeknights.
Ingredients
- 1 box sugar cookie mix (or 1 lb store-bought dough)
- 1 jar (16 oz) vanilla frosting
- 1 cup rainbow sprinkles
- 2 tablespoons butter, softened (optional, for homemade dough)
- 1 teaspoon vanilla extract (optional, for flavor boost)
- 1/2 cup white chocolate chips (optional alternative to frosting)
Instructions
- Prep your station by lining a baking sheet with parchment paper. Pour frosting into a shallow bowl (like a pie plate) and sprinkles onto a separate plate.
- Roll the dough into 1-inch diameter balls. If the dough is sticky, wet your hands slightly with water. Place balls on the prepared baking sheet.
- Dip each dough ball into the frosting, coating it completely. Let excess drip off and place back on the baking sheet.
- While the frosting is still wet, roll the frosted ball in the sprinkles, pressing gently to adhere. Place finished bites back on the sheet.
- Allow the frosting to set at room temperature for 10-15 minutes, or chill in the refrigerator for 30 minutes for a firmer set.
- Transfer to an airtight container for storage or serve immediately.
Notes
If using store-bought tub dough, ensure it is not frozen solid. If frosting is too thick, thin with a drop of milk. If dough is too warm, chill it for 10 minutes. For a shinier, harder set, use melted white chocolate instead of frosting.
- Prep Time: 5 minutes
- Cook Time: 0 minutes
- Category: Dessert
- Cuisine: American
Nutrition
- Serving Size: 1 bite-sized cookie
- Calories: 180
- Sugar: 18
- Sodium: 150
- Fat: 7
- Saturated Fat: 3
- Carbohydrates: 28
- Protein: 2
Keywords: sugar cookies, no bake cookies, lunchbox treats, back to school snacks, kid friendly desserts, sprinkle cookies, quick desserts



