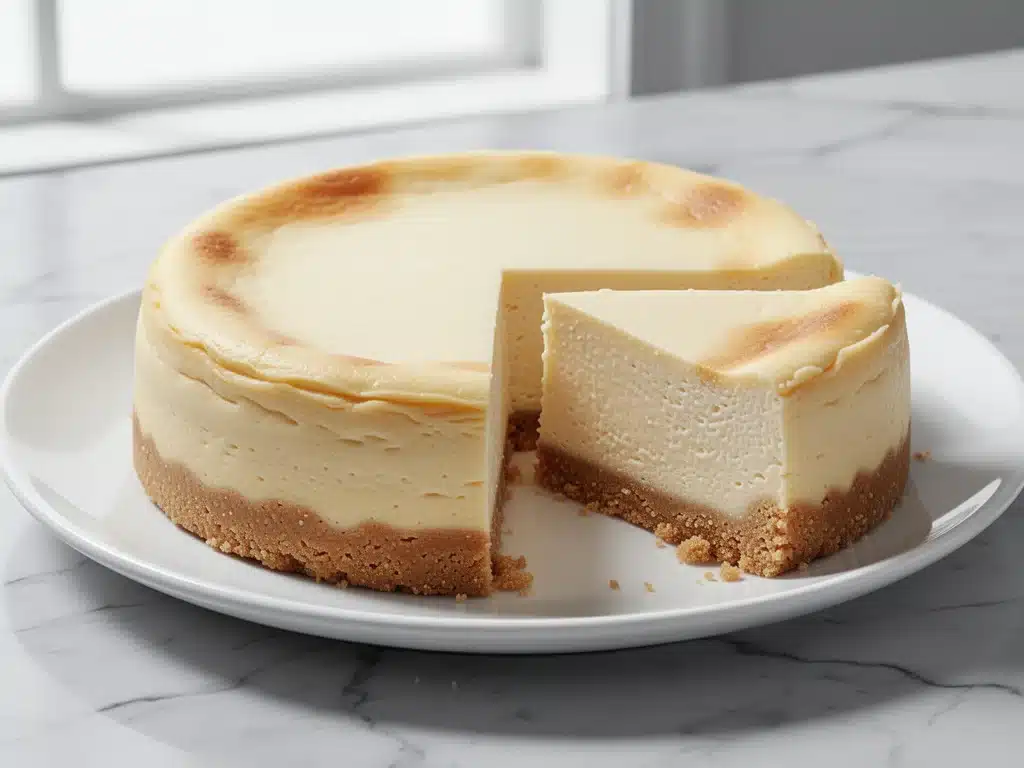
I still remember the exact texture of my first attempt at New York-style cheesecake. It was dry, cracked down the middle like a desert floor, and tasted suspiciously like sweetened cottage cheese. I was twenty-four, living in a tiny apartment with a oven that ran hot, and I was convinced I just didn’t have the “pastry genes.” My boyfriend took one bite, politely chewed, and said, “It’s… dense?” I ate the rest of it anyway because throwing away food felt worse than admitting defeat.
That was five years ago. Since then, I’ve made this Classic New York Style Baked Cheesecake with Graham Crust probably thirty times. Some batches were perfect—dense, creamy, with that distinct tang that makes you close your eyes. Others were too loose. Some had cracks. But I kept tweaking, kept testing, kept eating the mistakes. And somewhere around batch number fifteen, I cracked the code. Not just the recipe, but the method. The secrets to that impossibly smooth texture, the sturdy graham cracker base that actually holds up, and the tangy flavor profile that screams “I went to a fancy bakery in Manhattan” (even though I made it in my pajamas).
This isn’t just a dessert. It’s my go-to for impressing people when I’m running on empty. It’s the reason I’ve become the person everyone asks for holiday desserts. And the best part? It’s actually pretty forgiving once you know what to look for. If you’ve been intimidated by baked cheesecakes, thinking they’re too high-maintenance or complicated, let me tell you: this is the one that will change your mind. It’s rich, it’s indulgent, and it’s surprisingly straightforward. You’ll make this on repeat, I promise. Trust me.
Why You’ll Love This Classic New York Style Baked Cheesecake
There are a lot of cheesecakes out there. There’s the fluffy Japanese cotton kind, the no-bake whipped cream versions, the sour cream-heavy midwestern slices. But there is something about a classic New York style baked cheesecake that just hits different. It’s substantial. It’s serious. And it delivers on every single promise of what a cheesecake should be.
Here’s why this version has permanently replaced all others in my rotation:
That Perfect Texture — I’m talking about that dense, fudgy, almost brownie-like consistency, but creamy. Not airy, not fluffy. Dense. It melts in your mouth but stays on the plate. I’ve tried lighter versions, and they just don’t satisfy the craving. This is the real deal.
The Graham Crust That Actually Stays Put — So many cheesecake crusts turn soggy or fall apart when you slice. This one? It’s buttery, slightly crunchy, and holds its shape beautifully. The ratio of butter to crumbs is key, and I’ve tested enough to know exactly what works.
Tangy, Not Sweet — A good cheesecake shouldn’t taste like pure sugar. The cream cheese and sour cream combo gives it that signature tang that balances the sweetness. It’s sophisticated. It’s complex. It’s what separates a homemade cheesecake from a box mix.
Makes Great Leftovers (If You Have Any) — Let’s be real, you will probably eat half of this in the first two days. But the second half? It gets better. The flavors meld together overnight. By day three, it’s even creamier. I love having a slice with my morning coffee.
Impressive But Not Stressful — Yes, it needs a water bath. Yes, it needs to cool slowly. But the active prep time is less than thirty minutes. The rest is just waiting. You can chop veggies, watch a movie, or nap while this does its thing. It’s the ultimate “do it yourself” luxury.
Ingredients You’ll Need
Before we get into the nitty-gritty of the technique, let’s talk about what goes into this Classic New York Style Baked Cheesecake with Graham Crust. I’m particular about a few things here. The quality of your ingredients matters more than usual because there aren’t a ton of them, and they’re all playing leading roles.
For the Crust:
Graham Cracker Crumbs (1 ½ cups / 150g) — I buy pre-made crumbs to save time, but if you have full sheets, blend them in a food processor. Don’t use the chocolate graham crackers unless you want a chocolate cheesecake. Plain is the way to go for this classic style.
Unsalted Butter (6 tablespoons / 85g, melted) — This binds the crust. Use real butter, not margarine. Margarine can make the crust greasy and soft. I like to melt it in the microwave and let it cool slightly before mixing.
Granulated Sugar (2 tablespoons / 25g) — Just a little bit to sweeten the crust and help it brown. You don’t want a sweet crust; you want a buttery, crumbly foundation.
Pinch of Salt — Enhances the flavor. Don’t skip it.
For the Filling:
Full-Fat Cream Cheese (32 ounces / 900g) — This is non-negotiable. I use four 8-ounce blocks. Brick-style, not the tub stuff. The tub stuff has more water and additives, which can affect the texture. Bring it to room temperature! Cold cream cheese creates lumps that are impossible to beat out. I plan ahead and take it out of the fridge the night before.
Granulated Sugar (1 cup / 200g) — Standard white sugar. Some people use brown sugar, but I prefer white for a cleaner, tangier flavor. It dissolves better too.
Sour Cream (1 cup / 240g) — Full-fat, plain sour cream. This is the secret ingredient for that tang and creamy texture. Some recipes use heavy cream, but I find sour cream gives a better structure and less risk of cracking.
Eggs (4 large) — Room temperature eggs. Cold eggs can shock the cream cheese and cause curdling. Crack them into a bowl and let them sit for 20 minutes if you forgot to take them out.
Vanilla Extract (2 teaspoons) — Use real vanilla, not imitation. It makes a noticeable difference in a high-quality cheesecake.
Flour (2 tablespoons / 16g) — This is the stabilizer. It helps prevent cracking and gives that dense NY texture. Don’t skip it, but don’t add more or it’ll get cakey.
Equipment Needed
You don’t need a fancy kitchen to make this. Here’s what I actually use:
9-Inch Springform Pan — This is essential. The springform allows you to release the sides without flipping the cake. Make sure it’s high-quality; cheap ones leak. I wrap the bottom in heavy-duty aluminum foil to be safe.
Food Processor or Blender — For crushing the graham crackers if you’re using sheets. If you’re using crumbs, you can just use a bowl and a whisk.
Stand Mixer or Hand Mixer — Mixing by hand is possible but painful. You need to beat the cream cheese until it’s completely smooth before adding sugar. A mixer saves your arms.
Roasting Pan — For the water bath. A large roasting pan that can hold your springform pan and have hot water poured around it. I use a deep roasting pan from my oven.
Kettle or Large Pot — For boiling water for the bath.
Wire Rack — For cooling the cake gradually.
How to Make It: Step-by-Step
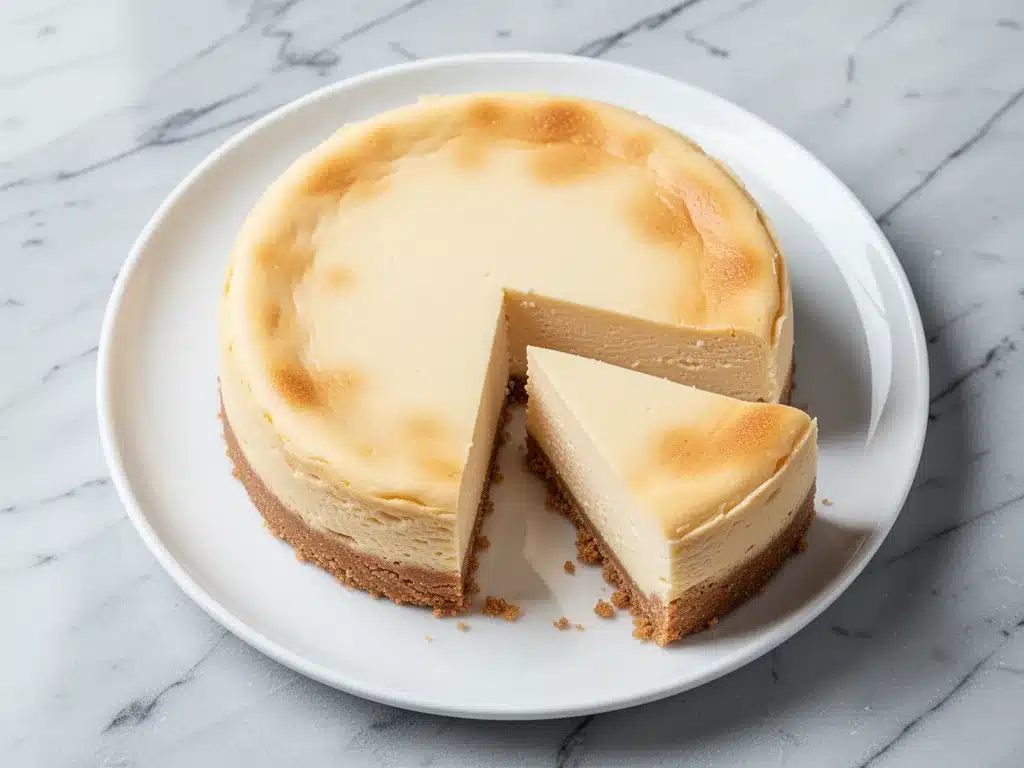
Alright, let’s get into the kitchen. I’m walking you through exactly how I make this Classic New York Style Baked Cheesecake with Graham Crust. Pay attention to the details, especially the mixing and cooling steps.
Step 1: Prep Your Pan and Oven
Preheat your oven to 325°F (160°C). This is a low and slow bake. High heat causes cracking. Take your cream cheese and eggs out to come to room temperature. Wrap the outside of your 9-inch springform pan in two layers of heavy-duty aluminum foil. This is crucial for the water bath to prevent leaking.
Step 2: Make the Crust
In a medium bowl, mix the graham cracker crumbs, melted butter, sugar, and salt. It should look like wet sand. Press this mixture firmly into the bottom of the prepared springform pan. Use the bottom of a measuring cup to pack it down tight. You want an even, compact layer. Bake this for 10 minutes to set it, then remove and let it cool while you make the filling. This pre-baking helps prevent a soggy bottom.
Step 3: Beat the Cream Cheese
In your mixer, beat the room-temperature cream cheese on medium-low speed until it’s completely smooth and creamy. This can take 3-5 minutes. Scrape down the bowl and beaters. There should be zero lumps. If you see lumps now, they’ll be there forever.
Step 4: Add Sugar and Sour Cream
Add the sugar and beat on low until combined. Scrape the bowl again. Add the sour cream and vanilla extract. Mix on low until just combined. Do not overmix at this stage.
Step 5: Incorporate the Eggs
Add the eggs one at a time, mixing on low speed just until the yellow disappears. If you overmix now, you’ll incorporate too much air, which leads to cracking. Stop as soon as the eggs are blended. Finally, add the flour and mix gently until incorporated.
Step 6: The Water Bath
Place your springform pan (wrapped in foil) into the large roasting pan. Pour the batter over the cooled crust. Smooth the top with a spatula. Now, carefully pour hot water from your kettle into the roasting pan until it reaches about an inch up the side of the springform pan. Be careful not to splash water into the cheesecake.
Step 7: Bake
Place the roasting pan in the oven. Bake for 60-70 minutes. The edges should be set, but the center should still jiggle slightly like Jell-O when you shake the pan. It will firm up as it cools. Do not overbake!
Step 8: The Slow Cool
This is the hardest part. Turn off the oven and crack the oven door open slightly. Let the cheesecake sit in the cooling oven for 1 hour. This gradual temperature change prevents cracking. After an hour, remove it from the water bath and let it cool completely on a wire rack. Then, refrigerate for at least 6 hours, preferably overnight.
Expert Tips & Tricks
Here’s everything I’ve learned from making this dozens of times. These tips will save you from my mistakes.
Room Temperature is Everything
I cannot stress this enough. If your cream cheese is cold, you will have lumps. If your eggs are cold, you might curdle the mixture. Plan ahead. Take everything out the night before.
Don’t Overmix
Once you add the eggs, mix on the lowest speed possible. You want to combine, not aerate. Air bubbles expand in the oven and then collapse, causing cracks. If you want a crack-free top, keep the mixing minimal.
The Jiggle Test
Don’t rely solely on the clock. The cheesecake is done when the edges are set but the center 2 inches still wobble. It should look like a gentle wave, not a liquid splash. If it’s firm, you’ve overbaked it.
Patience During Cooling
Don’t rush the cooling process. Taking it out of the hot oven and putting it in the fridge immediately causes thermal shock, which leads to cracks. The oven-off method is your friend.
Wrap That Pan
Even if you have a high-quality springform pan, water can seep in. Double-wrapping the bottom with foil is a small step that prevents a watery mess.
Variations & Substitutions
Once you’ve nailed the basic version, here’s how you can mix it up. I’ve tried all of these.
Berry Swirl
Before baking, dollop ½ cup of strawberry or raspberry jam on top of the batter. Use a knife to swirl it in. Don’t over-swirl or it’ll turn muddy.
Chocolate Chip
Stir 1 cup of semi-sweet chocolate chips into the batter after the eggs are mixed in. Rich and indulgent.
Lemon Cheesecake
Add the zest of two lemons to the batter. Swap ½ cup of sour cream for fresh lemon juice. Bright and refreshing.
Gluten-Free
Use gluten-free graham crackers or almond flour for the crust. The filling is naturally gluten-free (thanks to the flour, which you can omit or substitute with cornstarch if needed, though cornstarch changes the texture slightly).
Dairy-Free
This is harder. Use dairy-free cream cheese (like Miyoko’s) and coconut cream instead of sour cream. The texture will be different but still tasty.
Serving & Storage
How to Serve:
I serve this plain, with a dollop of whipped cream and maybe some fresh berries on top. It’s simple. Let the cheesecake shine. Use a sharp knife dipped in hot water for clean slices. Wipe the knife between cuts.
Storage:
Keep this in the refrigerator, covered, for up to 5 days. It actually gets better after day two. Don’t freeze it unless you have to; the texture can become grainy upon thawing.
Leftovers:
If you have leftovers, store them in an airtight container. They make for an amazing breakfast or snack.
Nutrition Information
I’m not a nutritionist, but here’s the breakdown if you’re tracking. This is a rich dessert, so portion control is key.
Per Slice (based on 12 slices):
- Calories: 450
- Protein: 8g
- Carbs: 35g
- Fat: 32g
- Sugar: 28g
Look, this is cheesecake. It’s supposed to be rich. But it’s way better than anything from a store, and you know exactly what’s in it. Enjoy it mindfully.
Final Thoughts
So that’s my go-to Classic New York Style Baked Cheesecake with Graham Crust! I’ve talked your ear off, but when you make a recipe this often, you have a lot to say about it. This has saved my holidays, my potlucks, and my sanity. It’s my answer to “I need to impress people but I’m tired.” My family loves it, my friends beg for it, and I love making it.
Make it yours! Try different toppings, swap in your favorite berries, or adjust the sugar if you prefer it less sweet. The best recipes are the ones you adapt. If you make this, drop a comment and let me know how it turned out! I love hearing from you. And if something doesn’t work, tell me—I’m here to help.
Happy baking! And I hope your kitchen smells half as good as mine does right now.
Frequently Asked Questions
Q: Why did my cheesecake crack?
A: Cracking is usually caused by overmixing (too much air), overbaking (dryness), or rapid temperature changes. Follow the slow cooling method in the oven, and don’t overbeat the eggs. It’s still delicious even if it cracks!
Q: Can I use low-fat cream cheese?
A: I don’t recommend it. Low-fat cream cheese has more water and stabilizers, which can make the texture grainy and prevent it from setting properly. Full-fat is the only way to go for this classic style.
Q: How long do I need to refrigerate it?
A: At least 6 hours, but overnight is best. This allows the flavors to meld and the texture to set fully. If you cut into it too soon, it might be soft and messy.
Q: Can I make this ahead of time?
A: Yes! This is actually better when made ahead. You can make it 2-3 days in advance. Just keep it covered in the fridge.
Q: Do I really need a water bath?
A: For a true New York style cheesecake, yes. It creates a humid environment that prevents the top from drying out and cracking. Without it, you risk a dry, cracked top.
Q: Can I freeze this cheesecake?
A: You can, but the texture might change slightly upon thawing. If you must freeze, wrap it tightly in plastic and foil. Thaw it slowly in the fridge overnight.
Pin This Recipe!
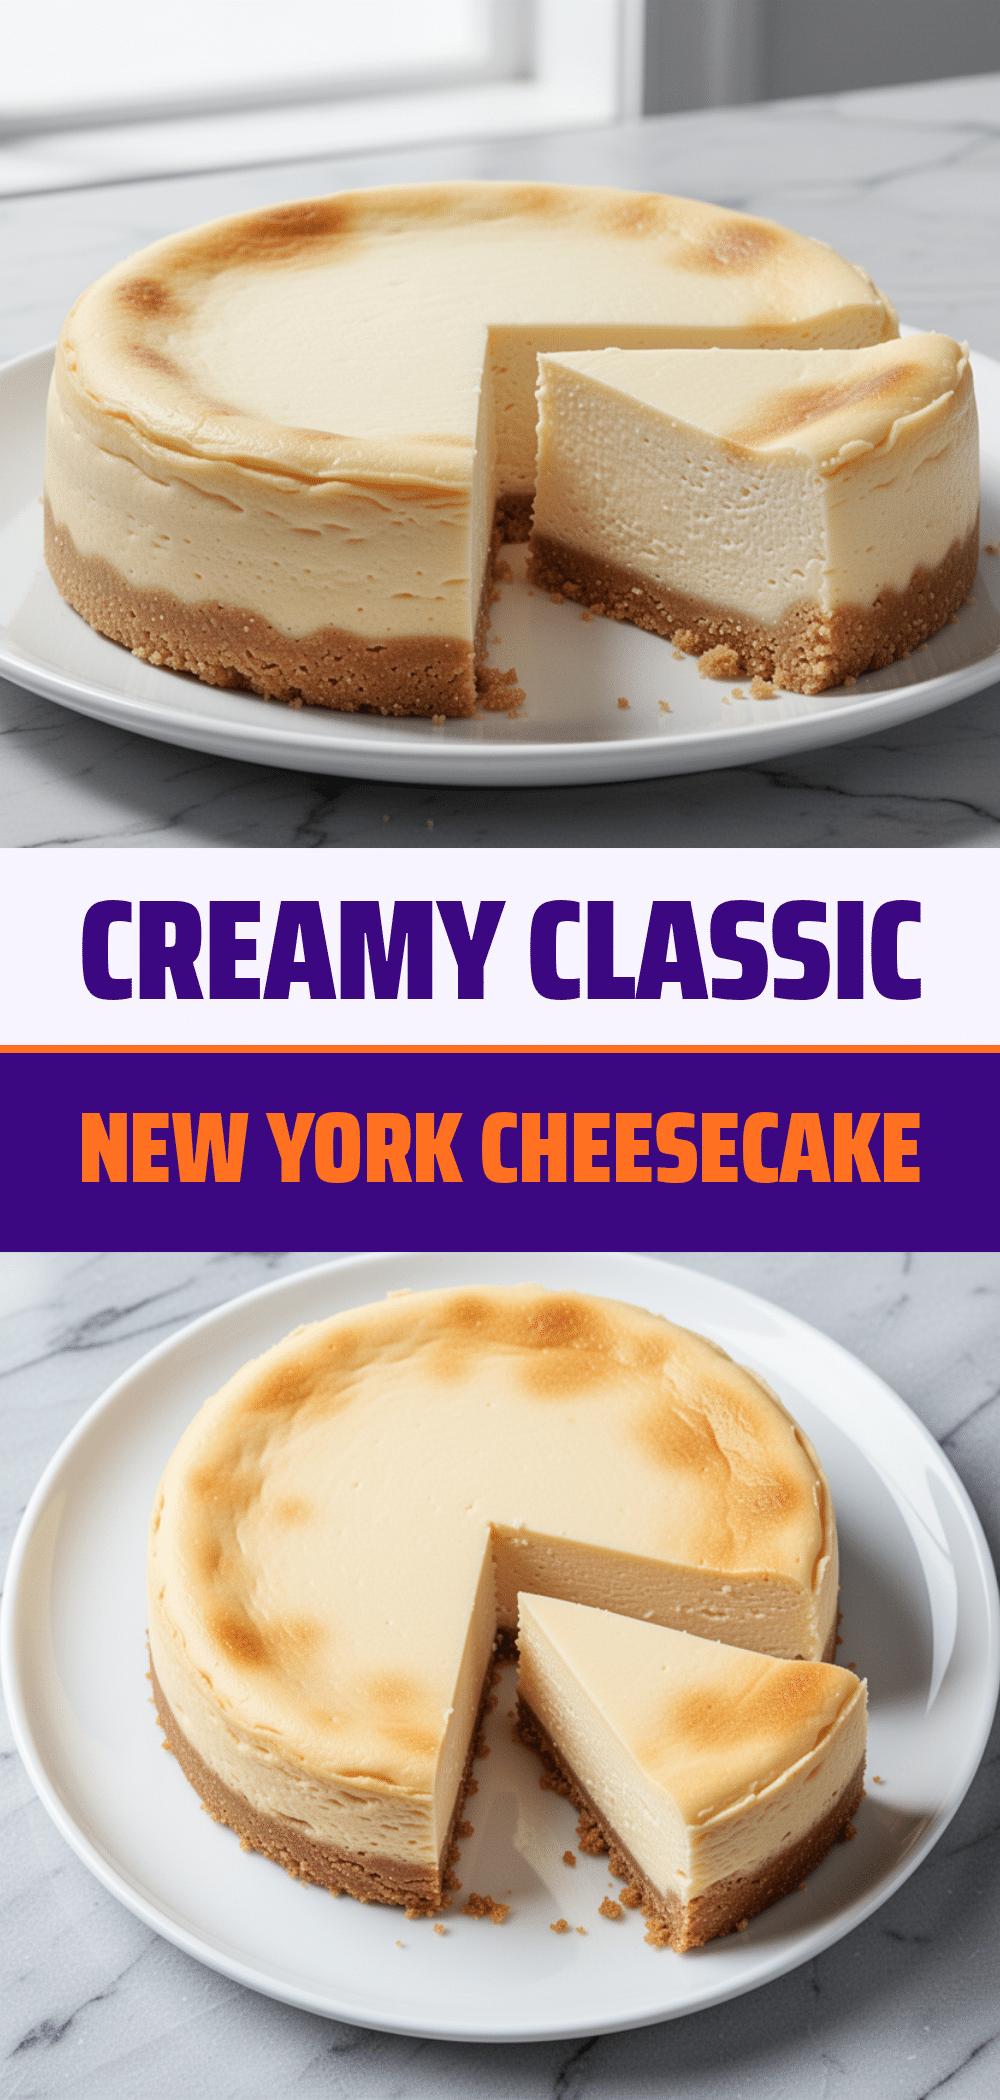
Classic New York Style Baked Cheesecake with Graham Crust
- Total Time: 8 hours 40 minutes
- Yield: 12 servings 1x
Description
A dense, creamy, and tangy New York-style cheesecake with a sturdy graham cracker crust. This recipe uses a water bath and slow cooling method to achieve a smooth texture without cracks.
Ingredients
- 1 ½ cups (150g) Graham Cracker Crumbs
- 6 tablespoons (85g) Unsalted Butter, melted
- 2 tablespoons (25g) Granulated Sugar
- 1 pinch Salt
- 32 ounces (900g) Full-Fat Cream Cheese, room temperature
- 1 cup (200g) Granulated Sugar
- 1 cup (240g) Full-Fat Plain Sour Cream
- 4 large Eggs, room temperature
- 2 teaspoons Vanilla Extract
- 2 tablespoons (16g) All-Purpose Flour
Instructions
- Preheat oven to 325°F (160°C). Wrap the outside of a 9-inch springform pan in two layers of heavy-duty aluminum foil.
- In a medium bowl, mix graham cracker crumbs, melted butter, sugar, and salt until it resembles wet sand. Press firmly into the bottom of the prepared pan. Bake for 10 minutes, then remove and let cool.
- In a stand mixer or hand mixer, beat the room-temperature cream cheese on medium-low speed until completely smooth (3-5 minutes). Scrape down the bowl.
- Add the sugar and beat on low until combined. Scrape the bowl again.
- Add the sour cream and vanilla extract. Mix on low until just combined.
- Add eggs one at a time, mixing on low speed just until the yellow disappears. Do not overmix.
- Add the flour and mix gently until incorporated.
- Pour the batter over the cooled crust and smooth the top.
- Place the springform pan into a large roasting pan. Pour hot water into the roasting pan until it reaches about an inch up the side of the springform pan.
- Bake for 60-70 minutes. The edges should be set, but the center should still jiggle slightly like Jell-O.
- Turn off the oven and crack the door open slightly. Let the cheesecake sit in the cooling oven for 1 hour.
- Remove from the water bath and let cool completely on a wire rack.
- Refrigerate for at least 6 hours, preferably overnight, before serving.
Notes
Ensure all dairy ingredients are at room temperature to prevent lumps and curdling. Do not overmix after adding eggs to avoid incorporating air, which causes cracking. The slow cooling process in the turned-off oven is crucial for preventing cracks. For gluten-free, use gluten-free graham crackers or almond flour for the crust and omit or substitute the flour with cornstarch.
- Prep Time: 30 minutes
- Cook Time: 70 minutes
- Category: Dessert
- Cuisine: American
Nutrition
- Serving Size: 1 slice
- Calories: 450
- Sugar: 28
- Sodium: 350
- Fat: 32
- Saturated Fat: 18
- Carbohydrates: 35
- Fiber: 1
- Protein: 8
Keywords: New York cheesecake, baked cheesecake, graham cracker crust, cream cheese dessert, holiday dessert, crack-free cheesecake



