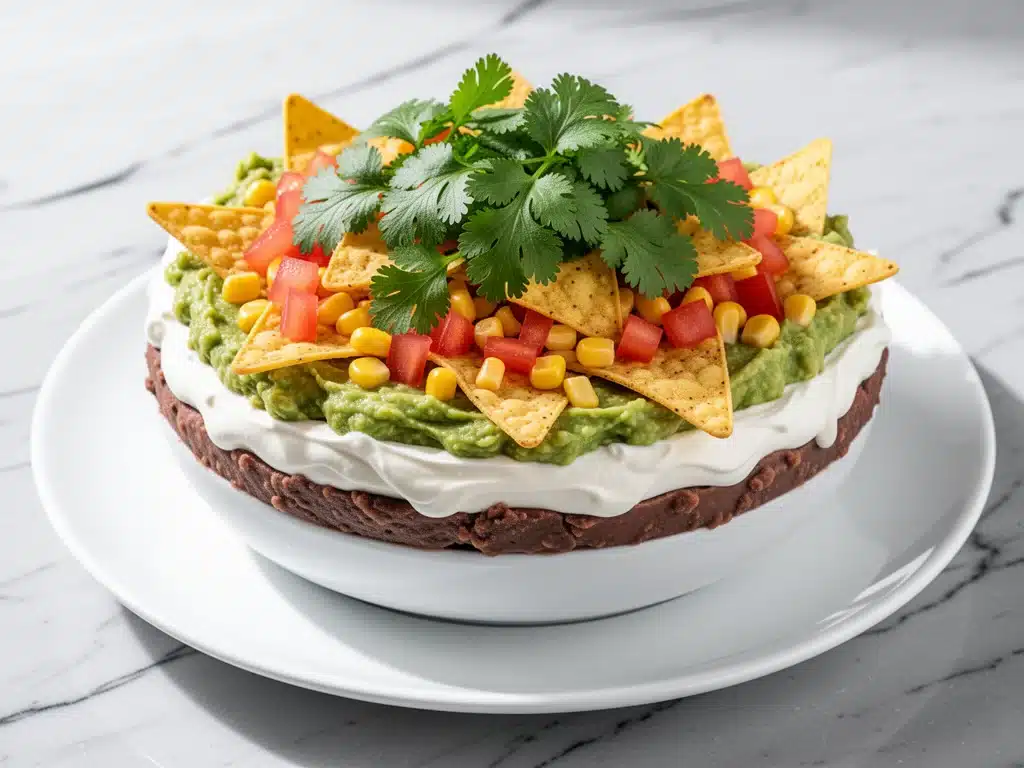
I still remember the panic of that Tuesday night in November. My in-laws were coming over, my friends were planning to drop by, and I had absolutely nothing prepared. I had tried to be a hostess with the mostess all day, only to realize at 4:30 PM that my grocery store was closing in thirty minutes. I was staring into a fridge that contained half a bag of lettuce, a sad-looking container of sour cream, and a block of cheddar cheese that was slowly turning yellow.
Most people would have ordered pizza. But I’m stubborn, and I really didn’t want to serve pepperoni to my mother-in-law, who has strong opinions about “real” appetizers. So, I did what I always do when I’m cornered: I raided my pantry and made a desperate, beautiful mess. I pulled out a bag of shredded Mexican cheese, a jar of salsa, some black beans I’d bought on a whim weeks ago, and a bag of tortilla chips. I started layering them in a glass dish, just to have something to put on the table.
Here’s the thing about the creamy seven layer taco dip: it’s the kind of recipe that feels like a cheat code. It’s not fancy. It doesn’t require an oven. It doesn’t require you to stand over a stove stirring something for twenty minutes. But when I pulled that dish off the counter and set it on the table, the room went quiet. Then, the chips started flying. By the time my in-laws arrived, the bottom of the dish was already visible, and everyone was asking for the recipe.
That was three years ago. Since then, I’ve made this seven layer taco dip for every Super Bowl, every birthday party, every “hey, I’m having people over for a few hours” night. It’s become my go-to. It’s reliable. It’s crowd-pleasing. And honestly? It’s so easy that I can make it while helping my kids with homework or answering work emails. If you’re looking for a party appetizer that looks impressive but takes five minutes to assemble, you’ve found it. Let me show you how to make the best version of this classic.
Why You’ll Love This Seven Layer Taco Dip
There are about a dozen reasons I keep coming back to this dip, but let’s be real. You’re not here for a lecture. You’re here because you want something delicious that doesn’t require a degree in culinary arts. Here’s why this creamy seven layer taco dip is your new best friend:
- Zero Cooking Required — Seriously. If you can open a can and spread something with a spoon, you can make this. I’ve made this while my toddler was screaming in the next room, and it still turned out perfect. No heat, no mess, no stress.
- Make-Ahead Magic — This is the ultimate make-ahead appetizer. You can assemble it the morning of the party (or even the night before). The flavors actually meld together while it sits in the fridge, making it taste even better later. I love this because I can prep everything before my guests arrive and actually enjoy the party instead of being stuck in the kitchen.
- Customizable to Any Diet — Picky eaters? Vegetarians? Gluten-free friends? This dip handles them all. Swap the tortilla chips for gluten-free ones, use dairy-free cheese, or leave out the meat. It’s flexible without losing its soul.
- Insanely Crowd-Pleasing — I’ve served this to people who claim they “don’t like appetizers” and they always come back for seconds. The combination of cold, creamy, crunchy, and savory hits all the right buttons. It’s comfort food in a bowl.
- Budget-Friendly — You don’t need expensive ingredients. Most of this relies on pantry staples and basic grocery store items. It feeds a crowd for a fraction of the cost of ordering appetizers at a restaurant.
- Beautifully Simple — The layers look gorgeous in a clear glass dish. It’s visually appealing without being fussy. Plus, it’s Instagram-worthy for those of us who like to share our food (even if we’re too lazy to cook).
This is my answer to “what should I bring to the potluck?” or “what can I throw together fast?” It just works. Every single time.
Ingredients You’ll Need
Here’s the best part: you probably have most of this already in your kitchen. The creamy seven layer taco dip relies on simple, accessible ingredients that work together to create something much bigger than the sum of its parts. I’m particular about a few things here, so pay attention to the notes.
For the Base Layers
Refried beans (15 oz / 425g can) — This is your foundation. Look for a brand that’s creamy and smooth. I prefer the ones that are seasoned with a little cumin and garlic already. If you can’t find refried beans, you can mash cooked pinto beans with a fork and a little cumin, but refried is traditional and easier.
Sour cream (1 cup / 240g) — Use full-fat. Low-fat or light sour cream tends to be runny and doesn’t hold its layer well. You want that rich, tangy creaminess. If you’re lactose-intolerant, a high-quality dairy-free sour cream alternative works well here.
Guacamole or avocado (1 cup / 240g) — I’m a huge fan of using store-bought guacamole for convenience (like Guac & More or a good local brand), but fresh is always better. If using fresh avocado, mash it with a little lime juice and salt to prevent browning. The key is to keep it smooth so it spreads evenly.
Tomato salsa (1.5 cups / 360g) — This adds the moisture and the kick. I like a medium-chunk salsa for texture. If you prefer it spicier, go for a hot salsa. If you’re serving kids, stick to mild. Avoid salsa con queso here; we want the fresh tomato flavor.
For the Toppings
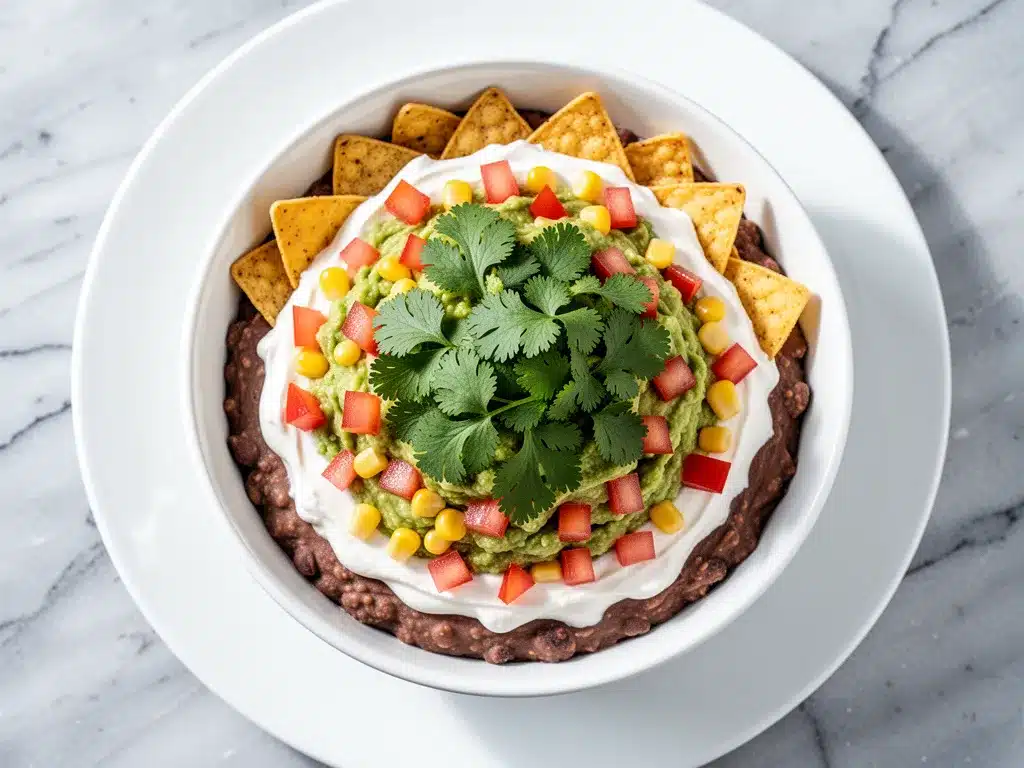
Shredded Mexican cheese blend (2 cups / 225g) — Use a pre-shredded blend of cheddar, Monterey Jack, and queso fresco for ease. However, if you have time, grate your own block cheese. Pre-shredded cheese has anti-caking agents that can make the texture slightly grainy, but for a dip like this, it’s usually fine. I’m usually lazy, so I buy the bag.
Black olives (½ cup / 75g, sliced) — Sliced black olives add a nice briny contrast. If you hate olives, skip them. I won’t judge (much). Jalapeño slices work too if you want heat.
Green onions (½ cup / 50g, chopped) — These add a fresh, oniony crunch on top. They’re not essential, but they elevate the presentation and flavor. Scallions work the same way.
Fresh cilantro (¼ cup / 15g, chopped) — Optional, but highly recommended. It adds a bright, herbal finish. If you think cilantro tastes like soap (genetic thing, I get it), skip it or use parsley.
Tortilla chips (1 family-size bag) — For serving. Use sturdy, thick-cut chips that won’t break under the weight of the dip. I like restaurant-style tortilla chips.
Optional Add-ins:
- Ground beef or turkey (1 lb / 450g) — Browned and seasoned with taco seasoning. Adds protein and makes it a heartier meal.
- Jalapeños (fresh or pickled) — For extra heat.
- Corn kernels (½ cup / 75g) — Fresh, frozen (thawed), or canned. Adds sweetness and crunch.
- Black beans (1 can, drained) — If you want to skip refried beans for a lighter version, use whole black beans.
Equipment Needed
You don’t need any fancy gadgets for this. Here’s what I actually use:
Large glass serving dish — A 9×13 inch casserole dish or a deep oval serving platter works best. Glass is nice because you can see the beautiful layers, which makes it look more impressive. A pie dish works if you’re making a smaller version.
Spatula — An offset spatula is ideal for spreading the sour cream and guacamole evenly. A regular butter knife works in a pinch.
Measuring cups and spoons — Standard stuff. I eyeball it sometimes, but measuring helps keep the layers even.
Knife and cutting board — For chopping green onions and slicing olives.
Colander — If you’re using canned beans or corn, you’ll need this to drain them.
Small skillet — Only needed if you’re adding cooked ground meat. If you’re keeping it vegetarian, you can skip this.
How to Make It: Step-by-Step
Alright, let’s make this! It’s incredibly straightforward, but there are a few tricks to keeping those layers distinct and beautiful.
Step 1: Prep Your Ingredients (5 minutes)
Before you start assembling, make sure everything is ready. Drain and rinse your black beans if you’re using them whole. Chop your green onions and cilantro. Slice your olives. If you’re making ground meat, cook it now and let it cool slightly. Having everything prepped makes the assembly process smooth and fast.
Step 2: Spread the Refried Beans (2 minutes)
Start with the base. Spoon the refried beans into the bottom of your serving dish. Use your spatula to spread them out evenly to the edges. This is your foundation, so make it flat. If the beans are too thick, you can mix in a little water or milk to thin them out for easier spreading.
Step 3: Add the Sour Cream Layer (2 minutes)
Dollop the sour cream over the beans. Spread it out carefully, trying to cover the entire surface. If you’re nervous about mixing the layers, use a spoon to gently spread it from the center outward. Don’t worry if it’s not perfect; it’s a dip, not a painting.
Step 4: Layer the Guacamole (2 minutes)
Spread the guacamole (or mashed avocado) over the sour cream. This layer should be smooth. If using fresh avocado, make sure it’s mashed well so there are no large chunks. This adds creaminess and a vibrant green color.
Step 5: Add the Salsa (2 minutes)
Spread the salsa over the guacamole. If your salsa is very watery, consider draining it slightly in a colander first to prevent the dip from becoming soggy. Leave a little bit of the salsa aside if you want to drizzle it on top for extra moisture.
Step 6: Sprinkle the Cheese (1 minute)
Evenly distribute the shredded cheese over the salsa. This layer acts as a barrier and adds that melty, savory flavor. Don’t skimp on the cheese; it’s a key component of the texture.
Step 7: Add the Toppings (2 minutes)
Scatter the black olives, green onions, and cilantro over the cheese. If you’re adding ground meat, spread it over the cheese before the toppings. Finally, drizzle any reserved salsa or a little hot sauce on top if you like. Serve immediately with tortilla chips.
Pro Tip for Layering:
If you want to keep the layers distinct, chill the dip for 30 minutes before serving. This helps the sour cream and guacamole set slightly, making it easier to cut and serve without everything blending together.
Expert Tips & Tricks
Here’s everything I’ve learned from making this dozens of times. These tips will save you from my mistakes.
Prevent Sogginess
The biggest enemy of a good seven layer dip is soggy chips. To avoid this, keep the salsa on the upper layers rather than the bottom. Also, serve the chips on the side in a separate bowl, rather than letting them sit in the dip. If you’re making it ahead, wait to add the salsa and chips until right before serving.
Choose the Right Cheese
I recommend a Mexican blend cheese, which usually includes cheddar, Monterey Jack, and asadero. Asadero melts beautifully, which adds to the creamy texture. Avoid using only cheddar, as it can become oily when it warms up slightly.
Make It Ahead Properly
You can assemble the dip up to 24 hours in advance. Cover it tightly with plastic wrap and refrigerate. The flavors will meld, making it taste even better. Just add the fresh toppings (green onions, cilantro, olives) right before serving to keep them crisp and colorful.
Customize the Heat
Not everyone likes spice. Keep a mild salsa and a hot sauce on the side so people can adjust their own portions. If you’re making it for a crowd with mixed preferences, this is a lifesaver.
Use a Food Processor for Guacamole
If you’re making guacamole from scratch, pulse the avocado in a food processor for a few seconds to get a smooth, uniform texture. This makes it much easier to spread evenly over the sour cream.
Variations & Substitutions
Once you’ve nailed the basic version, here’s how you can mix it up. I’ve tried all of these.
Meat-Lover’s Version
Add a layer of seasoned ground beef or turkey between the refried beans and sour cream. Use 1 lb of meat, browned and seasoned with taco seasoning. Let it cool before adding to prevent the dip from getting too warm.
Vegetarian/Vegan Version
Skip the cheese and sour cream. Use a dairy-free sour cream alternative and nutritional yeast or a vegan cheese blend. Use black beans instead of refried beans for a lighter, whole-food option. Add corn and extra veggies for bulk.
Seafood Twist
Replace the ground meat with cooked, flaked shrimp or crab meat. Add a layer of cream cheese mixed with lime zest for a brighter flavor. This is a bit more upscale but still fits the theme.
Spicy Jalapeño Version
Add diced fresh jalapeños to the guacamole layer. Use a hot salsa and top with pickled jalapeños. For extra heat, add a layer of chipotle peppers in adobo sauce.
Breakfast Taco Dip
Replace the salsa with a scrambled egg mixture (cooled). Add crumbled chorizo and top with sour cream and cheese. Serve with tortilla chips for a brunch appetizer.
Serving & Storage
How to Serve:
I usually serve this straight from the fridge with a bowl of sturdy tortilla chips on the side. The cold temperature keeps the layers distinct. If you want to serve it warm, you can bake it at 350°F for 10-15 minutes after adding the cheese, just until the cheese melts. But honestly? I prefer it cold.
Side Dishes:
This dip stands well on its own, but it pairs nicely with:
- Warm tortillas (for making tacos)
- Corn on the cob
- A simple green salad with lime dressing
- Grilled vegetables
Storage Instructions:
Refrigerator: Store covered in the fridge for up to 3 days. The layers may blend slightly over time, but it will still taste great. Bring it to room temperature for 15 minutes before serving for the best texture.
Freezing: This dip does not freeze well. The sour cream and guacamole will separate and become watery upon thawing. It’s best made fresh.
Leftovers: If you have leftovers, mix them up! It makes a fantastic salad topping or a filling for tacos. Don’t throw it away; it’s too good to waste.
Nutrition Information
I’m not a nutritionist, but here’s the breakdown if you’re tracking. Keep in mind that this is an appetizer, so portion sizes vary.
Per serving (approx. ¼ cup dip + 2 chips):
- Calories: 220
- Protein: 6g
- Carbs: 18g
- Fiber: 3g
- Sugar: 2g
- Fat: 14g
- Sodium: 350mg
What’s Good: It has some protein from the beans and cheese. It’s relatively low in sugar. The beans provide fiber.
What to Know: It’s higher in sodium and fat due to the cheese, sour cream, and refried beans. If you’re watching your intake, use light sour cream, low-sodium beans, and go easy on the cheese. But let’s be honest—it’s a party dip. Enjoy it in moderation.
Final Thoughts
So that’s my go-to creamy seven layer taco dip! I’ve probably talked your ear off at this point, but when you make a recipe this often, you have a lot to say about it. This dip has saved me more times than I can count. It’s my answer to “what’s for the party?” when I’m tired, don’t want to cook, and still want to impress.
Make it yours! Try different cheeses, add your favorite veggies, or adjust the spice level. The best recipes are the ones you adapt to your family’s tastes. If you make this, drop a comment and let me know what you think! I love hearing how recipes turn out in your kitchen. And if something doesn’t work, tell me that too—I’m here to help troubleshoot.
Happy snacking! And I hope your party is a hit.
Frequently Asked Questions
Can I make this ahead of time?
Absolutely. In fact, it tastes better if you make it a few hours ahead. Assemble all layers except the fresh toppings (green onions, cilantro, olives) up to 24 hours in advance. Cover tightly and refrigerate. Add the fresh toppings right before serving to keep them crisp and colorful.
Can I use fresh guacamole instead of store-bought?
Yes! Fresh guacamole is actually better. Just make sure it’s smooth and spreadable. If it’s chunky, mash it a bit more with a fork. Add a squeeze of lime juice to prevent browning.
Why did my dip turn out watery?
This usually happens if the salsa is too wet or if the guacamole oxidizes. Drain your salsa well before spreading. Also, make sure your avocado is fresh and add lime juice to keep it green. If the dip sits too long, the layers may blend, which is normal.
Can I freeze this dip?
No, I don’t recommend freezing this dip. The dairy components (sour cream, cheese) will separate and become grainy when thawed. It’s best made fresh.
Can I use white beans instead of refried beans?
Yes, you can use whole black beans or pinto beans. For a smoother texture, you can mash them slightly with a fork. Just make sure they’re drained well to avoid a watery dip.
How long does this dip last in the fridge?
It lasts up to 3 days in the fridge. After that, the textures may degrade, and it’s best to make a fresh batch.
Can I make this dip spicy?
Definitely. Use a hot salsa, add diced jalapeños to the guacamole, or sprinkle red pepper flakes on top. You can also add a layer of chipotle peppers in adobo sauce for a smoky heat.
Pin This Recipe!
Creamy Seven Layer Taco Dip
- Total Time: 15 minutes
- Yield: 12 servings 1x
Description
An easy, no-cook party appetizer featuring layers of refried beans, sour cream, guacamole, salsa, cheese, and toppings. This crowd-pleasing dip is customizable, make-ahead friendly, and perfect for gatherings.
Ingredients
- 15 oz can refried beans
- 1 cup full-fat sour cream
- 1 cup guacamole or mashed avocado
- 1.5 cups tomato salsa
- 2 cups shredded Mexican cheese blend
- ½ cup sliced black olives
- ½ cup chopped green onions
- ¼ cup chopped fresh cilantro
- 1 family-size bag sturdy tortilla chips
Instructions
- Prep ingredients: Drain and rinse beans if using whole, chop green onions and cilantro, slice olives, and cook ground meat if using.
- Spread the refried beans evenly across the bottom of a 9×13 inch glass serving dish.
- Dollop and spread the sour cream over the bean layer.
- Spread the guacamole or mashed avocado over the sour cream layer.
- Spread the salsa over the guacamole layer. Drain excess liquid if the salsa is watery.
- Sprinkle the shredded cheese evenly over the salsa.
- Top with black olives, green onions, and cilantro. Add cooked ground meat if desired.
- Chill in the refrigerator for at least 30 minutes before serving to set layers.
- Serve immediately with tortilla chips on the side.
Notes
For best results, chill the dip for 30 minutes before serving to help layers set. If making ahead, add fresh toppings (green onions, cilantro, olives) right before serving to maintain crispness. Do not freeze as dairy components will separate. Serve chips on the side to prevent sogginess.
- Prep Time: 15 minutes
- Cook Time: 0 minutes
- Category: Appetizer
- Cuisine: Mexican
Nutrition
- Serving Size: Approx. ¼ cup dip +
- Calories: 220
- Sugar: 2
- Sodium: 350
- Fat: 14
- Carbohydrates: 18
- Fiber: 3
- Protein: 6
Keywords: seven layer dip, taco dip, party appetizer, no cook recipe, make ahead appetizer, easy dip, crowd pleaser



