I have a confession to make. For years, I treated roasted potatoes like a weekend project. You know the type: you wake up early, preheat the oven, fuss over cutting every wedge to the exact same size, and then stand by the oven door like a hawk, worrying they’ll burn or undercook. By the time they’re done, it’s 7:30 PM, the rest of the meal is cold, and you’re too exhausted to care that they’re actually pretty good.
That was me. Until last October.
I was working late, coming home with zero energy, and my partner said, “What’s for dinner?” I looked at the clock, looked at the bag of potatoes in the pantry, and realized I didn’t have time to babysit a dish for two hours. So I did something radical. I chopped everything up, tossed it with oil and garlic, threw it in the oven, and went to take a shower. I didn’t check on them. I didn’t stir them. I just let them do their thing.
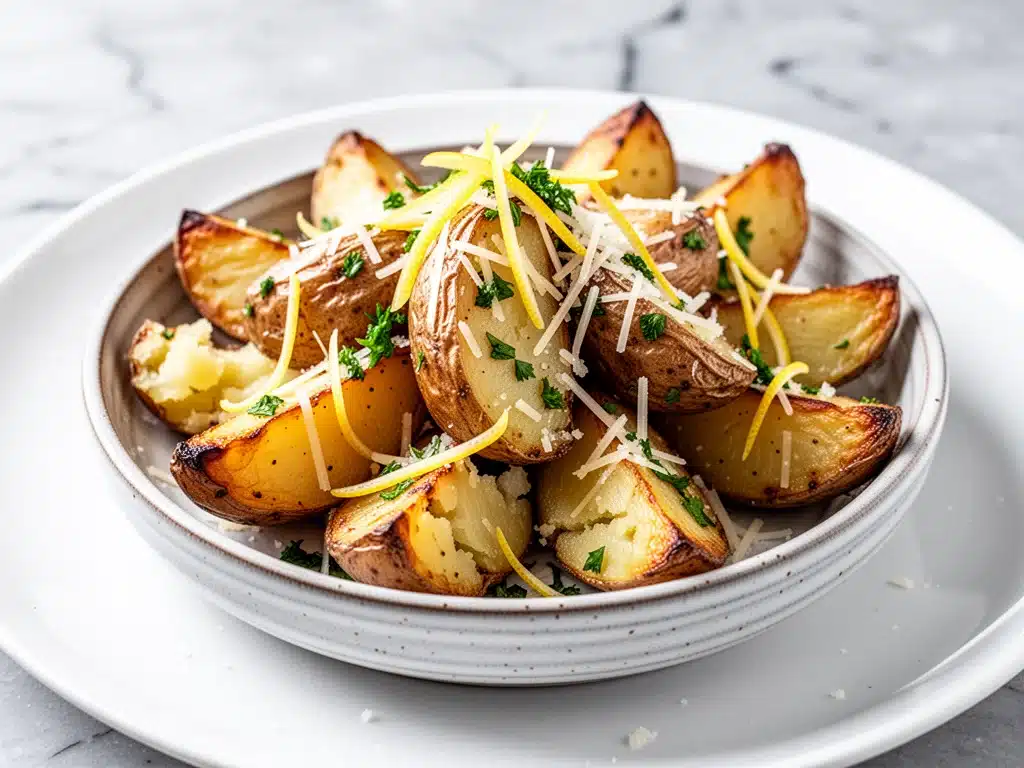
When I walked back into the kitchen thirty minutes later, the smell hit me first. That rich, savory, garlic-infused aroma that makes your stomach growl before you even sit down. I pulled the tray out, expecting something mediocre—dry edges, soggy centers. Instead? Crispy, golden, herb-crusted perfection. They were tender inside, crisp outside, and packed with flavor that actually complemented the rest of the meal instead of stealing the show.
That night changed how I cook sides. These Garlic Herb Roasted Potatoes aren’t just a recipe; they’re my answer to “I’m tired but I want to eat good food.” They take about 30 minutes of hands-on time (mostly just chopping), and the oven does the heavy lifting. I’ve made these at least forty times in the last year. Sometimes I use rosemary, sometimes thyme, sometimes a mix. Sometimes I add parmesan cheese (controversial, I know, but delicious). But the core technique? It’s foolproof.
If you’ve ever struggled with soggy roasted potatoes or boring sides that taste like nothing, this is your fix. It’s simple, it’s cheap, and it tastes like you spent hours in the kitchen. Let’s get into why these work so well and how you can make them tonight.
Why You’ll Love This Garlic Herb Roasted Potatoes Recipe
There are a dozen reasons I keep coming back to this method, but let’s be real: you’re here because you want potatoes that actually taste good without the hassle. Here’s why this version has replaced every other side dish in my rotation.
Actually Crispy, Not Soggy
This is the biggest pain point with home-roasted potatoes. Most recipes fail because the potatoes steam instead of roast. I’ve cracked the code: cut them small, toss them well, and don’t crowd the pan. The result? Those golden, crunchy edges that make you want to scrape the pan clean. I’ve tested this with Yukon Golds, Russets, and even red potatoes, and the technique holds up every time.
Flavor That Doesn’t Need a Sidekick
Too often, side dishes are bland buffers between the main course and your fork. These potatoes stand on their own. The combination of fresh garlic, sharp herbs, and a little bit of salt creates a complex flavor profile that pairs with literally anything. Chicken? Perfect. Fish? Great. Leftover pizza? (Don’t judge me, it works.)
Zero Stress, Maximum Reward
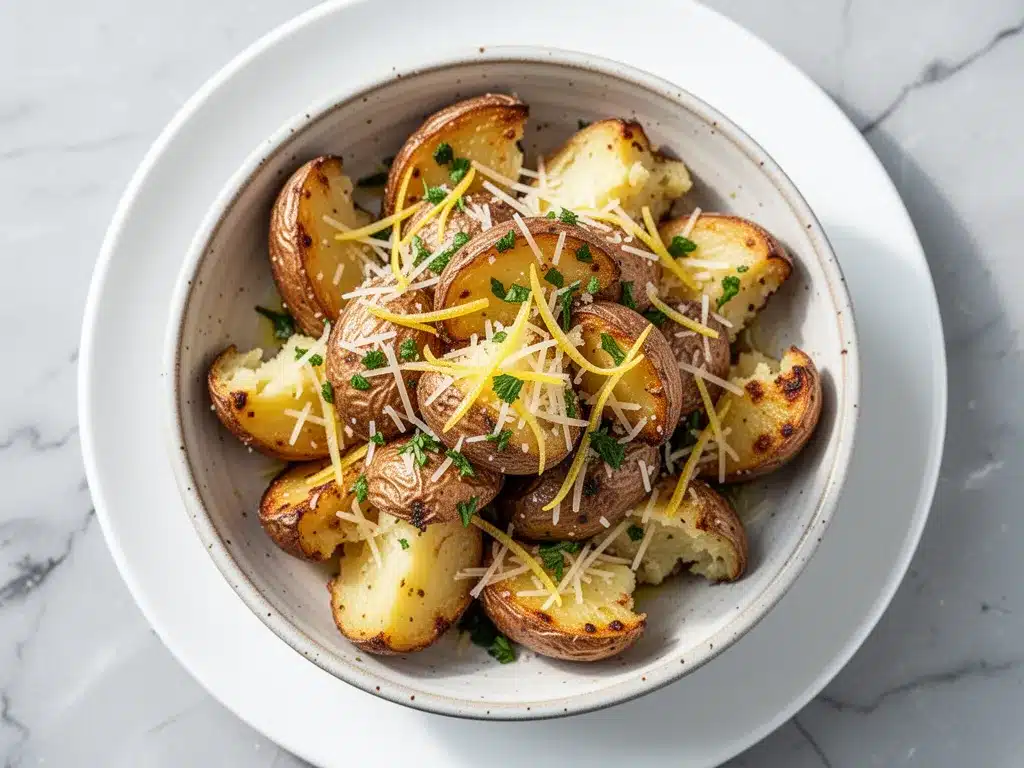
“Weeknight” is in the title for a reason. This isn’t a recipe that requires you to stand over the stove. You chop, you toss, you bake. You can spend those 40 minutes in the oven actually relaxing, reading a book, or helping the kids with homework. When the timer goes off, dinner is essentially ready.
Budget-Friendly and Pantry-Ready
Potatoes are cheap. Garlic is cheap. Herbs are cheap (and you probably have dried versions if you’re out of fresh). This recipe costs about $2 to feed a family of four. It’s the kind of meal that feels indulgent but doesn’t hurt your wallet. I keep a bag of Yukon Golds in my pantry for days when I don’t know what to make.
Versatile Enough for Any Taste
Love spicy? Add red pepper flakes. Hate garlic? Use garlic powder. Vegan? Skip the butter. This recipe bends to your preferences without breaking. It’s a blank canvas that’s hard to mess up.
So basically, if you want crispy, flavorful, easy potatoes that make your house smell amazing, this is the one. It’s my go-to when I need dinner to just work.
Ingredients You’ll Need
Here’s the best part: you probably have most of this already. I’m particular about a few things here, but honestly, you can sub just about anything. I’ll tell you exactly what matters and what doesn’t.
The Potatoes
Yukon Gold potatoes (2 pounds / 900g) — I swear by these. They have a naturally buttery flavor and a waxy texture that holds up well to roasting without falling apart. Russets work too if you want extra crispiness, but they’re starchier and can get dry. Red potatoes are okay, but they stay a bit softer. For this recipe, Yukon Gold is my top pick.
The Fat
Extra virgin olive oil (3 tablespoons / 45ml) — You need enough oil to coat the potatoes so they fry in the oven. Don’t skimp! If you use too little, they’ll dry out. If you use too much, they’ll be greasy. Three tablespoons is the sweet spot for 2 pounds of potatoes. I use regular olive oil for high-heat cooking, but extra virgin adds nice flavor here.
Unsalted butter (2 tablespoons / 30g) — Optional, but recommended. Adding a little butter at the end gives them that rich, restaurant-quality finish. If you’re dairy-free, skip this or use a plant-based butter. I usually add it right when they come out of the oven.
The Aromatics
Garlic (4 cloves, minced / about 1 tablespoon) — Fresh garlic is non-negotiable. Jarred garlic tastes metallic and weak in this context. Mince it yourself. If you’re really lazy, you can use garlic powder (1 teaspoon), but fresh is best. Don’t burn it! That’s why we toss it with the oil at the end or use a lower heat.
Dried thyme (1 teaspoon) — Or fresh thyme (1 tablespoon). Dried is more concentrated and easier to store. Fresh has a brighter flavor but wilts quickly. I usually keep dried thyme stocked because it lasts forever.
Dried rosemary (1 teaspoon) — Or fresh (1 tablespoon). Rosemary is strong, so a little goes a long way. If you’re using fresh, chop it finely so you get little bursts of flavor in every bite.
Garlic powder (½ teaspoon) — This adds a deeper, savory garlic note that complements the fresh minced garlic. It’s a secret weapon for building flavor layers.
The Seasoning
Kosher salt (1 teaspoon) — Or to taste. Kosher salt is better than table salt because it’s less salty by volume and doesn’t have additives. If you only have table salt, use half the amount. You want the potatoes to taste seasoned, not salty.
Black pepper (½ teaspoon, freshly cracked) — Freshly cracked adds a nice bite. Pre-ground pepper is fine in a pinch, but fresh is better.
Optional Add-Ins
Parmesan cheese (¼ cup / 25g, grated) — Sprinkle this on in the last 5 minutes of cooking. It gets crispy and nutty. My kids love this version.
Red pepper flakes (¼ teaspoon) — For a little heat. Great if you’re serving these with mild proteins like chicken or fish.
Fresh parsley (2 tablespoons, chopped) — For color and freshness. Add this right after they come out of the oven so it stays bright green.
Equipment Needed
You don’t need fancy gadgets for this. Here’s what I actually use. If you don’t have these exact items, you can substitute.
Large rimmed baking sheet — I use a half-sheet pan (18×13 inches). It’s big enough to hold all the potatoes in a single layer. If you use a smaller pan, you’ll need to roast in two batches. Crowding the pan is the #1 reason for soggy potatoes.
Large mixing bowl — For tossing the potatoes with oil and spices. A wide bowl makes it easier to coat everything evenly.
Sharp chef’s knife — For cutting the potatoes. A dull knife will slip and hurt you. Keep it sharp!
Cutting board — Any size works. I use a plastic one for easy cleanup.
Measuring spoons — For the herbs and spices. Level measurements are best for dried herbs.
Paper towels — To pat the potatoes dry before tossing. Moisture is the enemy of crispiness.
Pastry brush (Optional) — If you want to be precise with the oil, a brush helps. But honestly, I just pour and shake the bowl.
How to Make It: Step-by-Step
Alright, let’s make this! I’m walking you through exactly how I do it, including the little tricks I’ve picked up over dozens of attempts.
Step 1: Prep the Potatoes (5 minutes)
Start by washing the potatoes thoroughly. You don’t need to peel them—the skin adds texture and nutrients. Pat them completely dry with paper towels. This is crucial. Any surface moisture will steam them instead of roasting them.
Cut the potatoes into uniform pieces. I like wedges or 1-inch cubes. Uniformity ensures they cook evenly. If some pieces are huge and others are tiny, the small ones will burn before the big ones are tender. Aim for consistency.
Step 2: Season the Potatoes (3 minutes)
Place the cut potatoes in your large mixing bowl. Drizzle with the olive oil. Sprinkle with the dried thyme, dried rosemary, garlic powder, salt, and black pepper. Toss everything together until every piece is coated. You want them to look glossy, not swimming in oil.
Pro Tip: If your potatoes are very dry, add a splash more oil. If they look greasy, add a few more potatoes or toss more vigorously to distribute the oil.
Step 3: Arrange on the Pan (2 minutes)
Line your baking sheet with parchment paper or aluminum foil for easy cleanup. Spread the potatoes in a single layer. Leave space between them! This is non-negotiable. If they’re touching, they’ll steam. They need room to breathe and crisp up.
If you have a lot of potatoes, use two pans. Don’t be tempted to crowd one pan. Two pans in the oven is better than one crowded pan.
Step 4: Roast (35-40 minutes)
Preheat your oven to 425°F (220°C). High heat is key for crispiness. Place the pan in the middle rack of the oven. Roast for 20 minutes, then remove the pan and flip or stir the potatoes. This ensures even browning on all sides.
Continue roasting for another 15-20 minutes, until the potatoes are golden brown and tender when pierced with a fork. The edges should be crispy and slightly charred in spots. That’s where the flavor is.
Step 5: Finish and Serve (2 minutes)
Remove the pan from the oven. If using butter, add it now and toss quickly so it melts over the hot potatoes. If using fresh herbs like parsley, sprinkle them on now. If using Parmesan, add it in the last 5 minutes of roasting.
Taste and adjust salt if needed. Serve immediately while hot and crisp. These are best fresh out of the oven.
Expert Tips & Tricks
Here’s everything I’ve learned from making this dozens of times. These tips will save you from my mistakes.
Don’t Skip the Dry Step
I cannot stress this enough: dry potatoes = crispy potatoes. Wet potatoes = soggy potatoes. After washing, let them sit on paper towels for a few minutes if you’re in a hurry. Every bit of water matters.
Uniform Cuts Are Key
I know it’s tempting to chop quickly and carelessly, but uniform pieces cook evenly. If you have a huge chunk and a tiny chunk, the tiny one will burn. Take an extra minute to trim them.
Flip Midway
Ovens have hot spots. Flipping the potatoes halfway through ensures even browning. It’s a small step that makes a big difference in appearance and texture.
Use Fresh Garlic Carefully
Fresh garlic burns easily. If you’re worried about burning it, toss the minced garlic with the potatoes in the last 10 minutes of cooking. Or, use garlic powder for the base and fresh garlic for the finish. Both work, but fresh garlic needs protection from direct high heat for too long.
Don’t Overcrowd
I’ve said it twice, but it bears repeating. Crowding the pan steams the potatoes. Use two pans if you have to. Your future self will thank you for the crispiness.
Variations & Substitutions
Once you’ve nailed the basic version, here’s how you can mix it up. I’ve tried all of these.
Spicy Garlic Roasted Potatoes
Add ½ teaspoon of red pepper flakes and 1 teaspoon of smoked paprika. This gives them a kick and a smoky depth. Great with tacos or grilled steak.
Herb-Crusted with Parmesan
Add ¼ cup of grated Parmesan cheese in the last 5 minutes of roasting. The cheese gets crispy and nutty. My kids love this version.
Lemon Herb Potatoes
Add the zest of one lemon and 1 tablespoon of lemon juice after roasting. Brightens everything up. Perfect for spring.
Dairy-Free Version
Skip the butter. Use olive oil exclusively. The potatoes will still be delicious, just less rich.
Gluten-Free
This recipe is naturally gluten-free. Just ensure your herbs and spices are certified gluten-free if you’re sensitive.
Serving & Storage
How to Serve: I usually serve these straight from the pan at the dinner table—it looks rustic and stays warm. They pair well with almost anything. Chicken, fish, beef, or even just a simple salad.
Storage: Store leftovers in an airtight container in the fridge for up to 3 days. They’ll soften as they cool, which is normal.
Reheating: Reheat in the oven at 400°F for 10-15 minutes to restore crispiness. Microwaving will make them soft and chewy. If you must microwave, do it for 30 seconds, then finish in a toaster oven or air fryer.
Freezing: I don’t recommend freezing roasted potatoes. They lose their texture and become mushy when thawed. It’s best to make them fresh.
Nutrition Information
I’m not a nutritionist, but here’s the breakdown if you’re tracking. Per serving (based on 6 servings):
Calories: 180
Protein: 3g
Carbs: 24g
Fiber: 3g
Sugar: 1g
Fat: 9g
Saturated Fat: 2g
Cholesterol: 0mg
Sodium: 320mg
What’s Good: High in fiber and potassium. Good source of vitamin C.
What to Know: Higher in calories from oil. Contains no dairy in the base version.
My Take: It’s a hearty side dish. Not a diet food, but a wholesome, satisfying addition to your meal.
Final Thoughts
So that’s my go-to Garlic Herb Roasted Potatoes! I’ve probably talked your ear off at this point, but when you make a recipe this often, you have a lot to say about it. These potatoes have saved weeknight dinners more times than I can count. They’re my answer to “I’m tired but I want to eat good food.”
Make it yours! Try different herbs, add spices, or change the cheese. The best recipes are the ones you adapt to your family’s tastes. If you make this, drop a comment and let me know what you think! I love hearing how recipes turn out in your kitchen.
Happy cooking! And I hope your kitchen smells half as good as mine does right now.
Frequently Asked Questions
Can I use sweet potatoes instead of regular potatoes?
Yes, but they cook faster and are sweeter. Reduce the cooking time by 5-10 minutes and check for doneness earlier. They won’t get as crispy as Yukon Golds, but they’re still delicious.
Why are my potatoes soggy?
Usually, this means the pan was too crowded, or the potatoes weren’t dry enough before roasting. Make sure to space them out and pat them dry. Also, ensure your oven is fully preheated.
Can I make this ahead?
You can prep the potatoes and season them up to 24 hours in advance. Store them in the fridge in a sealed container. Take them out 30 minutes before roasting to come to room temperature. This actually helps them cook more evenly.
Do I need to flip the potatoes?
It’s highly recommended. Flipping ensures even browning on all sides. If you skip it, one side might be perfectly golden while the other is pale.
Can I use garlic salt instead of regular salt?
If you use garlic salt, reduce or omit the added garlic powder and be very careful with the salt amount. Garlic salt is already salty and garlicky. I recommend using regular salt and fresh/dried garlic for better control.
Pin This Recipe!
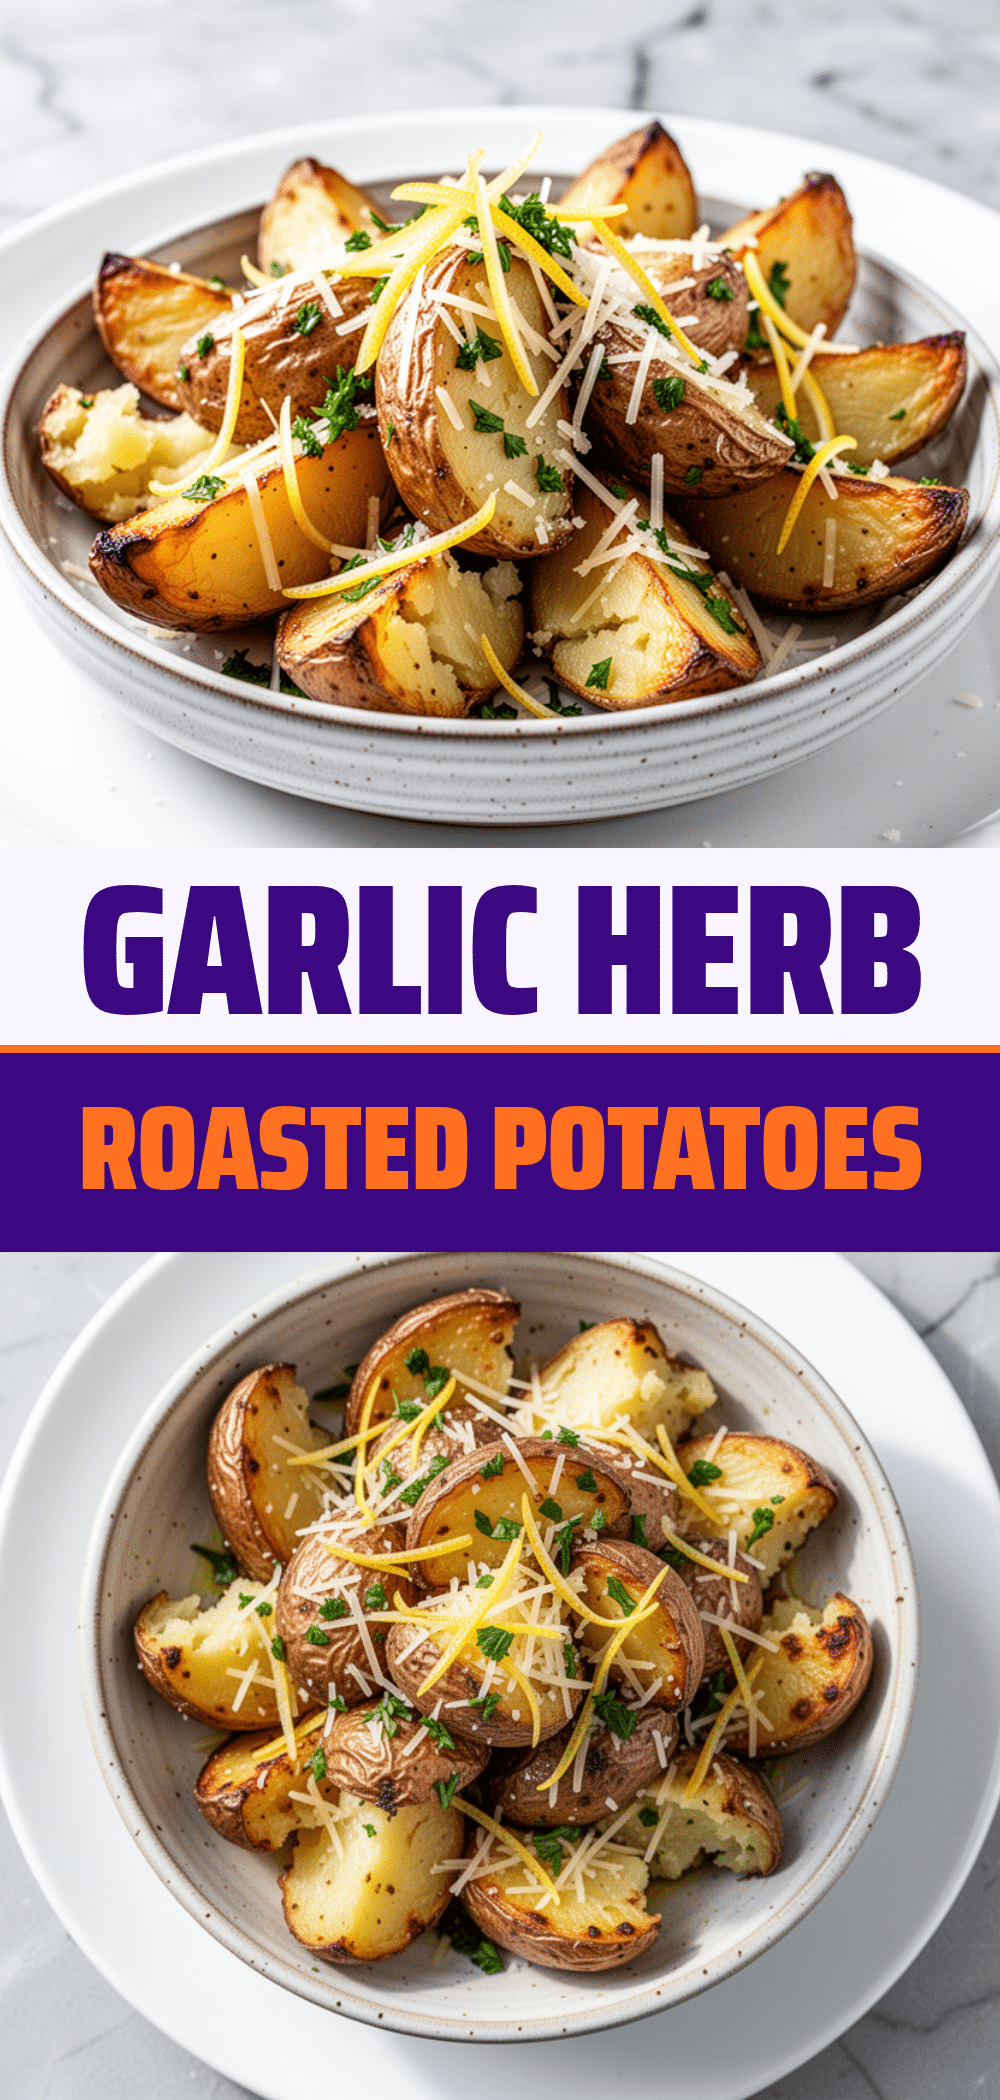

Garlic Herb Roasted Potatoes: Easy Weeknight Side
- Total Time: 50 minutes
- Yield: 6 servings 1x
Description
Crispy, golden, and herb-crusted roasted potatoes that are tender inside and packed with garlic flavor. This foolproof recipe takes about 30 minutes of hands-on time and delivers restaurant-quality results without the hassle.
Ingredients
- 2 pounds Yukon Gold potatoes
- 3 tablespoons extra virgin olive oil
- 2 tablespoons unsalted butter (optional)
- 4 cloves garlic, minced
- 1 teaspoon dried thyme (or 1 tablespoon fresh)
- 1 teaspoon dried rosemary (or 1 tablespoon fresh)
- 1/2 teaspoon garlic powder
- 1 teaspoon kosher salt
- 1/2 teaspoon freshly cracked black pepper
- 2 tablespoons fresh parsley, chopped (optional, for garnish)
Instructions
- Preheat oven to 425°F (220°C).
- Wash potatoes thoroughly and pat them completely dry with paper towels to ensure crispiness.
- Cut potatoes into uniform 1-inch cubes or wedges.
- Place cut potatoes in a large mixing bowl.
- Drizzle with olive oil and sprinkle with dried thyme, dried rosemary, garlic powder, salt, and black pepper.
- Toss everything together until every piece is evenly coated and looks glossy.
- Line a large rimmed baking sheet with parchment paper or foil.
- Spread potatoes in a single layer on the baking sheet, ensuring they are not touching to prevent steaming.
- Roast for 20 minutes, then remove pan and flip or stir the potatoes.
- Continue roasting for another 15-20 minutes until golden brown, tender when pierced with a fork, and crispy on the edges.
- Remove from oven. If using, toss immediately with butter and fresh parsley.
- Taste and adjust salt if needed. Serve immediately.
Notes
Dry potatoes thoroughly before cutting to ensure crispiness. Do not overcrowd the pan; use two pans if necessary to allow space between potatoes. For extra flavor, add Parmesan cheese in the last 5 minutes of roasting. Fresh garlic can burn easily, so ensure it is well-coated in oil or added later in the cooking process.
- Prep Time: 10 minutes
- Cook Time: 40 minutes
- Category: Side Dish
- Cuisine: American
Nutrition
- Serving Size: Approximately 1 cup
- Calories: 180
- Sugar: 1
- Sodium: 320
- Fat: 9
- Saturated Fat: 2
- Carbohydrates: 24
- Fiber: 3
- Protein: 3
Keywords: roasted potatoes, garlic potatoes, herb roasted potatoes, weeknight dinner, easy side dish, crispy potatoes, vegetarian side



