It’s 7:15 AM on a Tuesday. The house is still half-asleep. My seven-year-old is wearing one shoe and refusing to eat anything that isn’t shaped like a dinosaur, and I’m staring into the abyss of the refrigerator, wondering if I have enough time to make a real breakfast or if I’m just going to have to accept that today’s meal plan consists of dry cereal and hope.
This was my reality for about three weeks straight when my kids went back to school after summer break. I love mornings. I really do. But I love them when we have an extra hour. When the bus comes at 8:00 AM, my love for morning rituals evaporates faster than a puddle in July.
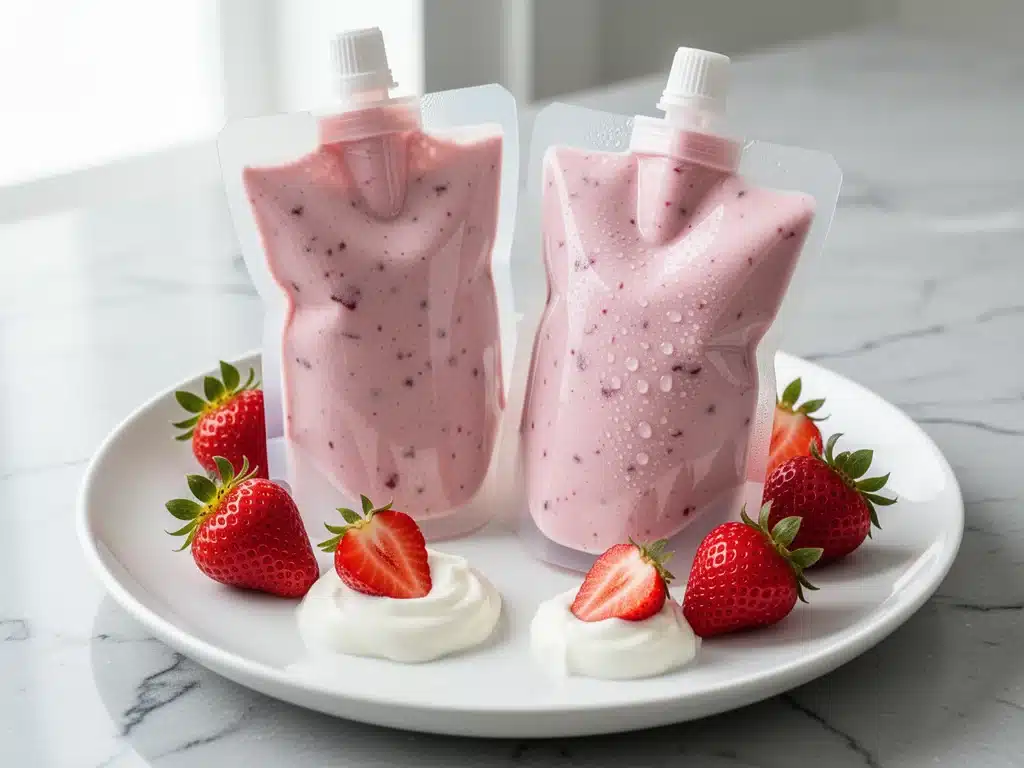
That’s when I discovered the strawberry yogurt smoothie pouch. It started as a desperate hack to get fruit into my picky eater. I threw some strawberries, Greek yogurt, and a splash of milk into a blender, poured the mixture into silicone pouches, and froze them. I expected a slushy mess. Instead, I got something creamy, cold, and totally portable. My kid ate it on the bus. He didn’t spill it. He didn’t complain. He was full.
Now? We make these strawberry yogurt smoothie pouches at least twice a week. They’ve become the anchor of our morning routine. No more arguing about toast. No more hunting for granola bars that don’t taste like cardboard. Just a quick blend, a pour, a freeze, and grab-and-go nutrition. If you’re drowning in the back-to-school chaos, you need this in your life. Trust me.
Why You’ll Love This Recipe
There are a hundred reasons I keep making these pouches, but if I had to narrow it down to the ones that actually keep me sane, here’s the list. This isn’t just a smoothie; it’s a strategic move for busy parents.
Zero Morning Stress — Seriously, if you can blend fruit and pour liquid, you can make this. I prep these on Sunday night or Wednesday afternoon. When the morning alarm goes off, the hard work is already done. I literally just hand my kid a frozen pouch. It’s that simple.
Actually Healthy — I’m not talking about those sugary fruit snacks that are basically candy in disguise. These are packed with protein from the Greek yogurt and vitamins from fresh strawberries. It’s a legitimate meal replacement, not a snack. My kids get their fruit. I get peace of mind.
No Mess, No Waste — Cups spill. Lids pop off. Straws get lost in the bottom of backpacks. These pouches are sealed tight. My kids can squeeze them, drop them (gently), or eat them upside down. I haven’t had to mop up a spilled smoothie in months. It’s a miracle.
Crowd-Pleasing Flavor — I’ve tried this with bananas, blueberries, and peaches. My kids reject them all. But strawberries? They fight over these. The tartness of the yogurt balances the sweetness of the berries perfectly. It tastes like a treat, but it fuels them like a healthy meal.
Freezer-Friendly — I make a batch of ten on Sunday, and they last for weeks in the freezer. If we’re running late for soccer practice, I grab one from the freezer bin. It thaws enough in the car ride to be drinkable, or they can eat it frozen like a popsicle. Versatility is key.
This is my go-to when I need breakfast to just work. No complicated techniques, no weird ingredients, just reliable, delicious food that makes everyone happy.
Ingredients You’ll Need
Here’s the best part: you probably have most of this already. I’m not asking you to go to three different specialty stores for this one. It’s simple, fresh, and cheap.
Fresh Strawberries (1 ½ cups / 200g, hulled and halved) — This is the star. Fresh strawberries taste way better than frozen for this specific recipe because they blend smoother and create a creamier texture. If you’re buying out of season, frozen works, but thaw them first so you don’t end up with icy chunks. I buy the big plastic clamshells when they’re in season and freeze the extras immediately.
Greek Yogurt (1 cup / 240g) — I use plain, non-fat or low-fat Greek yogurt. It adds that thick, creamy texture without the extra sugar. Plain is crucial because it lets the strawberry flavor shine. If you use vanilla yogurt, you’re adding unnecessary sugar. Trust me, the natural tartness is what makes it taste balanced. Fage or Chobani are my go-to brands.
Milk (½ cup / 120ml) — This is just the liquid base to help it blend. I use whole milk for richness, but almond milk or oat milk works fine if your family is dairy-sensitive. Just make sure it’s not too thin, or your pouches will leak. You want a thick consistency.
Honey or Maple Syrup (1-2 tablespoons / 15-30ml) — Optional, but recommended if your strawberries aren’t super sweet. I start with one tablespoon and taste the mixture before pouring. If you’re watching sugar, skip this. The yogurt and berries usually have enough natural sweetness.
Chia Seeds (1 tablespoon / 10g) — Optional boost. I throw these in for extra omega-3s and fiber. They swell up a bit, which helps thicken the smoothie. If you hate the texture of seeds, skip them. Nobody will know the difference.
Silicone Pouches — I know I mentioned these are ingredients, but they’re technically equipment. You need reusable, food-grade silicone pouches with twist-off caps. I use the ones from Zoli or Stasher. Make sure they’re leak-proof. I’ve learned this the hard way with cheaper brands that split open in the freezer.
Common Questions:
- Can I use frozen strawberries? Yes! Just let them thaw for 10 minutes so they blend evenly. Frozen strawberries make it colder and thicker, which is nice for summer.
- Can I add protein powder? Absolutely. A scoop of vanilla or unflavored whey protein works great. Just add an extra splash of milk because powder thickens things up.
Equipment Needed
You don’t need fancy gadgets for this. Here’s what I actually use in my kitchen.
Blender — I use a standard countertop blender. A high-speed Vitamix makes it silky smooth, but a cheap $30 blender works just as well. You just need to blend it longer to get the strawberries fully broken down. Hand blenders work too, but you have to be careful not to splash.
Measuring Cups and Spoons — Standard stuff. I keep my liquid measuring cup near the blender so I don’t have to wash extra dishes.
Silicone Pouches with Caps — These are the only special item. Look for BPA-free, leak-proof pouches. I’ve tried the ones with screw caps and the ones with snap locks. Snap locks are faster, but screw caps feel more secure for freezing. Whichever you choose, make sure the seal is tight.
Freezer-Safe Container or Tray — I lay my filled pouches flat in a shallow bin in the freezer. This keeps them organized and prevents them from rolling around and popping open. A simple plastic storage bin works perfectly.
Fine Mesh Strainer (Optional) — If you’re super particular about seeds, you can strain the blended mixture before pouring. I don’t bother, but some people prefer seedless smoothies for little kids.
Tool Tips:
- Don’t have pouches? You can use small freezer bags (like Ziploc sandwich bags). Lay them flat, squeeze out the air, and freeze. Cut a corner off to drink. It’s less elegant but works in a pinch.
- Cleaning: Rinse your pouches immediately after emptying them. Dried yogurt is a nightmare to clean. I usually just fill them with warm soapy water and shake them clean later.
How to Make It: Step-by-Step
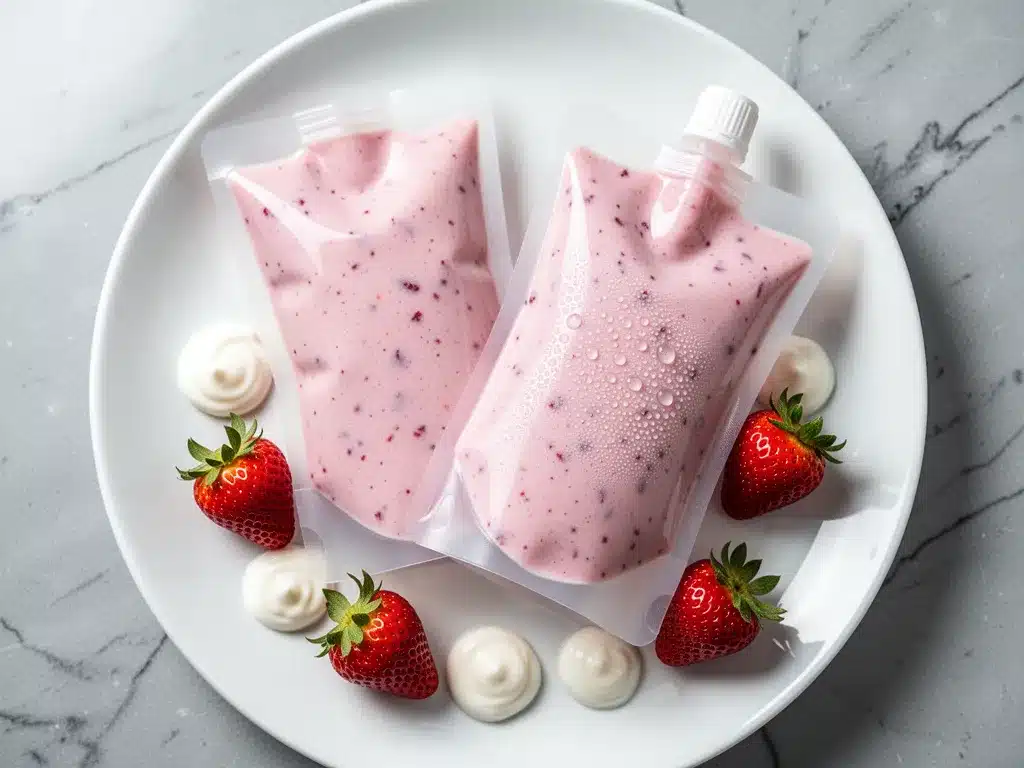
Alright, let’s make this! I’m walking you through exactly how I do it, including the little tricks I’ve picked up so your pouches don’t leak or turn into icy bricks.
Step 1: Prep the Fruit (2 minutes)
Wash your strawberries thoroughly and hull them (remove the green tops). If you’re using fresh berries, halve them. If you’re using frozen, just toss them in. I like to halve fresh berries because they blend more evenly. Uneven chunks can clog the pouch opening later.
Step 2: Blend the Smoothie (2 minutes)
Add the strawberries, Greek yogurt, milk, honey, and chia seeds to your blender. Start on low speed and gradually increase to high. Blend for about 45-60 seconds. You want it completely smooth. If you see little white bits of yogurt or red specks of strawberry skin, keep blending. The mixture should be thick and pourable, like heavy cream. If it’s too thick to pour, add another tablespoon of milk.
Step 3: Fill the Pouches (3 minutes)
Set your pouches upright in a mug or a tall glass to keep them steady. Pour the smoothie into each pouch, filling it about ¾ full. Leave a little room at the top for expansion. Liquids expand when they freeze, so if you fill it to the brim, the pouch might burst. I fill mine to the line marked inside, usually about 4-5 ounces per pouch.
Step 4: Seal and Check (2 minutes)
Wipe the rim of the pouch with a paper towel to remove any spills. This is crucial—if smoothie gets on the rim, it won’t seal properly and will leak. Twist or snap the cap shut tightly. Then, give each pouch a gentle squeeze to check for leaks. If you see any moisture, re-seal it. I always do a “squeeze test” before freezing.
Step 5: Freeze (4 hours minimum)
Lay the pouches flat in a single layer in the freezer. Do not stack them until they are completely solid. This usually takes 4-6 hours, but overnight is best. Once frozen solid, you can stack them or move them to a bin. They’ll keep in the freezer for up to 3 months.
Step 6: Serve
When it’s time to eat, just twist off the cap and squeeze. If it’s too frozen to squeeze, let it sit on the counter for 5-10 minutes. My kids love eating them straight from the freezer like a popsicle, but it’s easier to drink if they’re slightly thawed.
Visual Cues: The smoothie should look bright pink and creamy. If it’s pale, you have too much yogurt. If it’s dark red, you have too many strawberries. Aim for a vibrant, appealing color. The texture should be smooth, not chunky.
Troubleshooting:
- Pouch leaking? You didn’t wipe the rim, or you overfilled it. Always leave headspace.
- Too thick to pour? Add more milk, one tablespoon at a time.
- Too thin? Add more yogurt or frozen fruit.
Expert Tips & Tricks
Here’s everything I’ve learned from making these dozens of times. These tips will save you from my mistakes.
Blend It Longer Than You Think
Strawberry seeds are tough. If you rush the blending, you’ll get chunks that clog the pouch opening. I blend for a full minute. It sounds like a lot, but it makes a huge difference in the final texture.
Don’t Skimp on the Yogurt
The yogurt is what gives these pouches their creamy, dessert-like quality. If you use too much milk, it becomes a thin, watery smoothie that freezes into an icy block. You want a high yogurt-to-milk ratio. Aim for 2:1.
Label Your Pouches
I know it’s tempting to just toss them in the freezer and forget them. But after a week, you won’t know which is which. I use a sharpie to write the date on the pouch. They last 3 months, but after that, the freezer taste sets in.
Room Temperature Ingredients Blend Better
If you take your yogurt and milk straight from the fridge, they’re thick and cold. Let them sit on the counter for 10 minutes before blending. It helps them mix more evenly and creates a smoother texture.
Common Mistakes (and how to avoid them):
- Mistake: Pouches burst in the freezer. Fix: You overfilled them. Always leave ¼ inch of space at the top.
- Mistake: Smoothie is too sweet. Fix: Use unsweetened Greek yogurt and less honey. Taste the mixture before pouring.
- Mistake: Caps don’t seal. Fix: Wipe the rim clean. Any residue prevents a tight seal.
Variations & Substitutions
Once you’ve nailed the basic version, here’s how you can mix it up. I’ve tried all of these, and they’re all winners.
Banana Berry Blast
Add half a ripe banana to the blender. It adds natural sweetness and makes the texture even creamier. My kids love this version because it tastes like banana bread.
Tropical Twist
Swap strawberries for mango chunks and use coconut milk instead of dairy milk. Add a teaspoon of turmeric for color. It’s bright yellow and tastes like vacation.
Protein Power
Add a scoop of vanilla protein powder and a tablespoon of peanut butter. This is my post-workout version. It’s filling and keeps me going until lunch.
Green Machine
Add a handful of spinach. You won’t taste it, I promise. The strawberries mask the green completely. It’s a great way to sneak veggies into my kids’ diets.
Dietary Modifications:
- Dairy-Free: Use coconut yogurt or almond yogurt instead of Greek yogurt. Use oat milk or almond milk.
- Vegan: Use agave nectar instead of honey, and ensure your yogurt is plant-based.
- Low-Sugar: Skip the honey and use unsweetened yogurt. The natural fruit sugar is enough.
Serving & Storage
How to Serve:
I usually serve these straight from the freezer. They’re cold, refreshing, and easy to hold. For older kids, you can insert a straw into the pouch for a different experience. I’ve also seen parents cut the corner off and pour it into a cup for breakfast.
Side Dishes:
These pouches are a complete breakfast, so you don’t need much else. But if you want to add a side, try a piece of whole-grain toast or a handful of almonds. They pair well with anything.
Storage Instructions:
Refrigerator:
You can store the blended smoothie in the fridge for up to 24 hours. But it’s better to freeze it. If you do refrigerate it, stir it before pouring into the pouches because it will separate.
Freezer:
Store in the freezer for up to 3 months. Keep them in a single layer until frozen solid. After that, you can stack them. They’ll keep indefinitely, but the quality drops after 3 months.
Reheating:
Don’t reheat these. They’re meant to be eaten cold. If they’re too frozen to drink, let them sit on the counter for 5-10 minutes. Never microwave them—it’ll melt the pouch and make a mess.
Nutrition Information
I’m not a nutritionist, but here’s the breakdown if you’re tracking. This is per pouch (based on 10 pouches).
Per Serving (1 pouch):
– Calories: 120
– Protein: 8g
– Carbs: 14g
– Fiber: 2g
– Sugar: 10g (natural)
– Fat: 4g
– Saturated Fat: 2g
– Cholesterol: 10mg
– Sodium: 30mg
– Calcium: 150mg
What’s Good:
– High in protein from the Greek yogurt
– Good source of calcium
– Contains vitamins A and C from strawberries
– Low in sodium
What to Know:
– Contains dairy
– Natural sugars from fruit
– Can be made dairy-free or vegan
My Take:
Look, this is a healthy breakfast. It’s not a diet recipe, but it’s way better than a granola bar. I know exactly what’s in it, and it keeps my kids full until lunch. When I want to make it lighter, I use non-fat yogurt and skip the honey. But usually? I just enjoy it as a nutritious treat.
Final Thoughts
So that’s my go-to strawberry yogurt smoothie pouch! I’ve probably talked your ear off at this point, but when you make a recipe this often, you have a lot to say about it.
This has saved our mornings more times than I can count. It’s my answer to “what’s for breakfast?” when I’m tired, don’t want to cook, and still want something that tastes really good. My kids are happy, my husband’s happy, and I’m happy because I’m not stressed about cooking.
Make it yours! Try different fruits, swap in your favorite yogurt, adjust the sweetness. The best recipes are the ones you adapt to your family’s tastes.
If you make this, drop a comment and let me know what you think! I love hearing how recipes turn out in your kitchen. And if something doesn’t work, tell me that too—I’m here to help troubleshoot.
Happy cooking! And I hope your kitchen smells half as good as mine does right now.
Frequently Asked Questions
Q: Can I use frozen strawberries?
A: Yes! Just let them thaw for 10 minutes so they blend evenly. Frozen strawberries make it colder and thicker, which is nice for summer. If you use them frozen, you might need to blend a bit longer to break them down.
Q: Why did my pouch leak?
A: Usually means you didn’t wipe the rim clean, or you overfilled it. Smoothie on the rim prevents a tight seal. Also, always leave ¼ inch of space at the top for expansion.
Q: Can I make these ahead for the whole week?
A: Absolutely! I make a batch of 10 on Sunday, and they last for weeks in the freezer. Just make sure they’re sealed tight. I keep them in a bin in the freezer for easy grab-and-go access.
Q: Why did my smoothie separate in the pouch?
A: If you let the blended smoothie sit in the fridge for more than an hour, it will separate. Stir it well before pouring into the pouches. Freezing it immediately prevents this.
Q: Can I add protein powder?
A: Yes, but add an extra splash of milk because protein powder thickens things up. Vanilla or unflavored whey works best. Start with half a scoop and adjust to taste.
Q: How long do these last in the freezer?
A> Up to 3 months. After that, they might start to taste like freezer burn. Label your pouches with the date so you know when to use them.
Q: Can I use other fruits?
A> Sure! Blueberries, raspberries, mango, and peaches all work. Just adjust the sweetness if the fruit is tart. I’ve tried all of them, and they’re all delicious.
Pin This Recipe!
Back-to-School Strawberry Yogurt Smoothie Pouches
- Total Time: 4 hours 10 minutes
- Yield: 10 servings 1x
Description
A grab-and-go breakfast solution for busy mornings, these frozen strawberry yogurt smoothie pouches are creamy, healthy, and leak-proof, making them perfect for picky eaters and on-the-go families.
Ingredients
- 1 ½ cups fresh strawberries, hulled and halved (200g)
- 1 cup plain Greek yogurt (240g)
- ½ cup milk (whole, almond, or oat) (120ml)
- 1–2 tablespoons honey or maple syrup (optional) (15-30ml)
- 1 tablespoon chia seeds (optional) (10g)
- Reusable silicone pouches with twist-off caps
Instructions
- Wash, hull, and halve the fresh strawberries.
- Add strawberries, Greek yogurt, milk, honey (if using), and chia seeds to a blender.
- Blend on low speed, gradually increasing to high, for 45-60 seconds until completely smooth and creamy.
- Set silicone pouches upright in a mug or tall glass.
- Pour the smoothie into each pouch, filling to about ¾ full to allow for expansion.
- Wipe the rim of each pouch with a paper towel to ensure a clean seal.
- Twist or snap the caps shut tightly and perform a squeeze test to check for leaks.
- Lay pouches flat in a single layer in the freezer for 4-6 hours or overnight until solid.
- Store in the freezer for up to 3 months. Serve frozen or let sit for 5-10 minutes to slightly thaw before eating.
Notes
If using frozen strawberries, let them thaw for 10 minutes before blending. Ensure the rim of the pouch is completely dry before sealing to prevent leaks. Leave headspace in the pouch as liquids expand when frozen. For a dairy-free version, use coconut or almond yogurt and oat milk.
- Prep Time: 10 minutes
- Cook Time: 0 minutes
- Category: Breakfast
- Cuisine: American
Nutrition
- Serving Size: 1 pouch (approx. 4-5
- Calories: 120
- Sugar: 10
- Sodium: 30
- Fat: 4
- Saturated Fat: 2
- Carbohydrates: 14
- Fiber: 2
- Protein: 8
Keywords: smoothie pouches, strawberry yogurt, back to school breakfast, kid-friendly recipes, healthy snacks, freezer meals, grab and go breakfast, Greek yogurt smoothie



