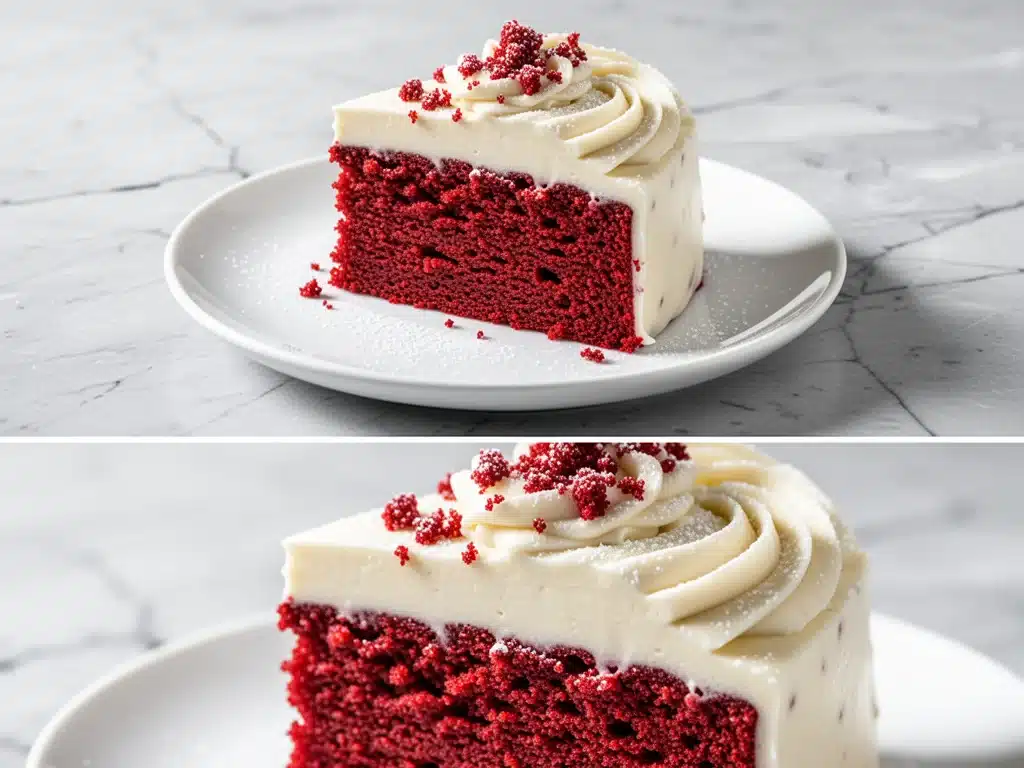
For years, I was the person who bought the square of red velvet cake from the bakery counter at the grocery store. You know the one. It’s that slightly dry, overly sweet square that’s more about the color than the flavor. It was my go-to “treat yourself” item when I was trying to stay somewhat sane during busy work weeks. But then I realized something: I was paying $4 for a slice of cake that tasted like artificial food coloring and regret.
So, one rainy Saturday in November, I decided to stop being lazy. I wanted to make the Classic Red Velvet Cake with Cream Cheese Frosting from scratch. I wasn’t aiming for the neon-pink monstrosity you see in movies; I wanted the real deal. The kind with a subtle cocoa flavor, a tender crumb that melts in your mouth, and frosting that’s tangy enough to cut through the sweetness. I wanted the version that makes people ask, “Wait, is this homemade?”
I’ve made this Classic Red Velvet Cake with Cream Cheese Frosting at least a dozen times since that first attempt. Some were disasters (too much baking soda gave me a metallic taste, and one batch was so dry it could have been used as a doorstop). But after tweaking the ratios and mastering the cream cheese frosting consistency, I finally nailed it. This cake is tender, moist, and absolutely stunning. It’s the kind of dessert that disappears in minutes, leaving everyone wondering if you bought it from a fancy bakery. Spoiler alert: they’ll never know it came from your oven.
Why You’ll Love This Classic Red Velvet Cake with Cream Cheese Frosting
There’s a reason red velvet has been a Southern staple for over a century. It’s not just the pretty color—it’s the balance of flavors and textures. Here’s why this Classic Red Velvet Cake with Cream Cheese Frosting has earned a permanent spot in my recipe rotation:
- It’s Actually Moist — Most homemade red velvet cakes turn out dry because they use too much flour or get overbaked. This recipe uses buttermilk and vegetable oil to keep it incredibly tender and moist for days. Seriously, it’s still good three days later.
- Tangy Frosting Perfection — The cream cheese frosting is the star. It’s not just sweet buttercream; it’s creamy, tangy, and rich. It balances the subtle cocoa and vanilla notes in the cake perfectly. I’ve tried using regular cream cheese, but full-fat block cream cheese is non-negotiable for the right texture.
- Impressive but Not Impossible — You don’t need to be a professional baker to make this. The batter comes together in one bowl (or two if you’re separating wet and dry ingredients), and the frosting is just whipped cream cheese and butter. It looks fancy, but the technique is straightforward.
- Perfect for Any Occasion — Valentine’s Day? Birthday? Just because it’s Tuesday? This Classic Red Velvet Cake with Cream Cheese Frosting works for every celebration. It’s elegant enough for a dinner party but comforting enough for a cozy night in.
- Make-Ahead Friendly — I often bake the cake layers a day ahead, wrap them tightly, and frost them the next day. It actually tastes better after the flavors have had time to meld. Plus, it saves you stress on the day of the event.
This cake is my answer to “I want something special but don’t want to order takeout.” It’s reliable, delicious, and always a crowd-pleaser. My family asks for this Classic Red Velvet Cake with Cream Cheese Frosting more than any other dessert, and I don’t blame them.
Ingredients You’ll Need for This Classic Red Velvet Cake with Cream Cheese Frosting
Let’s talk ingredients. This recipe calls for simple pantry staples, but a few key items make all the difference. I’m particular about quality here, especially with the cream cheese and cocoa powder.
For the Cake:
All-purpose flour (2 and 1/2 cups / 315g) — Sift this first to remove lumps. It ensures a light, tender crumb. Don’t skip the sifting; it really matters for red velvet.
Cocoa powder (1 tablespoon / 5g) — Use unsweetened natural cocoa, not Dutch-processed. It gives that subtle chocolate flavor without overpowering the red. I use Hershey’s Natural Cocoa Powder because it’s consistent and affordable.
Baking soda (1 teaspoon / 5g) — This reacts with the buttermilk to create lift. Make sure it’s fresh; old baking soda won’t work properly.
Salt (1/2 teaspoon / 3g) — Enhances all the flavors. Don’t skip it, even if you’re watching sodium.
Buttermilk (1 cup / 240ml) — This is crucial for tang and tenderness. If you don’t have buttermilk, make your own by adding 1 tablespoon of lemon juice or white vinegar to 1 cup of milk. Let it sit for 5 minutes until it curdles.
Vegetable oil (1/2 cup / 120ml) — Oil keeps the cake moist longer than butter does. I use regular vegetable oil, but canola works too. Avoid olive oil; it has too strong a flavor.
Sugar (1 and 3/4 cups / 350g) — Granulated white sugar. It’s not brown sugar; red velvet is light and airy, not dense.
Eggs (2 large / room temperature) — Room temperature eggs blend better into the batter. If you forget, just put them in a bowl of warm water for 5 minutes.
Vanilla extract (2 teaspoons / 10ml) — Use real vanilla, not imitation. It makes a noticeable difference in flavor.
Red food coloring (2 tablespoons / 30ml) — Gel food coloring gives a more vibrant color without thinning the batter. I use red gel paste, but liquid works too. Start with 1 tablespoon and add more if you want it deeper red.
For the Cream Cheese Frosting:
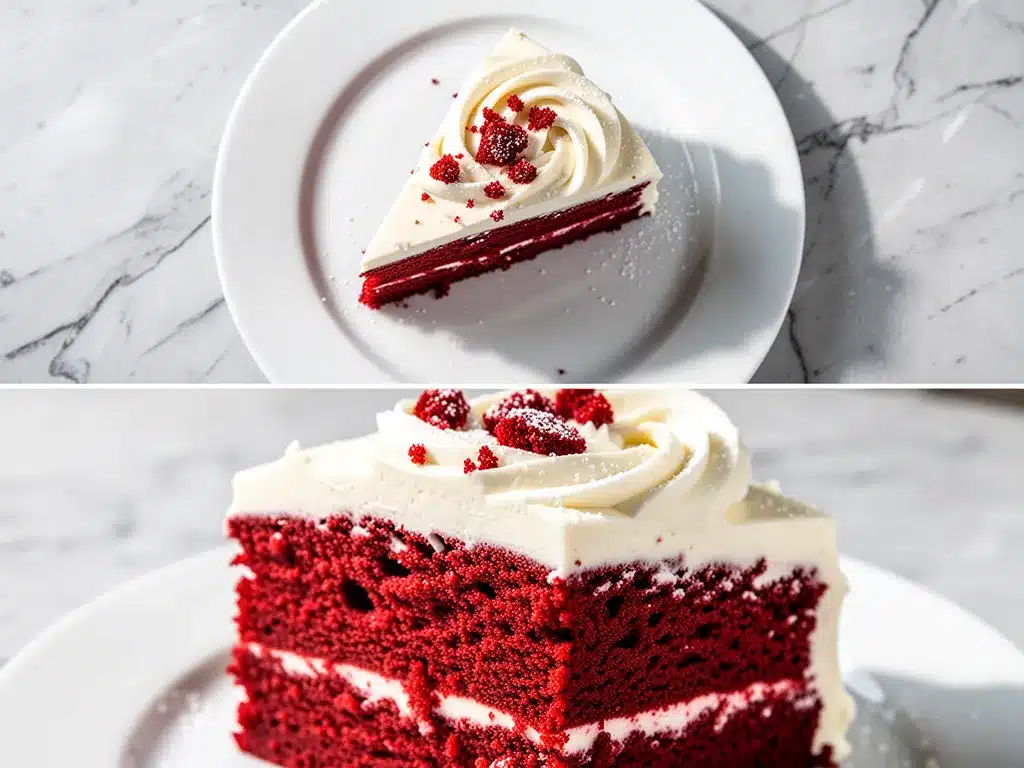
Cream cheese (8 oz / 225g, full-fat, block style) — Do NOT use spreadable cream cheese in a tub. It has too much water and won’t hold its shape. Let it soften to room temperature before mixing.
Butter (1/2 cup / 115g, softened) — Unsalted butter is best so you can control the salt. Soften it by leaving it out for 30 minutes or microwaving for 10 seconds.
Powdered sugar (4 cups / 480g) — Sift this! Lumpy powdered sugar will ruin your smooth frosting. I sift mine twice to be sure.
Vanilla extract (1 teaspoon / 5ml) — Adds depth to the frosting.
Salt (1/4 teaspoon / 1.5g) — Balances the sweetness. Don’t skip it.
Quick Tip: I always measure my flour by spooning it into the cup and leveling it off. Scooping directly from the bag packs it down and leads to dry cake.
Equipment Needed
You don’t need fancy gadgets for this Classic Red Velvet Cake with Cream Cheese Frosting. Here’s what I actually use:
Two 8-inch or 9-inch round cake pans — Grease and line the bottoms with parchment paper. This ensures the cake doesn’t stick and releases easily. I use a little extra flour to dust the pans after greasing.
Mixing bowls — One large bowl for wet ingredients, one medium for dry. Or use two large bowls if you’re mixing in batches.
Electric mixer — A hand mixer or stand mixer makes creaming the butter and sugar (if you’re using the butter method) and whipping the frosting much easier. I use a stand mixer for the frosting because it’s faster and more consistent.
Sifter or fine-mesh sieve — For flour and powdered sugar. I know it’s an extra step, but it prevents lumps and ensures a smooth texture.
Rubber spatula — For scraping down the sides of the bowl and folding in the dry ingredients. Silicone spatulas are best because they’re flexible and scrape everything.
Cooling rack — Let the cakes cool completely before frosting. If you frost warm cake, the frosting will melt and slide off. I’ve learned this the hard way.
Offset spatula — Makes spreading frosting on the cake layers much easier. A regular spatula works too, but an offset gives you more control.
Parchment paper — Essential for lining the cake pans. It’s a small investment that saves you from stuck cakes.
How to Make It: Step-by-Step
Alright, let’s make this Classic Red Velvet Cake with Cream Cheese Frosting! I’m walking you through exactly how I do it, including the little tricks I’ve picked up over the years.
Step 1: Prep Your Pans and Oven (5 minutes)
Preheat your oven to 350°F (175°C). Grease two 8-inch or 9-inch round cake pans with butter or non-stick spray. Line the bottoms with parchment paper circles for easy removal. Dust with a little flour, tapping out the excess. This step is crucial for preventing sticking.
Step 2: Mix Dry Ingredients (3 minutes)
In a medium bowl, sift together the flour, cocoa powder, baking soda, and salt. Whisk them together to ensure even distribution. Set aside. Sifting removes lumps and aerates the flour, which helps the cake rise evenly.
Step 3: Mix Wet Ingredients (5 minutes)
In a large bowl, whisk together the buttermilk, vegetable oil, eggs, vanilla extract, and red food coloring. Mix until well combined. The batter will be a vibrant red. If you want a deeper color, add more food coloring, but start with 2 tablespoons.
Step 4: Combine Wet and Dry (3 minutes)
Gradually add the dry ingredients to the wet ingredients, mixing on low speed until just combined. Do not overmix! Overmixing develops gluten and leads to a tough cake. Stop mixing as soon as you no longer see dry flour. The batter will be thick and smooth.
Step 5: Bake the Cakes (25-30 minutes)
Pour the batter evenly into the prepared pans. Bake for 25-30 minutes, or until a toothpick inserted into the center comes out clean or with a few moist crumbs. The cakes should spring back when lightly touched. Avoid opening the oven door too early, as this can cause the cakes to collapse.
Step 6: Cool the Cakes (1 hour)
Let the cakes cool in the pans for 10 minutes, then turn them out onto a wire rack to cool completely. This is important! If you try to frost warm cake, the frosting will melt. I usually let them cool for at least an hour, or even overnight in the fridge for easier handling.
Step 7: Make the Cream Cheese Frosting (10 minutes)
In a large bowl, beat the softened cream cheese and butter together until smooth and creamy. Gradually add the sifted powdered sugar, one cup at a time, beating on low speed. Once all the sugar is added, increase the speed to medium-high and beat for 2-3 minutes until light and fluffy. Add vanilla and salt, then mix briefly to combine.
Step 8: Assemble the Cake (10 minutes)
Place one cake layer on a cake stand or plate. Spread a generous layer of frosting on top. Place the second layer on top and frost the top and sides of the cake. Use an offset spatula to smooth the frosting. You can leave it rustic or smooth it out for a polished look.
Step 9: Chill and Serve (30 minutes)
Chill the cake in the fridge for at least 30 minutes to set the frosting. This makes slicing cleaner. Serve at room temperature for the best flavor and texture. Enjoy your homemade Classic Red Velvet Cake with Cream Cheese Frosting!
Expert Tips & Tricks
Here’s everything I’ve learned from making this cake dozens of times. These tips will save you from my mistakes.
Room Temperature Ingredients — Make sure your cream cheese, butter, and eggs are at room temperature. Cold ingredients won’t blend smoothly, leading to lumpy frosting or dense cake. I usually take my cream cheese and butter out of the fridge 30 minutes before I start.
Don’t Overmix the Batter — Once you add the dry ingredients to the wet, mix only until combined. Overmixing creates gluten, which makes the cake tough. I mix on low speed and stop as soon as the flour disappears.
Sift Your Dry Ingredients — Cocoa powder and powdered sugar are prone to clumps. Sifting ensures a smooth batter and frosting. It’s an extra step, but it’s worth it for the texture.
Use Full-Fat Cream Cheese — Spreadable cream cheese in tubs has too much water and air. It won’t hold its shape and will make your frosting runny. Always use block cream cheese, full-fat, softened.
Cool Completely Before Frosting — This is the most common mistake. If the cake is even slightly warm, the frosting will melt. I usually bake the cake the day before and frost it the next day. It’s easier to handle and tastes better.
Chill Before Serving — After frosting, chill the cake for at least 30 minutes. This sets the frosting and makes slicing cleaner. It also allows the flavors to meld.
Common Mistakes (and how to avoid them):
- Mistake: Cake is dry. Fix: Don’t overbake. Check the cake 5 minutes before the timer goes off. Also, ensure you’re using the correct amount of flour (spoon and level, don’t scoop).
- Mistake: Frosting is runny. Fix: Your cream cheese or butter was too warm, or you added too much powdered sugar too quickly. Chill the frosting for 15 minutes, then beat again.
- Mistake: Cake sank in the middle. Fix: You opened the oven door too early, or your baking soda was old. Make sure your oven is properly preheated and avoid opening the door during the first 20 minutes.
Variations & Substitutions
Once you’ve mastered the basic Classic Red Velvet Cake with Cream Cheese Frosting, here’s how you can mix it up. I’ve tried all of these.
White Velvet Cake — Omit the cocoa powder for a white velvet cake. It’s still moist and tangy, just without the chocolate flavor. Great for spring or summer events.
Strawberry Red Velvet — Add 1/2 cup of freeze-dried strawberries to the dry ingredients. It intensifies the strawberry flavor and gives a beautiful pink hue.
Chocolate Cream Cheese Frosting — Add 2 tablespoons of cocoa powder to the frosting. It’s less sweet and pairs well with the cocoa in the cake.
Mini Cupcakes — Divide the batter into cupcake liners and bake for 18-20 minutes. Perfect for parties and easier to serve.
Gluten-Free — Use a 1-to-1 gluten-free flour blend. Make sure it contains xanthan gum, or add 1/2 teaspoon. The texture will be slightly different but still delicious.
Dairy-Free — Use dairy-free butter and cream cheese alternatives. The texture might be slightly softer, but it’s still tasty. Use almond milk or coconut milk mixed with lemon juice for buttermilk.
Different Colors — Use gel food coloring in blue, green, or purple for holidays. Red is classic, but other colors are fun for specific occasions.
Serving & Storage
How to Serve: I usually serve this cake at room temperature. The frosting is creamier and the cake is more flavorful. Slice it with a sharp knife dipped in hot water for clean cuts. It’s elegant enough for a dinner party but casual enough for a family dinner.
Side Dishes: This cake is rich, so I usually serve it with a simple black coffee or a cup of tea. It’s also great with a glass of cold milk or a sweet dessert wine.
Toppings: I sometimes sprinkle crushed red velvet cake crumbs on top for decoration. You can also add fresh berries like raspberries or strawberries for a fresh contrast.
Storage Instructions:
Refrigerator: Store the cake in an airtight container or covered with plastic wrap in the fridge for up to 5 days. The cream cheese frosting requires refrigeration for food safety.
Freezing: You can freeze the unfrosted cake layers for up to 2 months. Wrap them tightly in plastic wrap and then in aluminum foil. Thaw overnight in the fridge before frosting. The frosting can also be frozen, but it may separate slightly when thawed. Beat it well after thawing to restore texture.
Reheating: Don’t reheat this cake. It’s best served at room temperature. If you’ve refrigerated it, let it sit out for 30 minutes before serving to take the chill off.
Pro Tip: If your frosting gets too hard in the fridge, let it sit at room temperature for 15 minutes before slicing. It will soften up and be easier to cut.
Nutrition Information
I’m not a nutritionist, but here’s the breakdown if you’re tracking. This is a rich dessert, so enjoy in moderation.
Per Slice (based on 12 slices):
- Calories: 450
- Protein: 6g
- Carbs: 60g
- Fiber: 1g
- Sugar: 45g
- Fat: 22g
- Saturated Fat: 13g
- Cholesterol: 65mg
- Sodium: 350mg
What’s Good: It provides some calcium from the cream cheese and milk. The cocoa powder has antioxidants.
What to Know: It’s high in sugar and saturated fat. Use low-fat cream cheese if you’re watching calories, though the texture will be different. You can also reduce the sugar in the frosting by 1/2 cup.
My Take: Look, this is a special occasion cake. It’s not a daily snack. But it’s homemade, so you know what’s in it. When I make this Classic Red Velvet Cake with Cream Cheese Frosting, I enjoy a slice and savor it. It’s worth the calories.
Final Thoughts
So that’s my go-to Classic Red Velvet Cake with Cream Cheese Frosting! I’ve probably talked your ear off at this point, but when you make a recipe this often, you have a lot to say about it.
This cake has saved many celebrations in my home. It’s my answer to “I want to impress but don’t want to order takeout.” My family is happy, my guests are impressed, and I’m happy because I’m not stressed about buying a store-bought cake that tastes like cardboard.
Make it yours! Try different food coloring, add fruit fillings, or adjust the sweetness. The best recipes are the ones you adapt to your family’s tastes. If you make this Classic Red Velvet Cake with Cream Cheese Frosting, drop a comment and let me know what you think! I love hearing how recipes turn out in your kitchen. And if something doesn’t work, tell me that too—I’m here to help troubleshoot.
Happy baking! And I hope your kitchen smells half as good as mine does right now.
Frequently Asked Questions
Q: Can I use Dutch-processed cocoa instead of natural cocoa?
A: You can, but it will change the flavor slightly. Dutch-processed cocoa is milder and darker. Natural cocoa has a more robust chocolate flavor that pairs well with the buttermilk. If you use Dutch-processed, you might want to add a teaspoon of vinegar to the buttermilk to maintain the acidity needed for the baking soda to react.
Q: Why did my cake turn out dry?
A: This usually happens from overmixing the batter or overbaking. Make sure you mix only until the flour is combined. Also, check your cake 5 minutes before the timer goes off. Ovens vary, so your cake might be done earlier than the recipe states. Use a toothpick to test—it should come out with a few moist crumbs, not completely clean.
Q: Can I make this cake ahead of time?
A: Absolutely! In fact, I recommend it. Bake the cake layers a day ahead, wrap them tightly in plastic wrap, and store them at room temperature. Frost them the next day. This makes the cake easier to handle and the flavors have time to meld. The frosting can also be made ahead and stored in the fridge for up to 3 days.
Q: Why is my frosting runny?
A: Your cream cheese or butter was likely too warm, or you didn’t sift the powdered sugar. Make sure your dairy products are softened but not melted. Sift the powdered sugar to remove lumps. If the frosting is still runny, chill it in the fridge for 15-20 minutes, then beat it again. You can also add a little more powdered sugar if needed.
Q: Can I use liquid food coloring instead of gel?
A: You can, but you’ll need to use a lot more to get a vibrant red color, which can thin out the batter. Gel food coloring is more concentrated and doesn’t add extra liquid. I strongly recommend using gel for the best color and texture.
Q: How do I store leftovers?
A: Store the cake in an airtight container in the refrigerator for up to 5 days. The cream cheese frosting requires refrigeration. Let the cake sit at room temperature for 30 minutes before serving to soften the frosting and enhance the flavor.
Q: Can I freeze this cake?
A: You can freeze the unfrosted cake layers for up to 2 months. Wrap them tightly in plastic wrap and then in aluminum foil. Thaw overnight in the fridge before frosting. The frosting can also be frozen, but it may separate slightly when thawed. Beat it well after thawing to restore texture.
Pin This Recipe!
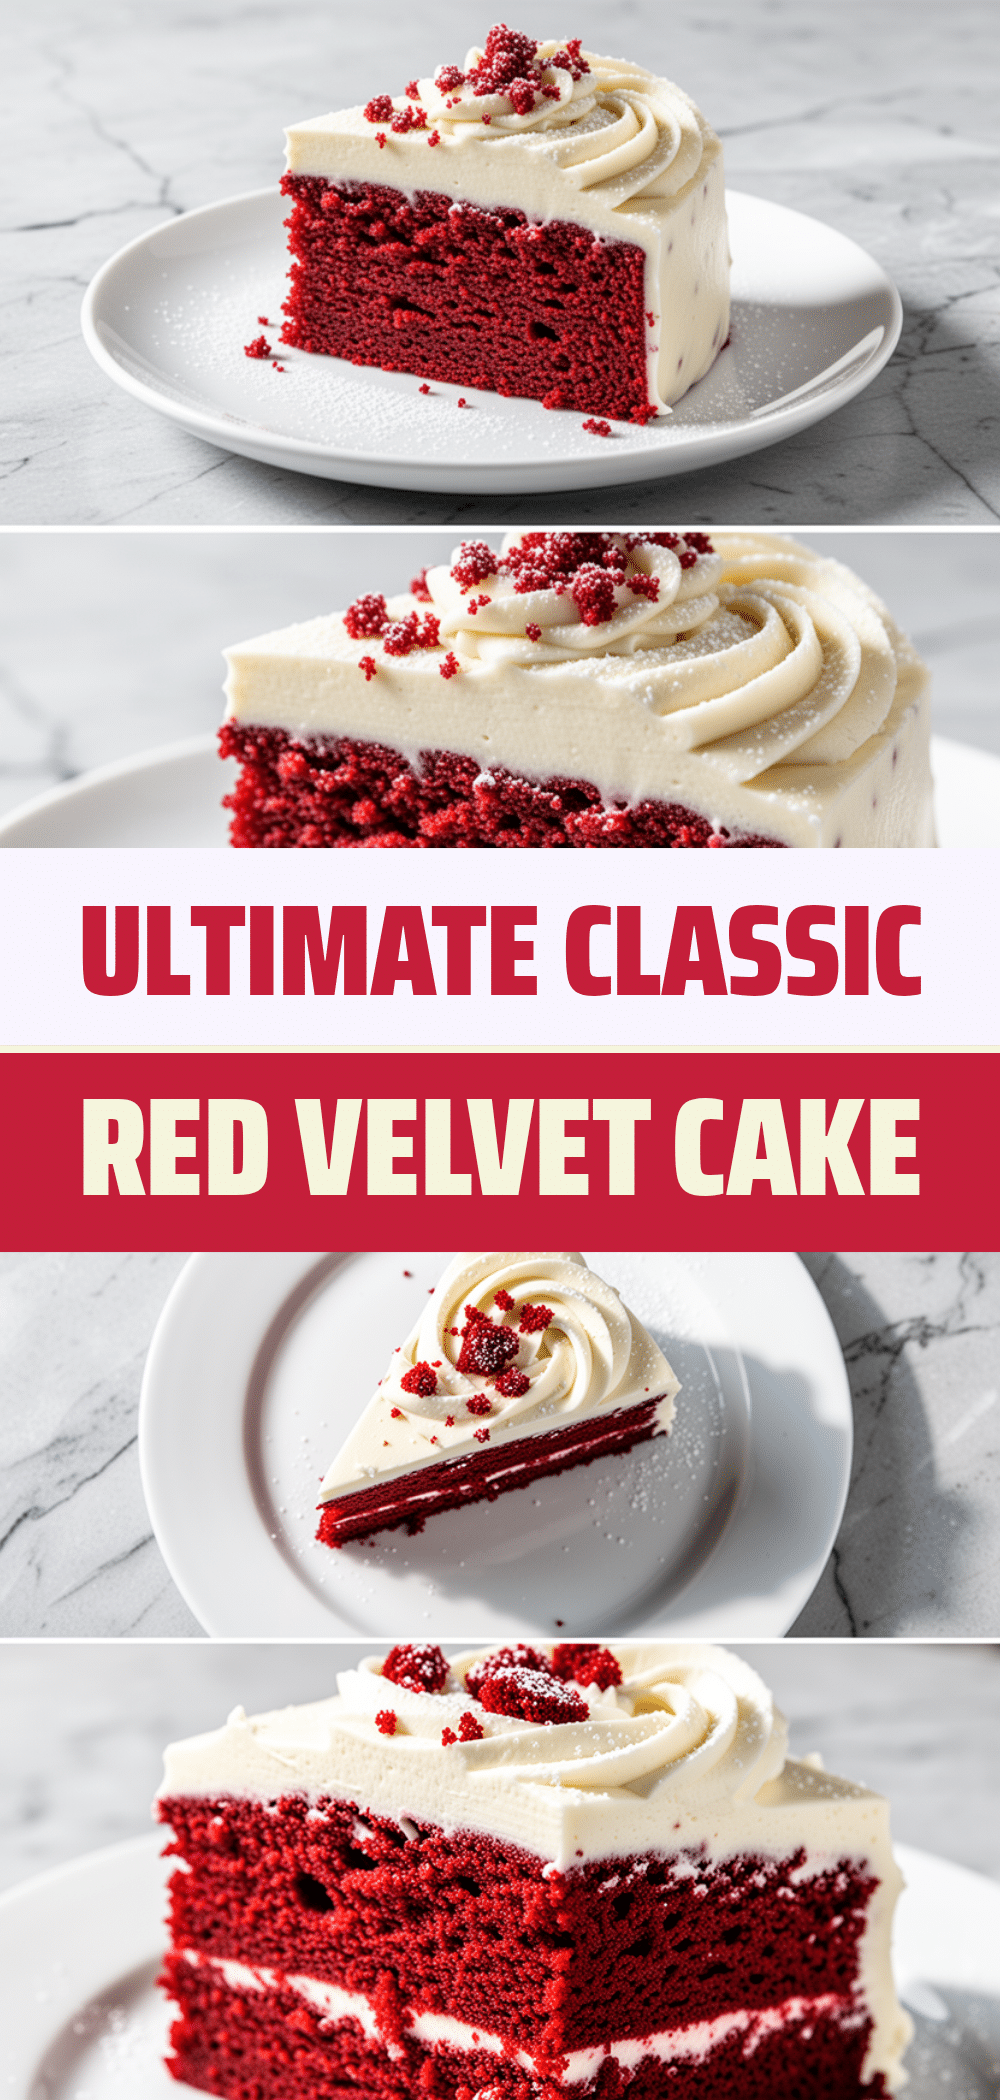
Classic Red Velvet Cake with Cream Cheese Frosting
- Total Time: 1 hour 30 minutes
- Yield: 12 servings 1x
Description
A moist, tender homemade red velvet cake with a subtle cocoa flavor, topped with a rich, tangy cream cheese frosting that balances the sweetness perfectly.
Ingredients
- 2 1/2 cups all-purpose flour
- 1 tablespoon unsweetened natural cocoa powder
- 1 teaspoon baking soda
- 1/2 teaspoon salt
- 1 cup buttermilk
- 1/2 cup vegetable oil
- 1 3/4 cups granulated white sugar
- 2 large eggs (room temperature)
- 2 teaspoons vanilla extract
- 2 tablespoons red gel food coloring
- 8 oz full-fat block cream cheese (softened)
- 1/2 cup unsalted butter (softened)
- 4 cups powdered sugar
- 1 teaspoon vanilla extract
- 1/4 teaspoon salt
Instructions
- Preheat oven to 350°F (175°C). Grease two 8-inch or 9-inch round cake pans, line bottoms with parchment paper, and dust with flour.
- In a medium bowl, sift together flour, cocoa powder, baking soda, and salt. Whisk to combine and set aside.
- In a large bowl, whisk together buttermilk, vegetable oil, eggs, vanilla extract, and red food coloring until well combined.
- Gradually add dry ingredients to wet ingredients, mixing on low speed until just combined. Do not overmix.
- Pour batter evenly into prepared pans and bake for 25-30 minutes, or until a toothpick inserted into the center comes out clean.
- Let cakes cool in pans for 10 minutes, then turn out onto a wire rack to cool completely.
- In a large bowl, beat softened cream cheese and butter until smooth. Gradually add sifted powdered sugar, beating on low then medium-high until light and fluffy.
- Add 1 teaspoon vanilla and 1/4 teaspoon salt to frosting and mix briefly to combine.
- Place one cake layer on a stand, spread a generous layer of frosting on top, and add the second layer.
- Frost the top and sides of the cake with remaining frosting.
- Chill cake in the fridge for at least 30 minutes to set frosting before serving.
Notes
Ensure all dairy ingredients (cream cheese, butter) and eggs are at room temperature for best texture. Do not overmix the batter to avoid a tough cake. Sifting dry ingredients is crucial for a smooth texture. The cake can be made ahead; bake layers a day in advance and frost the next day for easier handling and better flavor melding.
- Prep Time: 30 minutes
- Cook Time: 30 minutes
- Category: Dessert
- Cuisine: American
Nutrition
- Serving Size: 1 slice
- Calories: 450
- Sugar: 45
- Sodium: 350
- Fat: 22
- Saturated Fat: 13
- Carbohydrates: 60
- Fiber: 1
- Protein: 6
Keywords: red velvet cake, cream cheese frosting, homemade cake, southern dessert, baking, moist cake, holiday dessert



