There was a period in my life—let’s call it the “Great Sleep Deprivation Era”—where I genuinely believed that making breakfast meant waking up before the sun. I’m talking 5:30 AM alarms, standing over a sizzling stove, flipping eggs, and somehow trying to make toast without burning it. It was exhausting. And honestly? It tasted mediocre because I was too tired to care about seasoning properly.
The turning point came on a Sunday morning when I was staring at a pile of raw potatoes, a bottle of olive oil, and a profound sense of regret for agreeing to host brunch for my sister’s entire family. I didn’t have time to pan-fry twenty servings of hash browns. I needed a miracle. So, I did what any desperate, caffeine-deprived cook would do: I threw everything on a sheet pan and prayed.
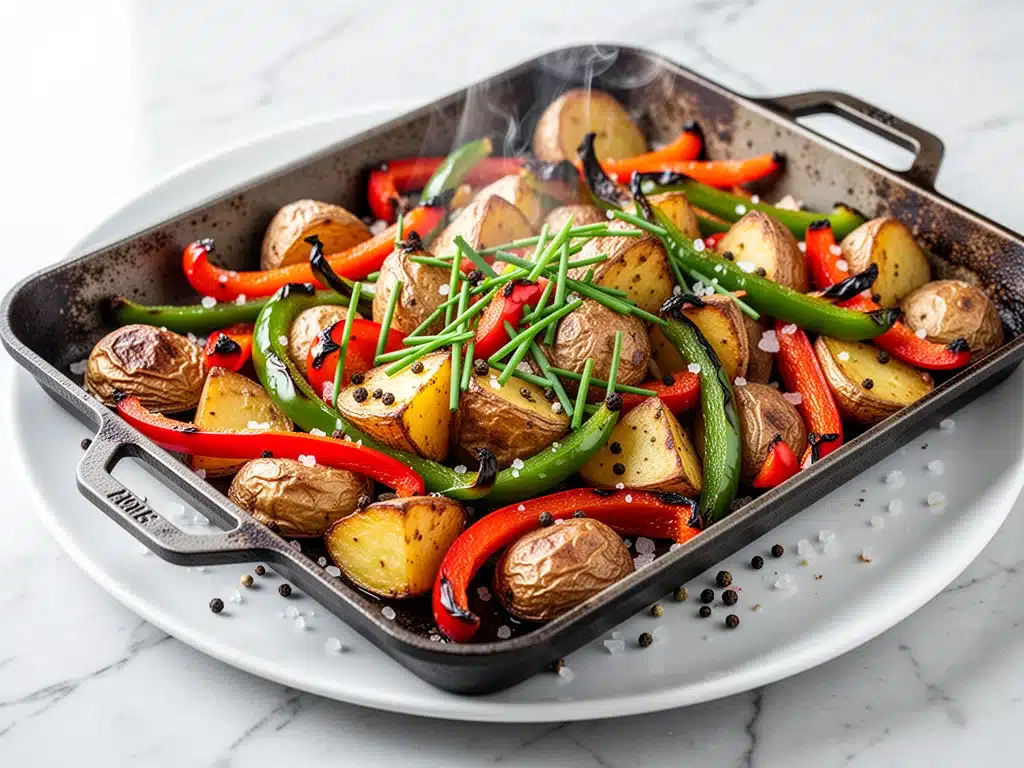
That prayer answered with the most crispy, golden, perfectly seasoned Crispy Sheet Pan Breakfast Potatoes I had ever tasted. They were easy. They were delicious. And best of all, they cooked themselves while I finished getting ready.
Since that chaotic Sunday, this recipe has become my holy grail. I make these Crispy Sheet Pan Breakfast Potatoes at least twice a month now. Sometimes they’re for lazy weekend brunches with mimosas (because we still celebrate like it’s the 1970s), but most often? They’re my secret weapon for busy weeknights. Yes, weeknights. Because let’s be real: if I can roast potatoes that taste like they took four hours in the oven in just 45 minutes, why am I settling for dry, sad microwave sides or takeout fries that cost $12?
These aren’t just “potatoes.” They’re crispy on the outside, fluffy on the inside, and packed with enough flavor that even my picky eater husband asks for seconds. I’ve tested this method dozens of times—changing temperatures, oils, and cutting styles—until I found the exact sweet spot for maximum crunch. If you’re tired of soggy, steamed veggies and want a side dish that actually gets people excited at the dinner table, you need to try this. It’s the easiest, most reliable way to get restaurant-quality potatoes on your table without the restaurant price tag or the stress.
Why You’ll Love This Recipe
I’ve tried a lot of potato recipes. Some are too complicated, requiring me to boil them first, then par-fry them, then roast them. Others just turn out soggy messes that stick to the pan. This Crispy Sheet Pan Breakfast Potatoes recipe is different. It’s the one that actually works when you’re tired, busy, or just don’t feel like babysitting a stove.
Here’s the real deal on why this has earned a permanent spot in my weekly rotation:
Zero Active Hassle — Seriously. Once you toss the potatoes with oil and spices (which takes about 5 minutes), you’re done. You can go take a shower, walk the dog, or argue with your teenager about homework. The oven does the heavy lifting. I’ve made this while on phone calls with my mom. It’s that hands-off.
Actually Crispy (Not Soggy)
This is the big one. Most sheet pan potatoes fail because the pan is too crowded or the potatoes aren’t cut right. I’ve cracked the code on getting that shattering, golden crust. The secret isn’t magic; it’s just proper technique. When you bite into these, they should crunch. If they don’t, you’ve done something wrong (and I’ll tell you how to fix it below).
Flavor That Doesn’t Need Ketchup
These are seasoned perfectly with paprika, garlic powder, onion powder, and a touch of cayenne. They have a savory, smoky depth that makes them stand on their own. I don’t need to dip them in sauce. They’re flavorful enough to be a main event, not just a background character.
Perfect for Meal Prep
I make a double batch every Sunday. They store beautifully in the fridge for up to 5 days. I reheat them in the air fryer for 3 minutes to get that crisp back, and they’re ready to go with my lunch bowls or quick dinners. It’s like having a side dish ready to go without the guilt of buying pre-made.
Feeds a Crowd (or Just You)
This recipe scales up easily. I’ve made it for 12 people at a potluck, and it disappeared in minutes. But it’s also perfect for a solo night where you want something hearty. One sheet pan equals about 4-6 servings, depending on how hungry you are. (I usually eat two servings because they’re addictive.)
So basically, if you want dinner to just work—if you want something that looks impressive but requires zero stress—this is your answer. It’s reliable, delicious, and it makes your kitchen smell like a bakery (but savory).
Ingredients You’ll Need
Here’s the best part: you probably have 90% of this already. This isn’t a recipe that requires a trip to three different specialty stores. It’s pantry-friendly, simple, and uses ingredients that play nicely together.
Yukon Gold Potatoes (2 pounds / about 900g) — This is non-negotiable if you want the best texture. Yukon Golds have a waxy-but-buttery skin and a creamy interior that holds up well to roasting. Russets are too starchy and can fall apart; red potatoes are too dense. Yukon Gold is the sweet spot. I buy them in the 2-pound bags at the grocery store—it’s the perfect amount.
Avocado Oil or Olive Oil (3 tablespoons / 45ml) — I prefer avocado oil because it has a high smoke point, which helps with that crispiness. But extra virgin olive oil works too if you don’t mind a slightly lower smoke point. Don’t use butter here—it’ll burn. Stick with oil.
Smoked Paprika (1 teaspoon) — This is where the flavor comes from. It adds a smoky, rich depth that regular paprika can’t match. It’s worth buying a specific jar of smoked paprika. It’s cheap and lasts forever. If you don’t have it, regular paprika works, but it won’t have that same “breakfast sausage” vibe.
Garlic Powder (1 teaspoon) — Not fresh garlic! Fresh garlic burns quickly in the oven. Garlic powder distributes evenly and gives that consistent savory flavor. I use the cheap bottle from the spice rack. It’s fine.
Onion Powder (1 teaspoon) — Similar to the garlic, this adds sweetness and depth without chunks of onion that might burn. It balances the smokiness of the paprika.
Cayenne Pepper (½ teaspoon) — Optional, but I highly recommend it. Just a pinch adds a subtle heat that wakes up your palate. It’s not spicy-hot; it’s just “interesting.” If you’re sensitive to spice, start with ¼ teaspoon.
Salt and Black Pepper (1 teaspoon kosher salt, ½ teaspoon black pepper) — Season generously. Potatoes are bland on their own, so they need a good amount of salt to bring out their flavor. Use kosher salt if you have it; it’s easier to control than table salt.
Optional: Fresh Herbs (2 tablespoons chopped parsley or chives) — I sprinkle these on right after they come out of the oven. It adds a fresh, green pop of color and flavor. It’s not essential, but it makes it look fancy. My kids ignore it, but I like the aesthetic.
Quick Tip on Potato Prep: You don’t need to peel these. The skin adds texture and nutrients. Just scrub them really well under cold water. If you have big potatoes, cut them in half. If they’re small, you can leave them whole or quarter them.
Equipment Needed
You don’t need fancy gadgets for this. Here’s what I actually use in my kitchen:
Large Rimmed Baking Sheet — I use a half-sheet pan (18×13 inches). It’s the standard size. Make sure it has a rim so the oil doesn’t drip into the oven. I have two of them, and I use one for this. If you only have one, make sure it’s not too small. Crowding is the enemy of crispiness.
Large Mixing Bowl — For tossing the potatoes. A glass or stainless steel bowl works best. Plastic is fine too, just wash it well afterward.
Sharp Chef’s Knife — For cutting the potatoes. A dull knife will slip and hurt you. Learn to sharpen it. It makes cutting the potatoes uniform, which is key for even cooking.
Measuring Spoons — For the spices. I use the standard set from my drawer. Doesn’t need to be fancy.
Paper Towels — This is the secret weapon. You’ll need these to dry the potatoes after washing. Moisture is the enemy of crispiness. If they’re wet, they’ll steam instead of roast.
Optional: Parchment Paper — I don’t always use it, but if you’re worried about cleanup, line the pan. It makes cleanup a breeze. But honestly, if you use enough oil, the potatoes release easily anyway. I prefer bare metal for maximum browning.
Quick Note: Don’t use a dark pan if you can avoid it. Dark pans get hotter and can burn the bottoms before the insides are cooked. A light-colored aluminum or stainless steel pan is ideal for even browning.
How to Make It: Step-by-Step
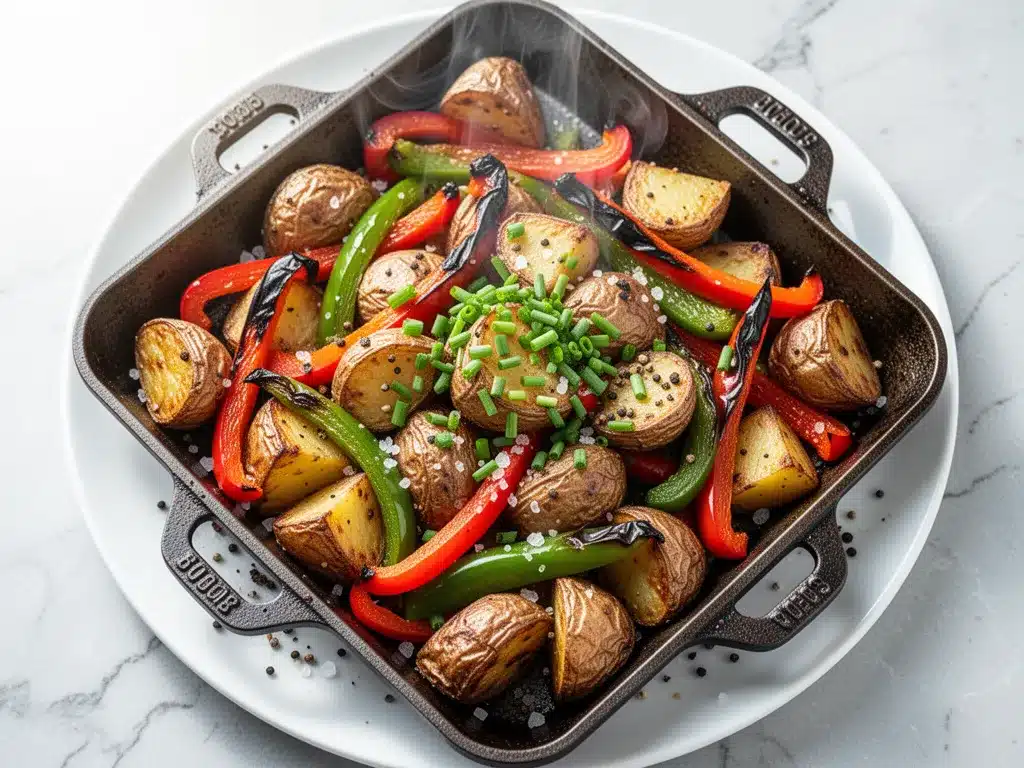
Alright, let’s make these Crispy Sheet Pan Breakfast Potatoes! I’m walking you through exactly how I do it, including the little tricks I’ve picked up over the years.
Step 1: Prep the Potatoes (5 minutes)
Start by washing your potatoes thoroughly. Scrub them with a vegetable brush under cold water to remove any dirt. Now, here’s the critical part: dry them. Use paper towels to pat them completely dry. Any moisture left on the skin will prevent them from getting crispy. If you’re in a rush, let them air dry for 10 minutes, but paper towels are faster.
Next, cut them into uniform pieces. I like to cut them into 1-inch cubes. If you cut them too small, they’ll burn. If you cut them too big, the outsides will burn before the insides are fluffy. Aim for consistency. Uniformity is key to even cooking.
Step 2: Season and Toss (3 minutes)
Put the dried potato cubes in your large mixing bowl. Drizzle with the avocado oil or olive oil. Sprinkle with smoked paprika, garlic powder, onion powder, cayenne, salt, and black pepper. Use your hands to toss everything together. Make sure every single cube is coated. If some are bare, they’ll just dry out in the oven. It should look like the potatoes are glistening with oil and spices.
Step 3: Arrange on the Pan (2 minutes)
Line your baking sheet with parchment paper if you’re using it. Spread the potatoes out in a single layer. This is non-negotiable. Do not pile them up. If they’re touching, they’ll steam each other and get soggy. Give them space. If you have a small pan, use two pans. Better to roast in batches than to have soggy potatoes.
Step 4: Roast (35-40 minutes)
Preheat your oven to 425°F (220°C). This high heat is what creates the crispiness. Once the oven is hot, put the pan in the middle rack. Roast for 20 minutes. Then, take the pan out and flip the potatoes over. Use a spatula to turn them so the other side gets crispy. Return to the oven and roast for another 15-20 minutes, until they are golden brown and fork-tender.
Step 5: Check and Serve (2 minutes)
Check for doneness by piercing a cube with a fork. It should go in easily. If they’re not crispy enough, roast for another 5 minutes. If they’re browning too fast, lower the heat to 400°F. Once they’re done, take them out and sprinkle with fresh herbs if you’re using them. Serve immediately while they’re hot and crispy.
Total Time: About 45 minutes (5 minutes active, 40 minutes cooking)
Troubleshooting: If your potatoes are sticking to the pan, your oil wasn’t hot enough or you didn’t use enough oil. Next time, add a bit more. If they’re burnt on the outside but raw inside, cut them smaller next time.
Expert Tips & Tricks
Here’s everything I’ve learned from making this dozens of times. These tips will save you from my mistakes.
Dry Them Thoroughly
I can’t stress this enough. Moisture is the enemy. If your potatoes are wet, they will steam. Pat them dry with paper towels. If you’re impatient, let them sit on a rack for 10 minutes after washing. It makes a huge difference.
Don’t Crowd the Pan
Crowding leads to steaming. If your pan is full, use two pans or roast in batches. It’s worth the extra time to get that crispiness. I’ve ruined batches by trying to fit too many in. Don’t make my mistake.
Flip Halfway
Flipping ensures even browning. If you skip this, one side will be golden and the other will be pale. Use a spatula to gently turn them. It takes 30 seconds but makes a big difference.
Use High Heat
425°F is the sweet spot. Lower temperatures will dry them out without crisping them. Higher temperatures might burn them before they cook through. Stick to 425°F.
Season Generously
Potatoes absorb salt. Don’t be shy with the seasoning. Taste a piece after roasting and add more salt if needed. But start with a good amount.
Common Mistakes (and how to avoid them):
Mistake: Soggy Potatoes
Fix: Dry them better, don’t crowd the pan, and make sure the oven is fully preheated.
Mistake: Burnt Potatoes
Fix: Cut them smaller, lower the heat to 400°F, or check them 5 minutes early.
Pro Tricks I’ve Learned:
For Extra Crunch
After roasting, sprinkle a little cornstarch on them and toss. It helps absorb moisture and creates an extra crispy exterior. I do this when I want them to feel like french fries.
For Flavor Boost
Add a pinch of nutritional yeast to the seasoning mix. It adds a cheesy, nutty flavor without dairy. It’s a great vegan hack.
Variations & Substitutions
Once you’ve nailed the basic version, here’s how you can mix it up. I’ve tried all of these.
Spicy Version
Add 1 teaspoon of cayenne pepper and ½ teaspoon of chili powder. Top with sliced jalapeños after roasting. This is for heat lovers.
Herb-Infused
Skip the paprika and use dried rosemary, thyme, and sage. It gives a more traditional, savory flavor. Great with roast chicken.
Garlic Lover’s
Add 2 cloves of minced fresh garlic after roasting (don’t roast it, it burns). Toss with the hot potatoes. The residual heat will cook the garlic slightly and infuse the flavor.
Sweet Potato Option
You can use sweet potatoes instead of Yukon Golds. Cut them into similar cubes. They take slightly longer to cook, so roast for 45-50 minutes. Add a little maple syrup to the oil for sweetness.
Dietary Modifications:
Gluten-Free
This recipe is naturally gluten-free. Just make sure your spices don’t have hidden gluten (rare, but check labels).
Vegan
This recipe is naturally vegan. Use oil instead of butter and skip the cheese if you’re adding it later.
Lower-Calorie
Use less oil (2 tablespoons instead of 3). They’ll be less crispy but still delicious. Spray oil can also help reduce calories.
Serving & Storage
How to Serve:
I serve these straight from the pan. They look rustic and stay warm. But here are other ways I’ve enjoyed them:
Side Dishes:
– Fried eggs (for breakfast)
– Grilled chicken (for dinner)
– Roast beef (for Sunday lunch)
– Salad (cold, as a potato salad alternative)
Toppings Bar:
When I have guests, I put out: sour cream, chives, bacon bits, hot sauce. Everyone customizes their bowl.
Storage Instructions:
Refrigerator:
Store in an airtight container for up to 5 days. They’ll soften in the fridge—totally normal.
Reheating:
Best method: Air fryer at 375°F for 3-5 minutes. They’ll get crispy again.
Microwave method: Heat for 1-2 minutes. They’ll be soft. Not recommended if you want crunch.
Freezing:
Honestly, these don’t freeze well. The texture gets weird. Make them fresh or store in the fridge.
Meal Prep:
Make a big batch on Sunday. Reheat in the air fryer for lunch or dinner during the week. It’s a lifesaver.
Nutrition Information
I’m not a nutritionist, but here’s the breakdown if you’re tracking.
Per Serving (based on 6 servings):
– Calories: 180
– Protein: 3g
– Carbs: 32g
– Fiber: 3g
– Sugar: 2g
– Fat: 6g
– Saturated Fat: 1g
– Cholesterol: 0mg
– Sodium: 350mg
What’s Good:
– Low in fat (if you use moderate oil)
– Good source of carbohydrates for energy
– Contains fiber from the skin
What to Know:
– Sodium can vary based on salt usage
– Calories can increase with added toppings
My Take:
Look, these are potatoes. They’re carbs. But they’re whole foods, not processed fries. They’re way better than takeout. When I want to make them lighter, I use less oil and skip the salty toppings. But usually? I just eat a reasonable portion and enjoy them.
Final Thoughts
So that’s my go-to Crispy Sheet Pan Breakfast Potatoes! I’ve probably talked your ear off at this point, but when you make a recipe this often, you have a lot to say about it.
This has saved weeknight dinners more times than I can count. It’s my answer to “what’s for dinner” when I’m tired, don’t want takeout, and still want something that tastes really good. My kids are happy, my husband’s happy, and I’m happy because I’m not stressed about cooking.
Make it yours! Try different spices, swap in your favorite vegetables, adjust the heat. The best recipes are the ones you adapt to your family’s tastes.
If you make this, drop a comment and let me know what you think! I love hearing how recipes turn out in your kitchen. And if something doesn’t work, tell me that too—I’m here to help troubleshoot.
Happy cooking! And I hope your kitchen smells half as good as mine does right now.
Frequently Asked Questions
Can I use russet potatoes instead of Yukon Gold?
You can, but the texture will be different. Russets are fluffier and more starchy, so they might fall apart more easily. Yukon Golds hold their shape better and have a creamier texture. If you use russets, cut them slightly larger so they don’t disintegrate.
Why are my potatoes soggy?
Usually, this means the pan was too crowded or the potatoes weren’t dry enough. Make sure you pat them dry before oiling, and give them space on the pan. Also, make sure your oven is fully preheated before putting them in.
Can I make these ahead for a dinner party?
Sort of. You can prep the potatoes (cut and season) up to 2 days ahead and store them in the fridge. When you’re ready, just toss them on the pan and roast. They’ll cook in the same amount of time. This is great for saving stress during a party.
Can I use fresh garlic instead of garlic powder?
I don’t recommend it. Fresh garlic burns quickly in the oven and can turn bitter. Garlic powder distributes evenly and roasts nicely. If you really want fresh garlic, add it after roasting, tossed with the hot potatoes.
How do I reheat leftovers without them getting dry?
Use an air fryer! It restores the crispiness perfectly. If you don’t have one, a toaster oven works too. Avoid the microwave if you want crunch. If you must use the microwave, add a splash of water and cover it, but expect soft potatoes.
Can I double this recipe?
Absolutely! Just use two baking sheets or roast in batches. Do not overcrowd the pan. If you double the recipe on one pan, the potatoes will steam instead of roast. Two pans are better than one crowded pan.
Can I freeze these?
Honestly, no. The texture of roasted potatoes changes when frozen and thawed. They become mushy. It’s better to make them fresh or store them in the fridge for up to 5 days.
Pin This Recipe!
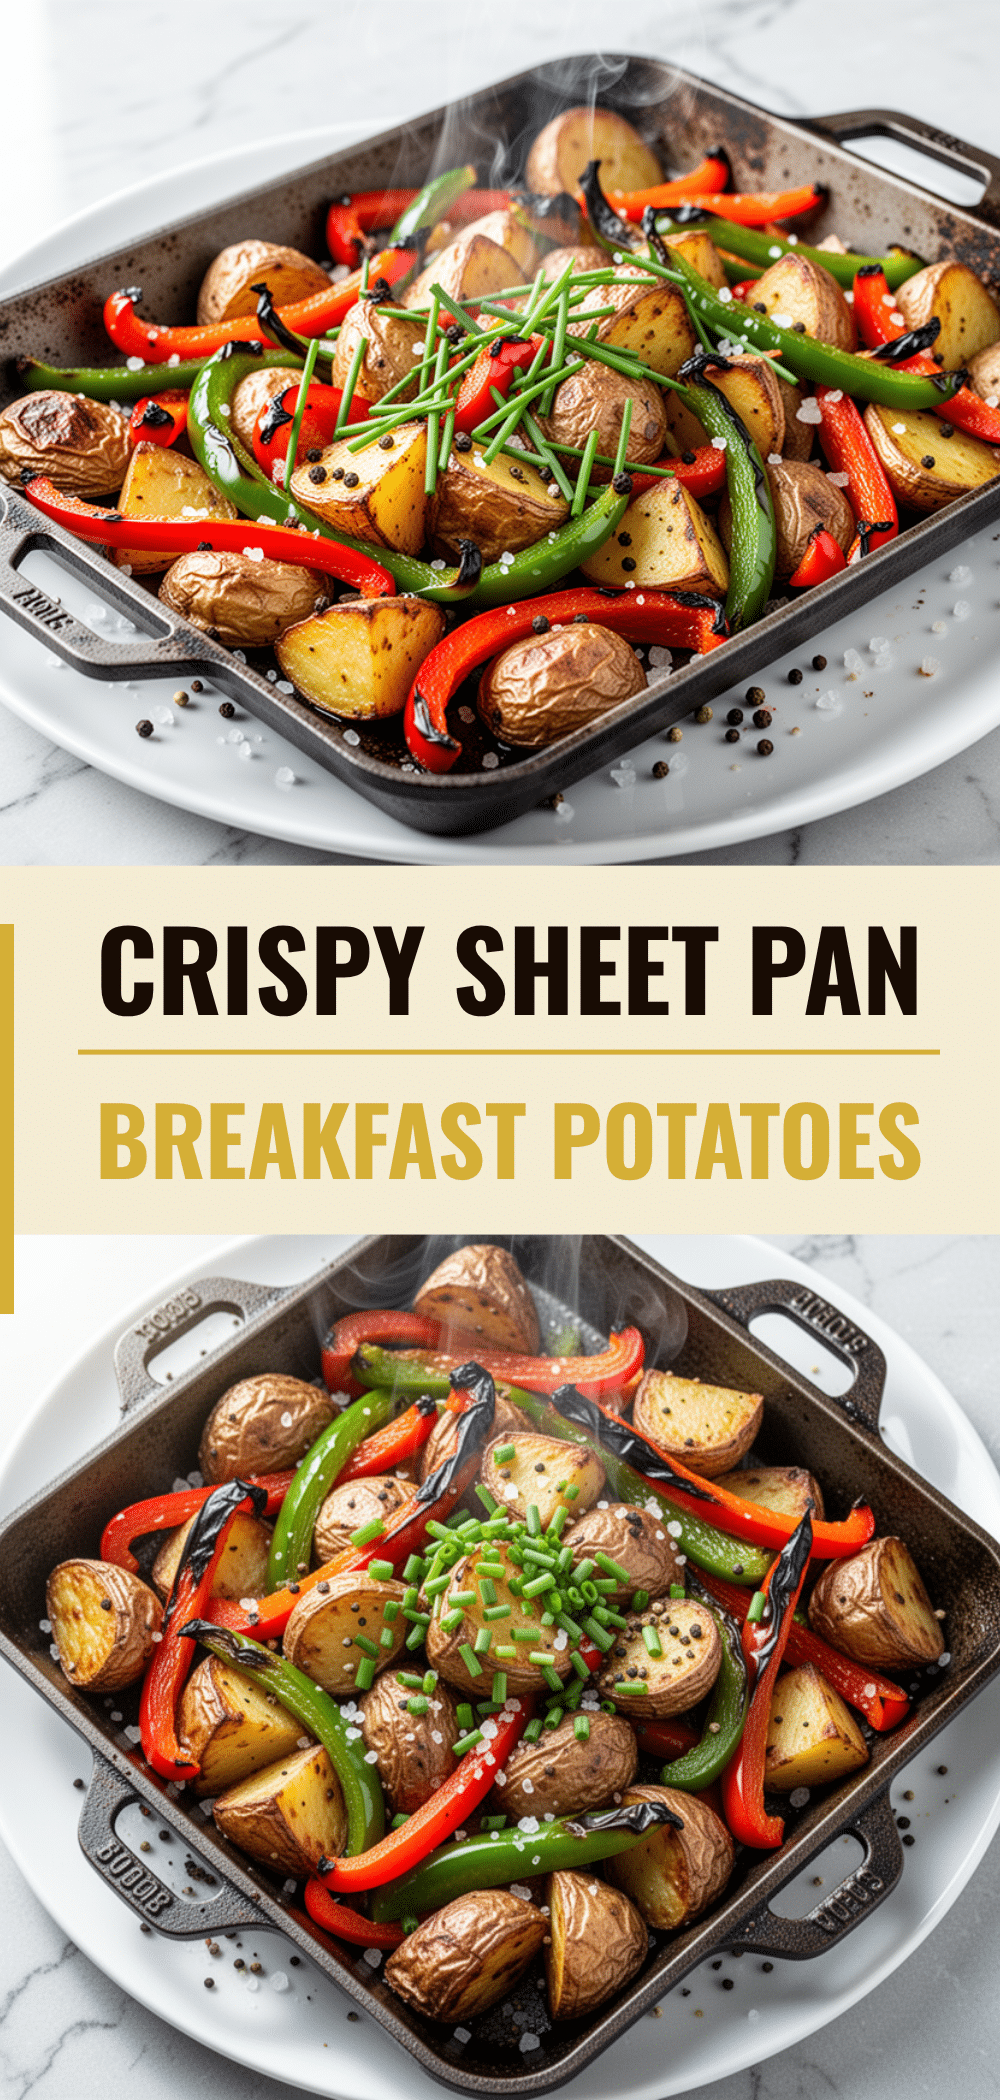
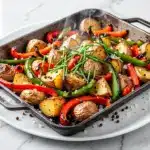
Crispy Sheet Pan Breakfast Potatoes
- Total Time: 45 minutes
- Yield: 4-6 servings 1x
Description
These crispy, golden sheet pan potatoes are the perfect easy side dish for busy weeknights or lazy weekend brunches. Seasoned with smoked paprika and roasted to perfection, they offer a crunchy exterior and fluffy interior with minimal active effort.
Ingredients
- 2 pounds Yukon Gold potatoes (scrubbed and cut into 1-inch cubes)
- 3 tablespoons avocado oil or olive oil
- 1 teaspoon smoked paprika
- 1 teaspoon garlic powder
- 1 teaspoon onion powder
- 1/2 teaspoon cayenne pepper (optional)
- 1 teaspoon kosher salt
- 1/2 teaspoon black pepper
- 2 tablespoons chopped fresh parsley or chives (optional, for garnish)
Instructions
- Preheat oven to 425°F (220°C).
- Wash potatoes thoroughly and pat them completely dry with paper towels to ensure crispiness.
- Cut potatoes into uniform 1-inch cubes.
- Place potato cubes in a large mixing bowl.
- Drizzle with oil and sprinkle with smoked paprika, garlic powder, onion powder, cayenne, salt, and black pepper.
- Toss with hands until every cube is evenly coated in oil and spices.
- Spread potatoes in a single layer on a large rimmed baking sheet. Do not crowd the pan.
- Roast for 20 minutes.
- Remove pan and flip potatoes over to ensure even browning.
- Return to oven and roast for another 15-20 minutes, until golden brown and fork-tender.
- Remove from oven, sprinkle with fresh herbs if using, and serve immediately.
Notes
Ensure potatoes are completely dry before oiling to prevent steaming. Do not crowd the pan; use two pans if necessary for even crisping. Flip halfway through cooking for uniform browning. For extra crunch, sprinkle a little cornstarch before roasting. These do not freeze well.
- Prep Time: 5 minutes
- Cook Time: 40 minutes
- Category: Side Dish
- Cuisine: American
Nutrition
- Serving Size: Approximately 1 cup
- Calories: 180
- Sugar: 2
- Sodium: 350
- Fat: 6
- Saturated Fat: 1
- Carbohydrates: 32
- Fiber: 3
- Protein: 3
Keywords: sheet pan potatoes, crispy potatoes, breakfast potatoes, easy side dish, weeknight dinner, roasted potatoes, gluten-free, vegan