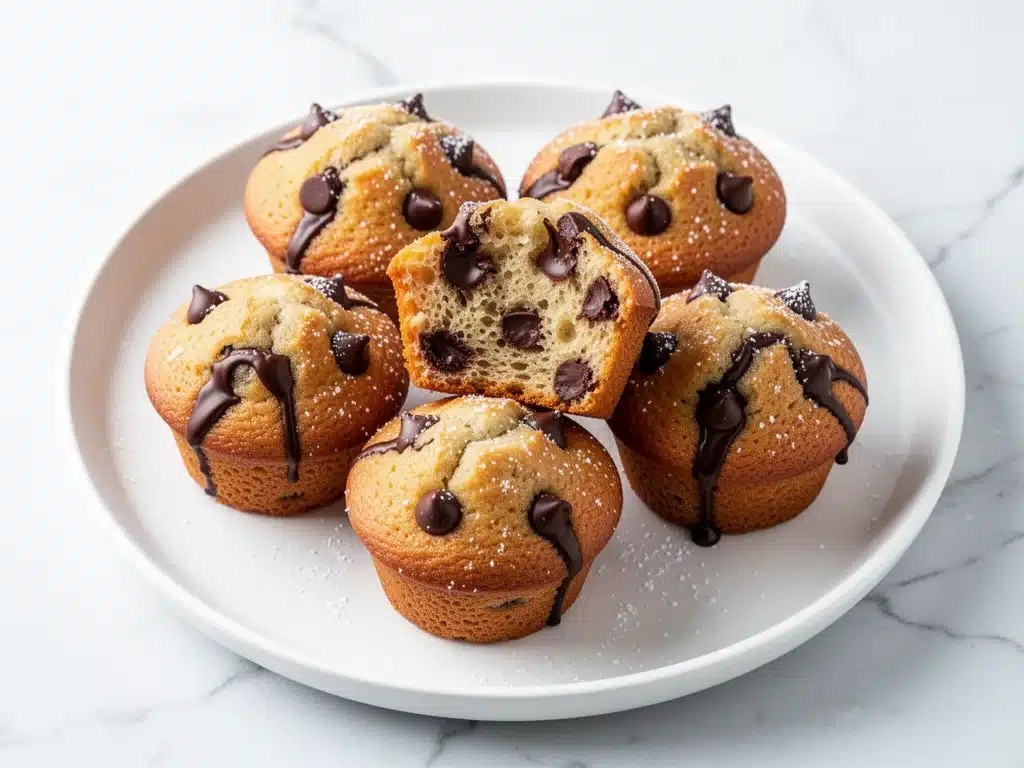
Last Tuesday, I stood in my kitchen at 6:45 AM, holding a Tupperware container that looked suspiciously like it had been through a woodchipper. Inside were what I thought were cute little banana muffins. They were flat. They were dense. And my six-year-old looked at them with the kind of polite disappointment that breaks a parent’s heart. “Can we just have cereal?” he asked. I wanted to cry. And eat cereal.
That was the moment I realized my “healthy” breakfast muffins were failing the back-to-school test. I didn’t need another sad, dry oat-brick. I needed something my kids would actually fight over. Something that tasted like a treat but could survive in a lunchbox until 2 PM without turning into a science experiment. I needed the holy grail of school mornings: the mini banana muffin with chocolate chips that actually stays moist, tastes rich, and doesn’t require me to be a baker to make it.
So, I went back to the drawing board. I tested this mini banana muffin recipe about seven times in two weeks. I adjusted the flour ratios. I played with the chocolate chip-to-banana balance. I even tried using applesauce (big mistake—too soggy). Finally, I nailed it. These aren’t just muffins; they are my family’s new lifeline. They are small enough for little hands, sweet enough to feel like a cheat, and sturdy enough to survive a backpack shake. If you are drowning in the back-to-school chaos, trust me on this one. You will make these on repeat.
Why You’ll Love These Mini Banana Muffins
Look, I know there are a million banana bread recipes out there. But here’s the thing: banana bread is heavy. It’s dense. It’s not exactly a grab-and-go snack for a kid rushing to the bus stop. These mini muffins are different. They are light, fluffy, and packed with flavor in every single bite. Here’s why they’ve taken over our kitchen:
- Zero Waste, Maximum Flavor — We always have overripe bananas sitting on the counter, waiting to be thrown out. This recipe uses three perfectly browned, spotty bananas. It’s the perfect way to use them up before they turn to mush. No more guilt, just deliciousness.
- Perfectly Portable — Because they are mini, they are the ideal size for lunchboxes. They fit in those standard plastic containers without getting crushed. Plus, my kids can eat two or three at a time without feeling like they just ate a whole loaf of bread.
- Stays Moist for Days — I’ve kept these in an airtight container for four days, and they still taste fresh. Unlike regular muffins that dry out by Tuesday, these stay soft because of the banana moisture and the right fat-to-flour ratio.
- Customizable for Picky Eaters — Got a kid who hates chocolate? Skip the chips and add a few walnuts or blueberries. My daughter loves the chocolate, but my son prefers them plain with a sprinkle of cinnamon sugar. The base recipe works for both.
- Meal Prep Friendly — I make a double batch on Sunday evening. It takes about 20 minutes of active time. By Monday morning, breakfast is already boxed and ready to go. This is huge for reducing morning stress.
These mini banana muffins with chocolate chips have saved our mornings. They are my go-to when I’m running late, when I need a healthy-ish snack, or when I just want something warm and comforting to start the day right.
Ingredients You’ll Need
The best part about this mini banana muffin recipe is how simple the ingredients are. You probably have most of them in your kitchen right now. I’m not asking for fancy flours or rare extracts. Just good, simple stuff.
For the Muffin Base
Ripe Bananas (3 medium, about 1 ½ cups mashed) — This is non-negotiable. I mean *really* ripe. Spotty brown peels. The browner the banana, the sweeter the muffin. If yours are still yellow, bake them in the oven at 300°F for 15 minutes until soft. Trust me, it makes a difference.
Butter (¼ cup / 57g, melted) — I use unsalted butter. It gives that rich, bakery-style flavor. You can use oil if you want them less rich, but butter tastes better. Let it cool slightly before mixing so it doesn’t cook the eggs.
Granulated Sugar (½ cup / 100g) — Don’t skip the sugar. Bananas are sweet, but this helps with the browning and the tender crumb. I’ve tried reducing it, and the muffins taste flat. It’s not a huge amount of sugar for the whole batch.
Brown Sugar (¼ cup / 50g, packed) — This adds a hint of molasses flavor and keeps the muffins moist. It’s what gives them that slightly chewy texture on the bottom.
Egg (1 large) — Just one egg. It binds everything together. Room temperature is best, but cold works if you’re in a rush.
Vanilla Extract (1 teaspoon) — Good quality vanilla makes a huge difference. I use pure extract, not the imitation stuff. It adds that warm, cozy aroma.
For the Dry Mix
All-Purpose Flour (1 ½ cups / 190g) — I use all-purpose flour because it gives the right structure. Cake flour makes them too crumbly; bread flour makes them too dense. This is the sweet spot.
Baking Soda (1 teaspoon) — This is what makes them rise. Make sure it’s fresh! If your baking soda is older than six months, it might not work, and you’ll end up with hockey pucks.
Salt (½ teaspoon) — Salt is crucial. It balances the sweetness and enhances the banana flavor. Don’t skip it.
The Star Add-In
Chocolate Chips (½ cup / 85g) — I use semi-sweet chocolate chips. They don’t melt as much as milk chocolate, so you get distinct pockets of chocolate in every bite. Mini chocolate chips work too, but regular ones are easier to find.
Optional: Walnuts or Pecans (¼ cup, chopped) — If your family likes a little crunch, add nuts. I skip them for my kids, but I love them myself.
Equipment Needed
You don’t need fancy gadgets for this. Here’s what I actually use:
- Mini Muffin Pan — This is the most important tool. Get a 24-cup mini muffin tin. I have a non-stick one from Nordic Ware, and it releases these muffins perfectly. If you don’t have one, you can use a regular muffin tin, but the baking time will be longer.
- Mixing Bowls — You’ll need two medium bowls. One for wet ingredients, one for dry. I like glass bowls because I can see the banana mash easily.
- Fork or Potato Masher — For mashing the bananas. A fork is fine, but a masher is faster if you have really soft bananas.
- Whisk — To mix the dry ingredients and combine the wet ones. A simple wire whisk works great.
- Measuring Cups and Spoons — Standard stuff. I measure my flour by spooning it into the cup and leveling it off, not scooping directly from the bag. This prevents dense muffins.
- Cooling Rack — To cool the muffins after baking. This stops them from steaming and getting soggy.
How to Make Mini Banana Muffins with Chocolate Chips
Alright, let’s get baking! I’m going to walk you through exactly how I do it. It’s super simple, and I promise you’ll have these done in no time.
Step 1: Prep Your Bananas
Start by peeling your bananas. If they are super ripe, they should be soft. Mash them in a medium bowl until they are mostly smooth with a few small lumps. You want about 1 ½ cups of mashed banana. Don’t over-mash it into a liquid; you want some texture.
Step 2: Mix the Wet Ingredients
To the mashed bananas, add the melted butter, granulated sugar, brown sugar, egg, and vanilla extract. Whisk everything together until it’s well combined. The mixture will look a bit oily at first—that’s normal. It should be smooth and fragrant.
Step 3: Combine the Dry Ingredients
In a separate bowl, whisk together the flour, baking soda, and salt. Make sure there are no clumps of baking soda. This ensures even rising.
Step 4: Bring It All Together
Pour the dry ingredients into the wet ingredients. Gently fold them together with a spatula or spoon. Stop as soon as the flour disappears. Do not overmix! If you mix too much, the muffins will be tough. It’s okay if there are a few small streaks of flour left.
Step 5: Add the Chocolate Chips
Gently fold in the chocolate chips. Now, here’s a pro tip: if you want chocolate in every bite, don’t stir them all the way in. Just drop them on top and press them in slightly. But for this recipe, folding them in gently is best.
Step 6: Fill the Muffin Pan
Preheat your oven to 350°F (175°C). Line your mini muffin pan with paper liners or grease them lightly with cooking spray. Fill each cup about ¾ full. You don’t want them overflowing, but you want them to rise nicely.
Step 7: Bake
Bake for 12-14 minutes. They are done when the tops are golden brown and a toothpick inserted into the center comes out clean or with just a few moist crumbs. Don’t overbake them, or they’ll be dry. The mini size means they cook fast, so keep an eye on them.
Step 8: Cool and Serve
Let them cool in the pan for 5 minutes, then transfer to a wire rack to cool completely. This prevents them from getting soggy on the bottom. Once cool, you can eat them warm or store them for later.
Expert Tips & Tricks for Perfect Muffins
After making these dozens of times, I’ve learned a few things that make a huge difference. Here’s how to avoid common mistakes:
- Use the Ripest Bananas Possible — I can’t stress this enough. The darker the peel, the sweeter the muffin. If your bananas are greenish-yellow, they won’t be sweet enough, and the muffins will taste bland.
- Don’t Overmix the Batter — This is the #1 reason muffins turn out tough. Mix until just combined. The batter should be lumpy. That’s good.
- Check Your Oven Temperature — Ovens can be inaccurate. I use an oven thermometer to make sure my oven is actually 350°F. If it’s too hot, the tops burn before the inside is cooked.
- Don’t Skip the Cool Down — Letting them cool on a rack is important. If you leave them in the hot pan, steam builds up and makes the bottoms soggy.
- Freeze for Later — These freeze beautifully. I put them in a freezer bag and freeze them for up to 3 months. Just thaw them in the microwave for 30 seconds before eating.
Variations & Substitutions
Once you’ve mastered the basic recipe, here are some fun ways to mix it up:
- Gluten-Free — Use a 1:1 gluten-free flour blend. It works perfectly. I’ve used Bob’s Red Mill and King Arthur, and both give great results.
- Dairy-Free — Swap the butter for coconut oil or a dairy-free butter alternative. The texture will be slightly different, but still delicious.
- Reduced Sugar — You can reduce the sugar to ⅓ cup, but the muffins won’t be as sweet or as moist. I don’t recommend going lower than that.
- Protein-Packed — Add a scoop of vanilla protein powder. You might need to add a splash of milk if the batter gets too thick.
- Fruit Swap — Instead of chocolate chips, try blueberries, raspberries, or diced apples. They add a nice tartness.
Serving & Storage
I usually serve these warm with a little bit of butter on top, but they are also great at room temperature. They make a perfect snack for after school or a breakfast on the go.
Storage: Keep them in an airtight container at room temperature for up to 3 days. They stay moist and fresh. If your kitchen is very hot, store them in the fridge.
Freezing: These freeze incredibly well. Place them in a single layer on a baking sheet to freeze, then transfer to a freezer bag. They last for up to 3 months. Thaw them at room temperature or in the microwave.
Reheating: To get that fresh-baked taste, microwave a muffin for 15-20 seconds. It warms the center and makes the chocolate slightly gooey.
Nutrition Information
I’m not a nutritionist, but here’s the breakdown for one mini muffin (based on 24 muffins):
- Calories: 65
- Protein: 1g
- Carbs: 10g
- Fat: 2.5g
- Sugar: 6g
These are relatively light, especially for a treat. They have some fiber from the bananas and flour, but they are still a sweet snack. Enjoy them in moderation!
Final Thoughts
So, there you have it. My mini banana muffins with chocolate chips. These have been a lifesaver for our family. They are easy to make, delicious to eat, and perfect for busy mornings. I hope they become a staple in your kitchen too. Give them a try and let me know what you think!
Frequently Asked Questions
Can I use frozen bananas?
Yes! Frozen bananas work great. Just thaw them completely and drain any excess liquid before mashing. They tend to be softer, so you might get a slightly denser muffin, but the flavor is still amazing.
Why are my muffins dry?
Overbaking is the most common cause. Check them at 12 minutes. Also, make sure you are using ripe bananas. Underripe bananas have less moisture and sugar, leading to drier muffins.
Can I make these in a regular muffin pan?
Yes, but increase the baking time to 18-22 minutes. The muffins will be larger, so they need more time to cook through. Test with a toothpick to ensure they are done.
How do I store these for school lunches?
Let them cool completely, then place them in an airtight container or zip-top bag. They will stay fresh for 3-4 days. If it’s hot outside, consider adding an ice pack to the lunchbox.
Can I add nuts?
Absolutely. Walnuts or pecans pair beautifully with banana and chocolate. Add ¼ cup of chopped nuts when you add the chocolate chips.
Pin This Recipe!
Mini Banana Muffins: Best Back-to-School Snack
- Total Time: 32-34 minutes
- Yield: 24 servings 1x
Description
Light, fluffy, and moist mini banana muffins with chocolate chips that are perfect for busy mornings and lunchboxes. Easy to make and customizable for picky eaters.
Ingredients
- 3 medium ripe bananas (about 1 ½ cups mashed)
- ¼ cup (57g) unsalted butter, melted
- ½ cup (100g) granulated sugar
- ¼ cup (50g) packed brown sugar
- 1 large egg
- 1 teaspoon vanilla extract
- 1 ½ cups (190g) all-purpose flour
- 1 teaspoon baking soda
- ½ teaspoon salt
- ½ cup (85g) semi-sweet chocolate chips
- ¼ cup chopped walnuts or pecans (optional)
Instructions
- Preheat oven to 350°F (175°C). Line a 24-cup mini muffin pan with paper liners or grease lightly.
- Peel and mash the ripe bananas in a medium bowl until mostly smooth with a few small lumps.
- To the mashed bananas, add the melted butter, granulated sugar, brown sugar, egg, and vanilla extract. Whisk until well combined and smooth.
- In a separate bowl, whisk together the flour, baking soda, and salt to remove clumps.
- Pour the dry ingredients into the wet ingredients. Gently fold together with a spatula until just combined; do not overmix.
- Gently fold in the chocolate chips (and nuts if using).
- Fill each muffin cup about ¾ full with the batter.
- Bake for 12-14 minutes, or until tops are golden brown and a toothpick inserted comes out clean.
- Let muffins cool in the pan for 5 minutes, then transfer to a wire rack to cool completely.
Notes
Use the ripest bananas possible for maximum sweetness and moisture. Do not overmix the batter to avoid tough muffins. These freeze well for up to 3 months. For gluten-free, use a 1:1 gluten-free flour blend. For dairy-free, swap butter for coconut oil.
- Prep Time: 20 minutes
- Cook Time: 12-14 minutes
- Category: Breakfast
- Cuisine: American
Nutrition
- Serving Size: 1 mini muffin
- Calories: 65
- Sugar: 6
- Sodium: 80
- Fat: 2.5
- Saturated Fat: 1.5
- Carbohydrates: 10
- Fiber: 0.5
- Protein: 1
Keywords: mini banana muffins, back-to-school snacks, banana muffins with chocolate chips, easy muffin recipe, kid-friendly breakfast, meal prep snacks



