It was July, the kind of humid July where the air feels like a warm wet towel wrapped around your face. I had just come from the market, sweating through my shirt, clutching a bag of ingredients that felt heavy with expectation. I wanted to bake. I really did. I wanted to preheat the oven, wait for that sweet hum of warmth, and pull out a golden, crack-free cheesecake that looked like it belonged in a magazine.
But then my oven died. Not a gradual decline, not a warning light. Just a sudden, silent death in the middle of preheating. I stood there in my kitchen, staring at the dark display, feeling a very specific kind of panic. It was the weekend. Guests were coming. And I had zero backup plan.
That was the moment I stopped fighting reality and started improvising. I looked at my counter: cream cheese, heavy cream, sugar, and a tiny, expensive-looking vanilla bean I’d been saving for a “special occasion.” Turns out, today was that occasion.
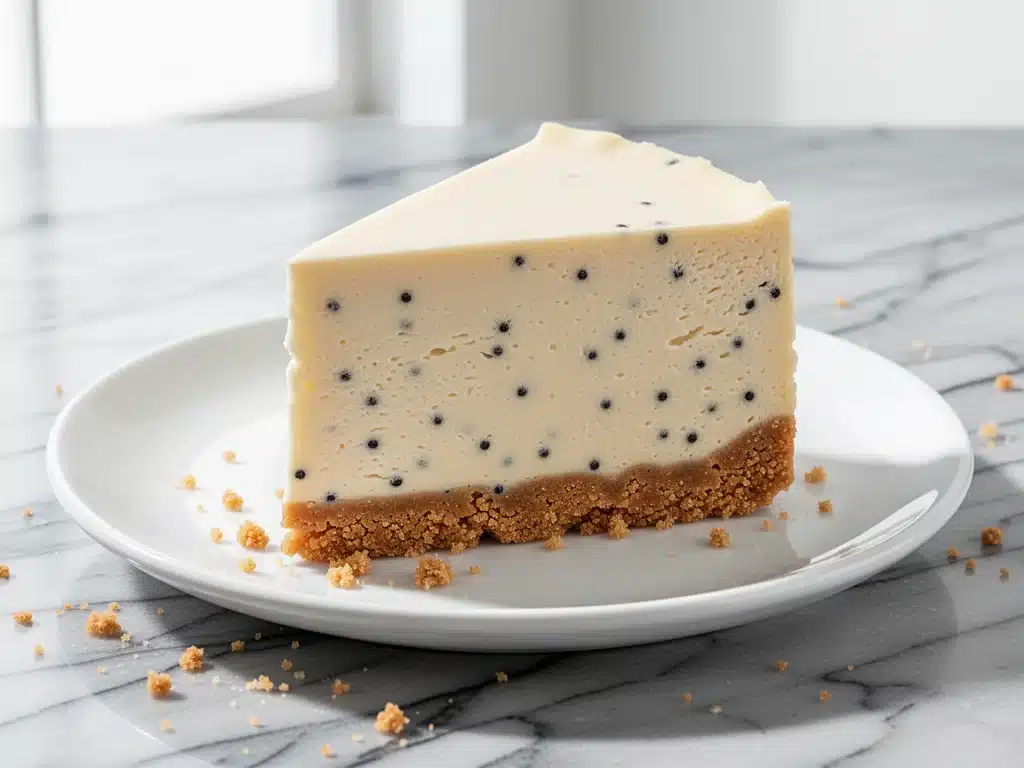
I mixed it all up, pressed a graham cracker crust into a springform pan, and put it in the fridge. No baking. No water baths. No cracking. Just cold, quiet setting time. Three hours later, I took it out. The texture was unlike anything I’d ever made with heat. It wasn’t dense or heavy. It was airy, cloud-like, and impossibly creamy. The vanilla flavor was potent and floral, cutting through the richness in a way that made my husband close his eyes and sigh.
I’ve made this no-bake creamy vanilla bean cheesecake ever since. In fact, I’ve made it so many times that the oven has long been repaired, and I still choose this method. Why? Because sometimes the best desserts aren’t the ones that require the most effort—they’re the ones that require the least stress and deliver the most flavor. This is the recipe I make when I want to impress without the hassle. It’s the dessert I make when it’s too hot to turn on the stove. It’s the one people ask for when they’re looking for something elegant but easy.
If you’ve been intimidated by cheesecake, or if you just want a version that actually stays creamy and never cracks, this is your new go-to. I’m going to walk you through exactly how I make it, including the tricks I’ve learned along the way to get that perfect, restaurant-quality texture.
Why You’ll Love This No-Bake Creamy Vanilla Bean Cheesecake
There are about ten reasons I keep coming back to this recipe, but here are the big ones. This isn’t just a quick fix; it’s genuinely better than many baked versions I’ve tried.
Zero Cracking Allowed — Baked cheesecakes crack. It’s just physics. The heat causes uneven expansion, and boom, you have a fissure right down the middle. With this no-bake creamy vanilla bean cheesecake, there’s no heat, so there’s no cracking. The top stays smooth and pristine, ready for a simple dusting of powdered sugar or a few fresh berries.
Texture That Melts on Your Tongue — Baked cheesecake can be dense, almost like a pudding that holds its shape. This version is lighter. Because we whip the cream into the mixture, it’s airy and mousse-like. It doesn’t sit heavy in your stomach; it just vanishes. My kids call it “cloud cake,” and honestly, that’s the highest compliment.
Make-Ahead Magic — This is the ultimate stress-buster. I can make this three days before a dinner party. It needs to chill, so it actually benefits from being made ahead. The flavors meld and deepen in the fridge, making it taste even better on day two. I love that I can focus on my guests instead of stressing over a dessert that’s currently baking.
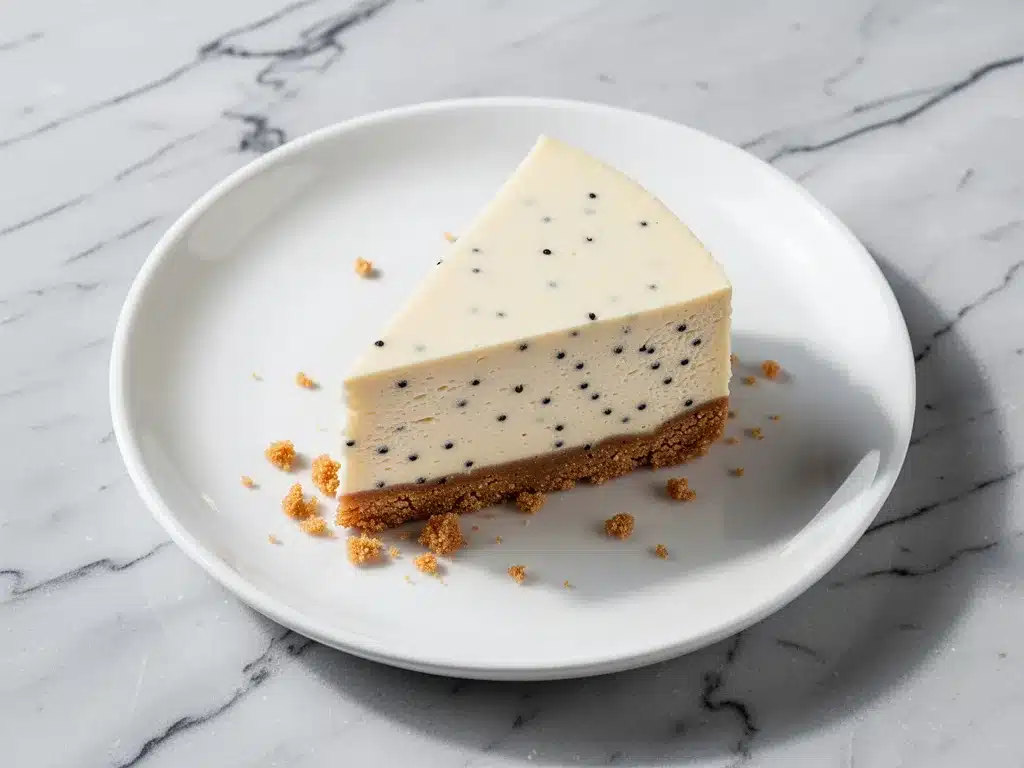
Real Vanilla Flavor — Most cheap cheesecakes taste like vanilla extract and sugar. By using a real vanilla bean, you get those tiny black specks (which look gorgeous) and a complex, floral aroma that extract just can’t match. It transforms the dessert from “sweet” to “sophisticated.”
Simple Ingredients — You don’t need fancy gadgets or hard-to-find items. Cream cheese, sugar, heavy cream, vanilla, and graham crackers. If you can find these at any grocery store, you can make this. No weird stabilizers or gelatin packets required.
This is my go-to when I need a dessert that feels special but doesn’t require a degree in pastry arts. It’s reliable, delicious, and always a crowd-pleaser.
Ingredients You’ll Need for the Perfect No-Bake Cheesecake
Here’s the best part: you probably have most of this already in your fridge or pantry. I’m particular about three ingredients here, and I’ll tell you exactly why they matter.
For the Crust
Graham crackers (1 ½ cups / 150g, crushed) — I use original honey graham crackers. They have that perfect balance of sweetness and cinnamon. You can crush them in a food processor or put them in a ziplock bag and smash them with a rolling pin. Don’t use chocolate graham crackers unless you want a chocolate cheesecake—stick to the classic for this recipe.
Unsalted butter (6 tablespoons / 85g, melted) — This binds the crust. Use good quality butter. If you’re using salted butter, reduce the added salt in the crust by half. Melt it completely so it mixes evenly with the crumbs.
Granulated sugar (2 tablespoons / 25g) — Just a little bit to sweeten the crust. Since the filling is sweet, we don’t want the crust to be too sugary. It should taste like a shortbread cookie.
Salt (¼ teaspoon) — This is crucial. It balances the sweetness and enhances the buttery flavor. Don’t skip it.
For the Filling
Full-fat cream cheese (32 ounces / 900g, softened) — This is the star. I use Philadelphia or a high-quality store brand. It MUST be softened to room temperature. If it’s cold, you’ll get lumps, and no amount of beating will fix it. I take it out of the fridge two hours before I start. If I forget, I microwave it in 10-second bursts, checking frequently.
Heavy whipping cream (2 cups / 480ml, cold) — This is what makes it light. Don’t use half-and-half or milk. You need the high fat content to whip up stiff peaks. If your cream is warm, it won’t whip. Keep it in the fridge until the moment you’re ready to use it.
Granulated sugar (½ cup / 100g) — This sweetens the filling. I’ve tried reducing it, but it affects the texture and stability. Stick to the amount.
Vanilla bean (1 whole bean, or 2 teaspoons high-quality paste) — This is the upgrade. Split the bean lengthwise, scrape out the seeds with the back of your knife, and add both the seeds and the pod to the mixture. The pod infuses flavor as it chills. If you don’t have a bean, use 2 teaspoons of pure vanilla bean paste. Avoid clear vanilla extract if you can help it—it lacks the depth.
Confectioners’ sugar (¼ cup / 30g) — This adds a bit of extra sweetness and helps stabilize the cream slightly. It also dissolves easier than granulated sugar in a cold mixture.
Lemon juice (1 tablespoon) — Just a splash. It cuts the richness and brightens the vanilla flavor. You won’t taste it as “lemon,” but it makes the whole dessert taste fresher.
Optional Toppings
Fresh berries (strawberries, raspberries, or blueberries) — The acidity of berries pairs perfectly with the creamy sweetness. I love a mixed berry topping.
Whipped cream rosettes — For extra elegance, pipe some whipped cream on top. It makes the presentation look professional.
Equipment Needed
You don’t need fancy equipment for this. Here’s what I actually use.
9-inch Springform pan — This is essential. It allows you to remove the cake without digging it out. Make sure the bottom fits tightly to prevent leaks, though leaks are rare in no-bake versions.
Stand mixer or hand mixer — You’ll be whipping cream and beating cream cheese. A stand mixer is easiest, but a hand mixer works fine. You need power to get those stiff peaks.
Large mixing bowls — You’ll need one for the cream cheese mixture and one for the whipped cream. Make sure they’re clean and dry.
Food processor or ziplock bag — For crushing the graham crackers. A food processor gives you the most uniform crumbs, which makes a nicer crust. If you don’t have one, a rolling pin and a bag work great.
Spatula — A flexible silicone spatula is best for folding the whipped cream into the cheese mixture without deflating it.
Knife — To split the vanilla bean and scrape the seeds.
Refrigerator space — Obviously, you need room for the pan to chill for at least 4 hours, preferably overnight.
How to Make It: Step-by-Step
Alright, let’s make this! I’m walking you through exactly how I do it, including the little tricks I’ve picked up to ensure that silky-smooth texture.
Step 1: Prep Your Pan and Crust (10 minutes)
Start by preparing your springform pan. Lightly grease the sides with butter or cooking spray. This helps the cheesecake release easily later. Now, make the crust. If using a food processor, pulse the graham crackers until they’re fine crumbs. If using a bag, crush them until they’re the size of sand. Transfer the crumbs to a bowl and mix in the melted butter, sugar, and salt. Press this mixture firmly into the bottom of the springform pan. Use the bottom of a measuring cup to pack it down tight. You want a solid base. Place the pan in the fridge while you make the filling. This helps the crust set quickly.
Step 2: Prepare the Vanilla Bean (2 minutes)
Take your vanilla bean out. Lay it flat on a cutting board. Using a small sharp knife, slice it lengthwise down the center. Open it up like a book. You’ll see tiny black seeds inside. Use the back of your knife to scrape those seeds out. You’ll have a small pile of black specks and a clean pod. Set the seeds aside. We’ll add both the seeds and the pod to the filling.
Step 3: Beat the Cream Cheese (3-4 minutes)
In a large bowl, add the softened cream cheese, granulated sugar, confectioners’ sugar, lemon juice, and the scraped vanilla seeds. Beat on medium-high speed with your mixer. You want this to be completely smooth and creamy. Scrape down the sides of the bowl and the beaters. If there are any lumps, keep beating. This step is crucial for a smooth texture. It should look like thick, fluffy frosting. This takes about 3-4 minutes. Don’t rush it.
Step 4: Whip the Heavy Cream (3 minutes)
In a separate large, cold bowl, pour the cold heavy whipping cream. Beat on high speed until stiff peaks form. This means when you lift the beaters, the cream stands up straight and doesn’t droop. Be careful not to over-whip it into butter. It should be glossy and firm. This usually takes 2-3 minutes depending on your mixer.
Step 5: Fold It All Together (3-4 minutes)
This is the most important step. You’re going to combine the whipped cream with the cream cheese mixture. Add about one-third of the whipped cream to the cream cheese bowl and beat it gently to lighten the mixture. Then, add the rest of the whipped cream. Switch to your spatula. Gently fold the cream into the cheese mixture. Use a cutting motion: go down the side, across the bottom, and up the other side. Rotate the bowl. Do this until just combined. You want to keep as much air in the mixture as possible. Over-mixing here will deflate the cheesecake and make it dense. It should look light and airy.
Step 6: Assemble and Chill (4+ hours)
Pour the filling into the prepared crust. Smooth the top with your spatula. Scrape the vanilla bean pod out of the mixture (or leave it in if you want extra flavor, but it’s tricky to eat) and discard it. Cover the pan loosely with plastic wrap or foil. Place it in the refrigerator for at least 4 hours, but ideally overnight. This long chill time is what allows the cheesecake to set firmly and the flavors to meld. Patience is key here.
Step 7: Serve
Once chilled, remove the pan from the fridge. Run a thin knife around the edge to loosen it, then release the springform ring. Transfer to a serving plate if desired. Top with fresh berries, a dusting of powdered sugar, or whipped cream. Slice with a warm knife for clean cuts. Serve and enjoy.
Expert Tips & Tricks
Here’s everything I’ve learned from making this dozens of times. These tips will save you from my mistakes.
Room Temperature Cream Cheese is Non-Negotiable
I cannot stress this enough. Cold cream cheese creates lumps. If you try to beat cold cream cheese, you’ll end up with a grainy texture that no amount of folding can fix. Plan ahead. Take it out of the fridge in the morning if you’re making it in the evening. Cut it into cubes to help it soften faster.
Cold Bowl, Cold Cream
For the whipped cream, make sure your bowl and beaters are cold. If you’re in a hurry, put them in the freezer for 15 minutes. Warm cream won’t whip up properly. It stays liquid and you’ll end up with a runny cheesecake.
Don’t Over-Fold
When combining the cream cheese and whipped cream, be gentle. You’re trying to maintain the air bubbles you worked so hard to create. If you stir too vigorously, you’ll deflate the mixture, and the cheesecake will be heavy and dense instead of light and airy.
Use a Warm Knife for Slicing
Cheesecake can be sticky. For clean slices, dip your knife in hot water, wipe it dry, and then cut. Wipe and reheat between each slice. This gives you those perfect, professional-looking wedges.
The Vanilla Pod Trick
Don’t throw away the vanilla pod after scraping it. Add the whole pod to the filling while it chills. It continues to infuse flavor. Remove it before serving. It’s a great way to get maximum flavor from a single bean.
Variations & Substitutions
Once you’ve nailed the basic version, here’s how you can mix it up. I’ve tried all of these.
Berry Swirl
Make a quick berry compote by simmering 1 cup of berries with 1 tablespoon of sugar until thickened. Let it cool, then swirl it into the filling before chilling. It looks beautiful and adds a tart contrast.
Chocolate Version
Add ¼ cup of melted, cooled chocolate to the cream cheese mixture before folding in the whipped cream. Use chocolate graham crackers for the crust. It’s like a mousse cake.
Coconut Cream
For a dairy-free option, use full-fat coconut cream instead of heavy cream, and coconut cream cheese if you can find it. It has a distinct coconut flavor that pairs well with vanilla. Note: It won’t be as fluffy as dairy version, but it’s still delicious.
Gluten-Free
Use gluten-free graham crackers or almond flour for the crust. Check your vanilla bean paste to ensure it’s gluten-free. The filling is naturally gluten-free.
Lower Sugar
You can reduce the sugar in the filling by 25% without affecting texture. Use a sugar substitute like erythritol if needed, but note that it may affect the final texture slightly. I prefer to keep the sugar for the best mouthfeel.
Serving & Storage
How to Serve:
I usually serve this straight from the springform pan. It looks rustic and elegant. But here are other ways I’ve enjoyed it:
Side Dishes:
- Fresh berries (strawberries, raspberries, blueberries)
- Chocolate sauce drizzle
- Caramel sauce
- Crushed nuts ( pistachios or almonds) for crunch
Storage Instructions:
Refrigerator: Store in an airtight container or covered with plastic wrap for up to 5 days. It actually tastes better on day 2 and 3 as the flavors meld.
Freezing: This cheesecake can be frozen! Wrap the whole pan (or individual slices) tightly in plastic wrap and then foil. Freeze for up to 2 months. Thaw overnight in the fridge. Note: The texture may be slightly softer after thawing, but it’s still delicious.
Reheating: Do not reheat. Serve cold or at room temperature. Heating will melt the structure.
Nutrition Information
I’m not a nutritionist, but here’s the breakdown if you’re tracking. This is a rich dessert, so portion control is key.
Per Serving (based on 12 slices):
- Calories: 380
- Protein: 6g
- Carbs: 32g
- Fiber: 1g
- Sugar: 24g
- Fat: 24g
- Saturated Fat: 14g
- Cholesterol: 75mg
- Sodium: 220mg
What’s Good:
- High in calcium from the cream cheese
- Good source of fat for satiety
What to Know:
- High in sugar and saturated fat
- Contains dairy and gluten
My Take:
Look, this is a decadent dessert. It’s not a health food. But it’s better than store-bought options which often have preservatives and weird additives. When I make this, I enjoy a small slice with fresh fruit to balance it out. It’s worth the indulgence.
Final Thoughts
So that’s my go-to no-bake creamy vanilla bean cheesecake! I’ve probably talked your ear off at this point, but when you make a recipe this often, you have a lot to say about it.
This has saved me more times than I can count. It’s my answer to “what’s for dessert” when I’m tired, don’t want to bake, and still want something that tastes really good. My family is happy, my guests are impressed, and I’m happy because I’m not stressed about cooking.
Make it yours! Try different toppings, swap in your favorite berries, or add a hint of liqueur like amaretto. The best recipes are the ones you adapt to your family’s tastes.
If you make this, drop a comment and let me know what you think! I love hearing how recipes turn out in your kitchen. And if something doesn’t work, tell me that too—I’m here to help troubleshoot.
Happy cooking! And I hope your kitchen smells half as good as mine does right now.
Frequently Asked Questions
Q: Can I use vanilla extract instead of a vanilla bean?
A: Yes, you can. Use 2 teaspoons of high-quality pure vanilla extract. The texture will be the same, but you won’t get those pretty black specks. The flavor will also be slightly less complex, but still very good. If you use extract, skip the vanilla pod step.
Q: Why is my cheesecake runny?
A: This usually happens if the cream cheese wasn’t fully softened before mixing, or if the whipped cream was under-whipped. Make sure your cream cheese is smooth and your whipped cream holds stiff peaks. Also, ensure it chills for at least 4 hours. If it’s still soft after 4 hours, give it another 2 hours.
Q: Can I make this in a different size pan?
A: Yes, but the cooking/chilling time will change. If you use a 10-inch pan, the cheesecake will be thinner and may not set as firmly. If you use an 8-inch pan, it will be thicker. Adjust the chilling time accordingly—check for firmness before serving.
Q: How do I prevent the crust from getting soggy?
A: Press the crust firmly into the pan. This creates a barrier. Also, make sure the filling isn’t too wet. If you add fresh fruit on top, add it just before serving, not before chilling. The moisture from the fruit can soften the crust over time.
Q: Can I freeze this cheesecake?
A: Yes! Wrap it tightly in plastic wrap and then foil. Freeze for up to 2 months. Thaw overnight in the fridge. The texture may be slightly softer, but it’s still delicious. Do not freeze with toppings on it.
Q: Is this recipe suitable for vegetarians?
A: Yes, this recipe is vegetarian. It contains no gelatin or animal products other than dairy. It is not vegan unless you substitute the dairy ingredients.
Q: Can I use a different type of crust?
A: Absolutely. You can use digestive biscuits, Oreos (remove the cream filling for a chocolate crust), or almond flour for a gluten-free option. Just adjust the sugar content based on the sweetness of the crust ingredients.
Pin This Recipe!
No-Bake Creamy Vanilla Bean Cheesecake
- Total Time: 4 hours 20 minutes
- Yield: 12 servings 1x
Description
An airy, cloud-like no-bake cheesecake featuring real vanilla bean and a graham cracker crust. This recipe requires no oven, ensuring a smooth, crack-free texture that is perfect for make-ahead entertaining.
Ingredients
- 1 ½ cups (150g) original honey graham crackers, crushed
- 6 tablespoons (85g) unsalted butter, melted
- 2 tablespoons (25g) granulated sugar
- ¼ teaspoon salt
- 32 ounces (900g) full-fat cream cheese, softened to room temperature
- ½ cup (100g) granulated sugar
- ¼ cup (30g) confectioners’ sugar
- 1 tablespoon lemon juice
- 1 whole vanilla bean (seeds scraped, pod reserved) OR 2 teaspoons vanilla bean paste
- 2 cups (480ml) heavy whipping cream, cold
Instructions
- Grease the sides of a 9-inch springform pan with butter or cooking spray.
- Crush graham crackers into fine crumbs using a food processor or a ziplock bag with a rolling pin.
- In a bowl, mix crushed graham crackers, melted butter, 2 tablespoons granulated sugar, and salt.
- Press the crust mixture firmly into the bottom of the springform pan using the bottom of a measuring cup.
- Place the pan in the refrigerator to set while preparing the filling.
- Slice the vanilla bean lengthwise and scrape out the seeds with the back of a knife.
- In a large bowl, beat the softened cream cheese, ½ cup granulated sugar, confectioners’ sugar, lemon juice, and vanilla seeds on medium-high speed until completely smooth and creamy (3-4 minutes).
- In a separate cold large bowl, whip the cold heavy cream on high speed until stiff peaks form (2-3 minutes).
- Add one-third of the whipped cream to the cream cheese mixture and beat gently to lighten.
- Add the remaining whipped cream and gently fold it in with a spatula using a cutting motion until just combined. Do not over-mix.
- Pour the filling into the prepared crust and smooth the top.
- Remove the vanilla bean pod from the filling (or leave it in for extra flavor during chilling) and discard.
- Cover the pan with plastic wrap or foil and refrigerate for at least 4 hours, preferably overnight.
- To serve, run a thin knife around the edge to loosen, release the springform ring, and slice with a warm knife.
- Top with fresh berries, powdered sugar, or whipped cream before serving.
Notes
Ensure cream cheese is fully softened to room temperature to avoid lumps. Keep the bowl and beaters cold when whipping cream for best results. Do not over-fold the whipped cream into the cheese mixture to maintain airiness. For clean slices, dip a knife in hot water and wipe dry between cuts. The vanilla pod can be added to the filling while chilling for extra flavor, then removed before serving.
- Prep Time: 20 minutes
- Cook Time: 0 minutes
- Category: Dessert
- Cuisine: American
Nutrition
- Serving Size: 1 slice
- Calories: 380
- Sugar: 24
- Sodium: 220
- Fat: 24
- Saturated Fat: 14
- Carbohydrates: 32
- Fiber: 1
- Protein: 6
Keywords: no-bake cheesecake, vanilla bean cheesecake, easy dessert, make-ahead dessert, creamy cheesecake, summer dessert



