It was 11 PM on a Tuesday. The house was finally quiet, the kids were asleep, and I was standing in my kitchen staring into the pantry like it held the secrets to the universe. Spoiler alert: it didn’t. It held a half-empty bag of pretzels, a dusty jar of peanuts, and a chocolate bar that had been buried in the back for three weeks.
I was hungry. Not “I need a snack” hungry, but “I will eat the drywall if it’s edible” hungry. I threw those three things into a bowl, tossed in a handful of random cereal bits I found in a box, and microwaved it for thirty seconds. I expected a melted mess. Instead, I got this.
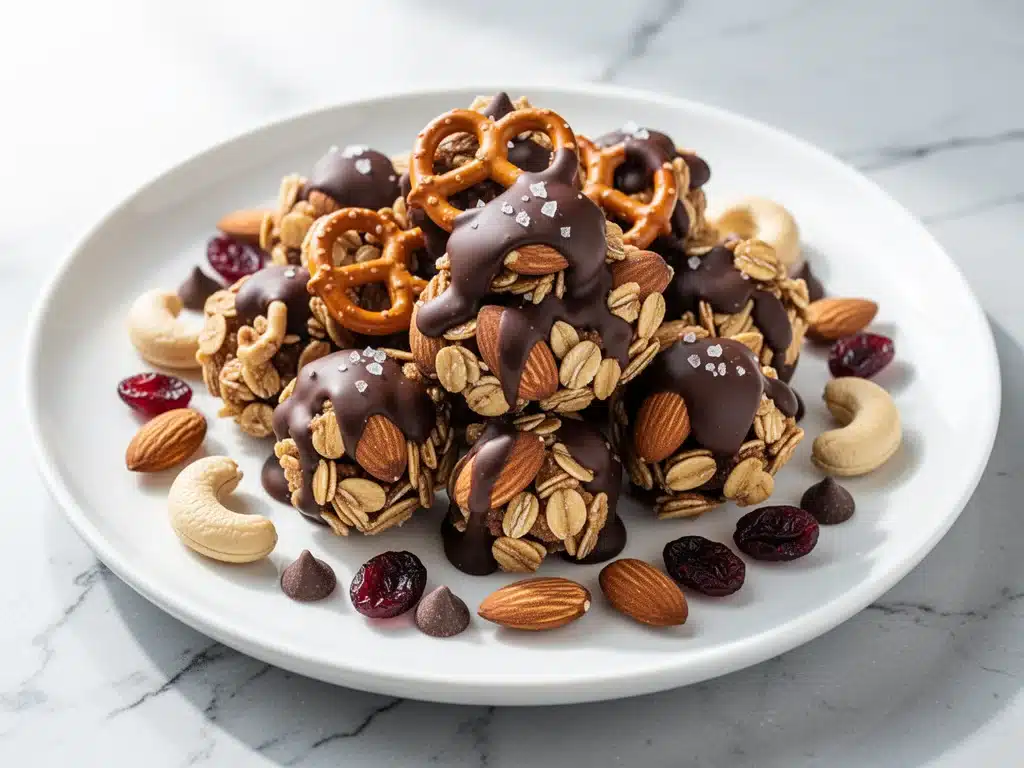
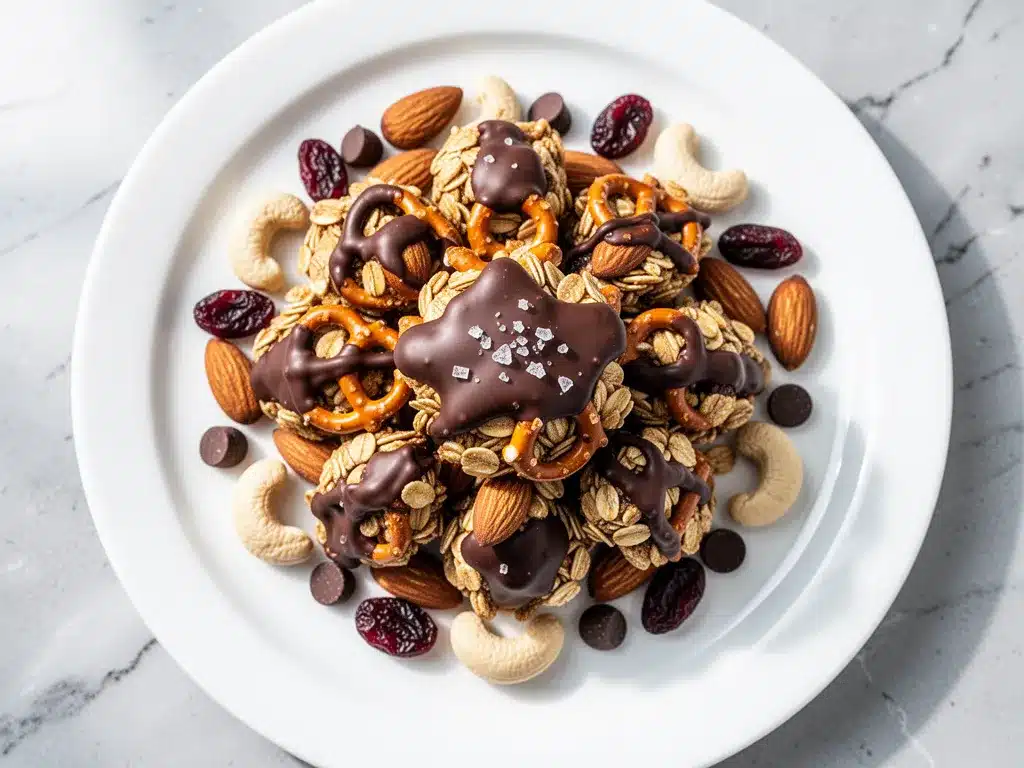
These sweet and salty trail mix clusters weren’t supposed to be a recipe. They were supposed to be a late-night mistake. But when I pulled that bowl out, the chocolate had melted just enough to bind everything together, creating crunchy, gooey, addictive little clusters that stuck to my fingers and made me happy. I ate one. Then another. Then I stopped myself from eating the whole batch because I knew if I didn’t, I’d be awake until 3 AM.
Since that night, I’ve made these sweet and salty trail mix clusters probably fifty times. I’ve tweaked the ratios, swapped the nuts, and even tried adding bacon (don’t ask). But the core magic remains the same: three simple ingredients, one bowl, and zero stress. It’s the ultimate no-bake snack for when you need comfort, crunch, and a little sugar rush without turning on the oven.
If you’ve ever felt stuck in a snack rut—tired of plain chips or too guilty for a full dessert—this is your answer. It’s basically chewy oatmeal raisin cookies but in cluster form, minus the flour and the fuss. Let’s get into how to make these lifesavers.
Why You’ll Love This Recipe
I know what you’re thinking. “Trail mix? In a cluster form? Really?” Yes, really. Here’s why these sweet and salty trail mix clusters have taken over my kitchen (and my grocery list):
- Three Ingredients Max — Seriously. If you can count to three, you can make this. No fancy pantry items, no trip to the store for exotic spices. Just stuff you probably already have.
- Five Minutes Active Time — I’m not kidding. The microwave does the work. You just stir, microwave, stir again, and let it cool. That’s it. It’s faster than ordering takeout.
- Perfectly Balanced — The salt from the pretzels and nuts cuts the sweetness of the chocolate perfectly. It’s that “I can’t stop eating this” flavor profile that keeps you coming back.
- Meal Prep Friendly — I make a big batch on Sunday, put them in an airtight container, and they last all week. They’re my go-to for after-school snacks, hiking trails, or late-night TV binges.
- Customizable — Hate peanuts? Use almonds. Love raisins? Add them. These clusters are a blank canvas for your taste buds. I even add a splash of vanilla sometimes (shh, don’t tell the purists).
Real talk? These clusters saved me during a particularly chaotic week last month. I had no time to bake, no energy to cook, but I still wanted something homemade and tasty. These clusters were the hero. If you’re looking for a snack that feels indulgent but doesn’t require a standing ovation to make, this is it.
Ingredients You’ll Need
Here’s the best part: you probably have most of this already. I’m being specific because the quality of your chocolate matters more than you think, but the rest is pretty flexible.
For the Base:
Mini chocolate chips (1 cup / 170g) — I use semi-sweet, but dark chocolate works if you want less sweetness. Mini chips melt faster and more evenly than regular chips. This is non-negotiable for the texture.
Pretzels (1 cup / 80g, broken) — Use mini pretzels or break standard pretzel rods into small pieces. They provide the crunch and the salt. Pretzel twists work too, but they’re chunkier. I like the uniform bite of small pieces.
Roasted peanuts (1 cup / 140g) — Unsalted or lightly salted. I prefer roasted for that extra nutty flavor. Cashews work too if you’re allergic or just prefer them. Almonds are great but they’re bigger, so chop them up.
For the Flavor (Optional but Recommended):
Vanilla extract (1 teaspoon) — Just a splash. It rounds out the chocolate flavor and makes it taste more “bakery-like.” I always keep this in.
Flaky sea salt (pinch) — Sprinkle on top after they cool. It elevates the whole thing from “snack” to “gourmet.” Maldon salt is my favorite, but any flaky salt works.
Butter (1 tablespoon) — Optional. I add this if I want the clusters to be extra glossy and rich. It helps bind everything if your chocolate is a bit thick.
Substitutions & Tips:
- No mini chips? Regular chips work, but chop them up first so they melt evenly. You might need to microwave a few seconds longer.
- Peanut allergy? Use sunflower seeds or pumpkin seeds (pepitas). They add a nice crunch and keep it seed-based.
- Want more sweetness? Add a handful of M&Ms or chocolate-covered raisins. But be careful—it can get too sweet fast.
- Gluten-free? Just use GF pretzels. Everything else is naturally gluten-free. I’ve used Simple Mills pretzels and they work great.
Equipment Needed
You don’t need fancy gadgets for this. Here’s what I actually use:
Microwave-safe bowl — Large enough to hold all ingredients. I use a 4-cup glass bowl. It needs to be big enough so the mixture doesn’t bubble over when it melts.
Silicone spatula — For stirring. Heat-resistant ones are best. I have a battered one from Target that’s seen better days, but it works perfectly.
Parchment paper — To line a plate or baking sheet. This prevents sticking and makes cleanup a breeze. I don’t even bother with a fancy mat; a sheet of parchment is all I need.
Measuring cups — Standard stuff. I eyeball it sometimes, but for consistency, measuring is better.
Knife (optional) — If you’re using pretzel rods or large nuts, a knife helps break them into smaller pieces.
Ziplock bag (optional) — If you don’t have small pretzels, put the rods in a bag and crush them with a rolling pin. It’s therapeutic and effective.
How to Make It: Step-by-Step
Alright, let’s make these sweet and salty trail mix clusters! I’m walking you through exactly how I do it, including the little tricks I’ve picked up over dozens of batches.
Step 1: Prep Your Ingredients (2 minutes)
Break your pretzels into bite-sized pieces if they’re not already mini. Measure out your peanuts and chocolate chips. Have your spatula and parchment-lined plate ready. I know it seems like extra work, but it makes the actual melting process way less stressful. You don’t want to be chopping while your chocolate is melting.
Step 2: Melt the Chocolate (1-2 minutes)
Place the chocolate chips in your microwave-safe bowl. If you’re adding butter, add it now. Microwave on high for 30 seconds. Remove and stir. If it’s not fully melted, microwave in 15-second intervals, stirring after each. Crucial tip: Do not overheat! Chocolate burns easily. You want it smooth and glossy, not grainy or separated. If it looks clumpy, keep stirring—it will come together.
Step 3: Add the Mix-Ins (1 minute)
Once the chocolate is smooth, stir in the vanilla extract (if using). Add the pretzels and peanuts. Stir gently but thoroughly. You want every piece coated in chocolate. It’ll look messy at first, but keep going. The mixture should be thick and chunky. If it’s too dry, add a tiny bit more melted chocolate. If it’s too wet, add a few more pretzels.
Step 4: Form the Clusters (2 minutes)
Drop spoonfuls of the mixture onto your parchment-lined plate. Don’t make them too small—they’ll shrink a bit as they cool. I use a tablespoon measure for consistency. Space them out; they’ll stick together if you’re too close. You should get about 8-10 clusters from this batch.
Step 5: Chill and Set (15-20 minutes)
Place the plate in the refrigerator. This is the hardest part—waiting. The chocolate needs to harden. If you’re impatient (like me), you can put them in the freezer for 10 minutes. But the fridge gives a more even set. Once they’re firm to the touch, they’re ready.
Step 6: Finish with Salt (1 minute)
Before they’re fully set, sprinkle a tiny pinch of flaky sea salt on top. It adds that gourmet touch and balances the sweetness. If you missed this step, don’t worry—you can sprinkle it after, but it won’t stick as well.
Total Time: About 5 minutes active, plus 15-20 minutes chilling.
Troubleshooting:
- Chocolate seized? It got too hot or water got in it. Add a teaspoon of warm water or cream and stir vigorously to save it.
- Clusters too soft? They didn’t chill long enough. Put them back in the fridge for 5 more minutes.
- Too sweet? Next time, use dark chocolate or reduce the chocolate amount by ¼ cup.
Expert Tips & Tricks
Here’s everything I’ve learned from making these dozens of times. These tips will save you from my mistakes.
Don’t Skip the Stir
Chocolate melts unevenly. Even if it looks melted, stir it. That redistributes the heat and ensures a smooth finish. I’ve had grainy clusters because I was lazy and didn’t stir. Don’t be lazy.
Use High-Quality Chocolate
I know it’s a snack, but cheap chocolate chips have wax and don’t melt well. Guittard or Ghirardelli work great. It’s worth the extra dollar for the taste difference. My kids can tell when I use the cheap stuff.
Keep Pieces Small
Bite-sized pretzels and nuts are key. If you have huge chunks, the cluster will be unbalanced—one bite is all pretzel, the next is all chocolate. Uniformity = better texture.
Chill, Don’t Freeze (Unless You’re Rushed)
The fridge sets the chocolate more evenly. Freezing can cause condensation when you take them out, making them sticky. If you’re in a hurry, freezer is fine, but let them come to room temp before eating.
Add Texture Variations
I’ve added crispy rice cereal, toasted coconut, or even crushed potato chips (yes, really). The base recipe is flexible. Try different combinations to find your favorite.
Variations & Substitutions
Once you’ve nailed the basic version, here’s how you can mix it up. I’ve tried all of these.
Chocolate Chip Cookie Dough
Add ¼ cup mini chocolate chips to the mix-ins. It’s like a cookie in cluster form. My favorite version.
Savory Spin
Skip the chocolate. Use white chocolate or caramel instead. Add dried cranberries and almonds. It’s sweet and savory in a different way.
Spicy Kick
Add a pinch of cayenne pepper to the chocolate. Or use chili-lime peanuts. It’s surprising and delicious.
Protein Boost
Swap peanuts for roasted soybeans or edamame. Or add a scoop of protein powder to the chocolate (this changes the texture, so add a bit more liquid).
Dairy-Free
Use dairy-free chocolate chips. Everything else is naturally dairy-free. I use Enjoy Life chips and they melt well.
Nut-Free
Use sunflower seeds or pumpkin seeds instead of peanuts. Add extra pretzels to keep the volume up.
Serving & Storage
How to Serve:
I serve these straight from the container. They’re finger food, so no plates needed. But for parties, I arrange them on a platter with toothpicks. They look fancy and taste homemade.
Side Dishes:
These go great with iced peach green tea lemonade for a refreshing afternoon snack. Or pair them with coffee for a dessert alternative.
Storage Instructions:
Refrigerator: Store in an airtight container for up to 2 weeks. They stay fresh and crunchy. I keep them in the fridge to prevent melting in warm weather.
Room Temperature: Good for 1 week if it’s cool. If it’s hot, they’ll get soft. Keep them in the pantry in a sealed bag.
Freezing: Yes, you can freeze them! Place them in a single layer on a tray, freeze until hard, then transfer to a bag. They last 3 months. Thaw in the fridge overnight.
Pro Tip: If they get sticky, put them in the fridge for 10 minutes before serving. They’ll be firm and perfect.
Nutrition Information
I’m not a nutritionist, but here’s the breakdown if you’re tracking. This is a snack, so enjoy it in moderation.
Per Cluster (approx. 10 clusters per batch):
- Calories: 150
- Protein: 4g
- Carbs: 18g
- Fiber: 2g
- Sugar: 12g
- Fat: 8g
- Sodium: 90mg
What’s Good:
- Protein from peanuts
- Fiber from pretzels and nuts
- Easy to portion control
What to Know:
- High in sugar due to chocolate
- High in fat (healthy fats from nuts)
- Contains gluten (unless GF pretzels used)
My Take:
Look, this is a treat. It’s chocolate and sugar. But it’s also nuts and pretzels, so it’s not *just* sugar. I make these for my kids, and I limit them to 1-2 clusters per day. It’s a better alternative to candy bars because it’s more filling. When I make them, I use dark chocolate to cut the sugar, which helps.
Final Thoughts
So that’s my go-to sweet and salty trail mix clusters! I’ve probably talked your ear off at this point, but when you make a recipe this often, you have a lot to say about it.
This has saved my snack game more times than I can count. It’s my answer to “what’s for a snack” when I’m tired, don’t want to cook, and still want something that tastes really good. My kids are happy, my husband’s happy (he hides them from the kids), and I’m happy because I’m not stressed about making something fancy.
Make it yours! Try different nuts, different chocolates, different add-ins. The best recipes are the ones you adapt to your family’s tastes. If you make this, drop a comment and let me know what you think! I love hearing how recipes turn out in your kitchen. And if something doesn’t work, tell me that too—I’m here to help troubleshoot.
Happy snacking! And I hope your kitchen smells half as good as mine does right now (it smells like chocolate and victory).
Frequently Asked Questions
Q: Can I use regular chocolate chips instead of mini?
A: You can, but they won’t melt as evenly. You’ll need to chop them up first or microwave them longer, stirring frequently. Mini chips are just easier for this recipe because they coat the mix-ins better. If you use regular chips, expect a chunkier texture.
Q: Why are my clusters too soft?
A: They probably didn’t chill long enough. Chocolate needs time to set. Put them in the fridge for another 10-15 minutes. If they’re still soft, you might have used low-quality chocolate that has a lower cocoa butter content. Next time, try a higher-quality brand.
Q: Can I make these ahead for a party?
A: Absolutely! I make these 2-3 days ahead and store them in the fridge. They actually taste better after a day because the flavors meld together. Just keep them in an airtight container so they don’t absorb fridge smells.
Q: Can I use peanut butter instead of peanuts?
A: Yes! Swirl in a tablespoon of peanut butter with the chocolate. It makes them creamier and more like a Reese’s cup. You might need to chill them longer because peanut butter is softer than nuts.
Q: How do I store them if it’s hot outside?
A: Keep them in the fridge. If you’re taking them to a picnic, use a cooler with ice packs. Chocolate melts fast in the heat. If they melt, you can re-melt and re-form them, but it’s extra work.
Q: Can I double this recipe?
A: Yes! Double everything and use a larger bowl. The microwave times might need to be slightly longer (30 seconds instead of 15). Stir well to ensure even melting. I double this recipe all the time for big batches.
Q: Are these gluten-free?
A: Only if you use gluten-free pretzels. The chocolate and nuts are naturally gluten-free, but standard pretzels contain wheat. I use Simple Mills or Enjoy Life pretzels, which are certified GF.
Q: Can I use almond butter instead of peanut butter?
A: Sure! Almond butter works great and adds a nice flavor. Just be aware it might be thicker, so you might need to warm it up slightly before mixing it into the chocolate.
Pin This Recipe!
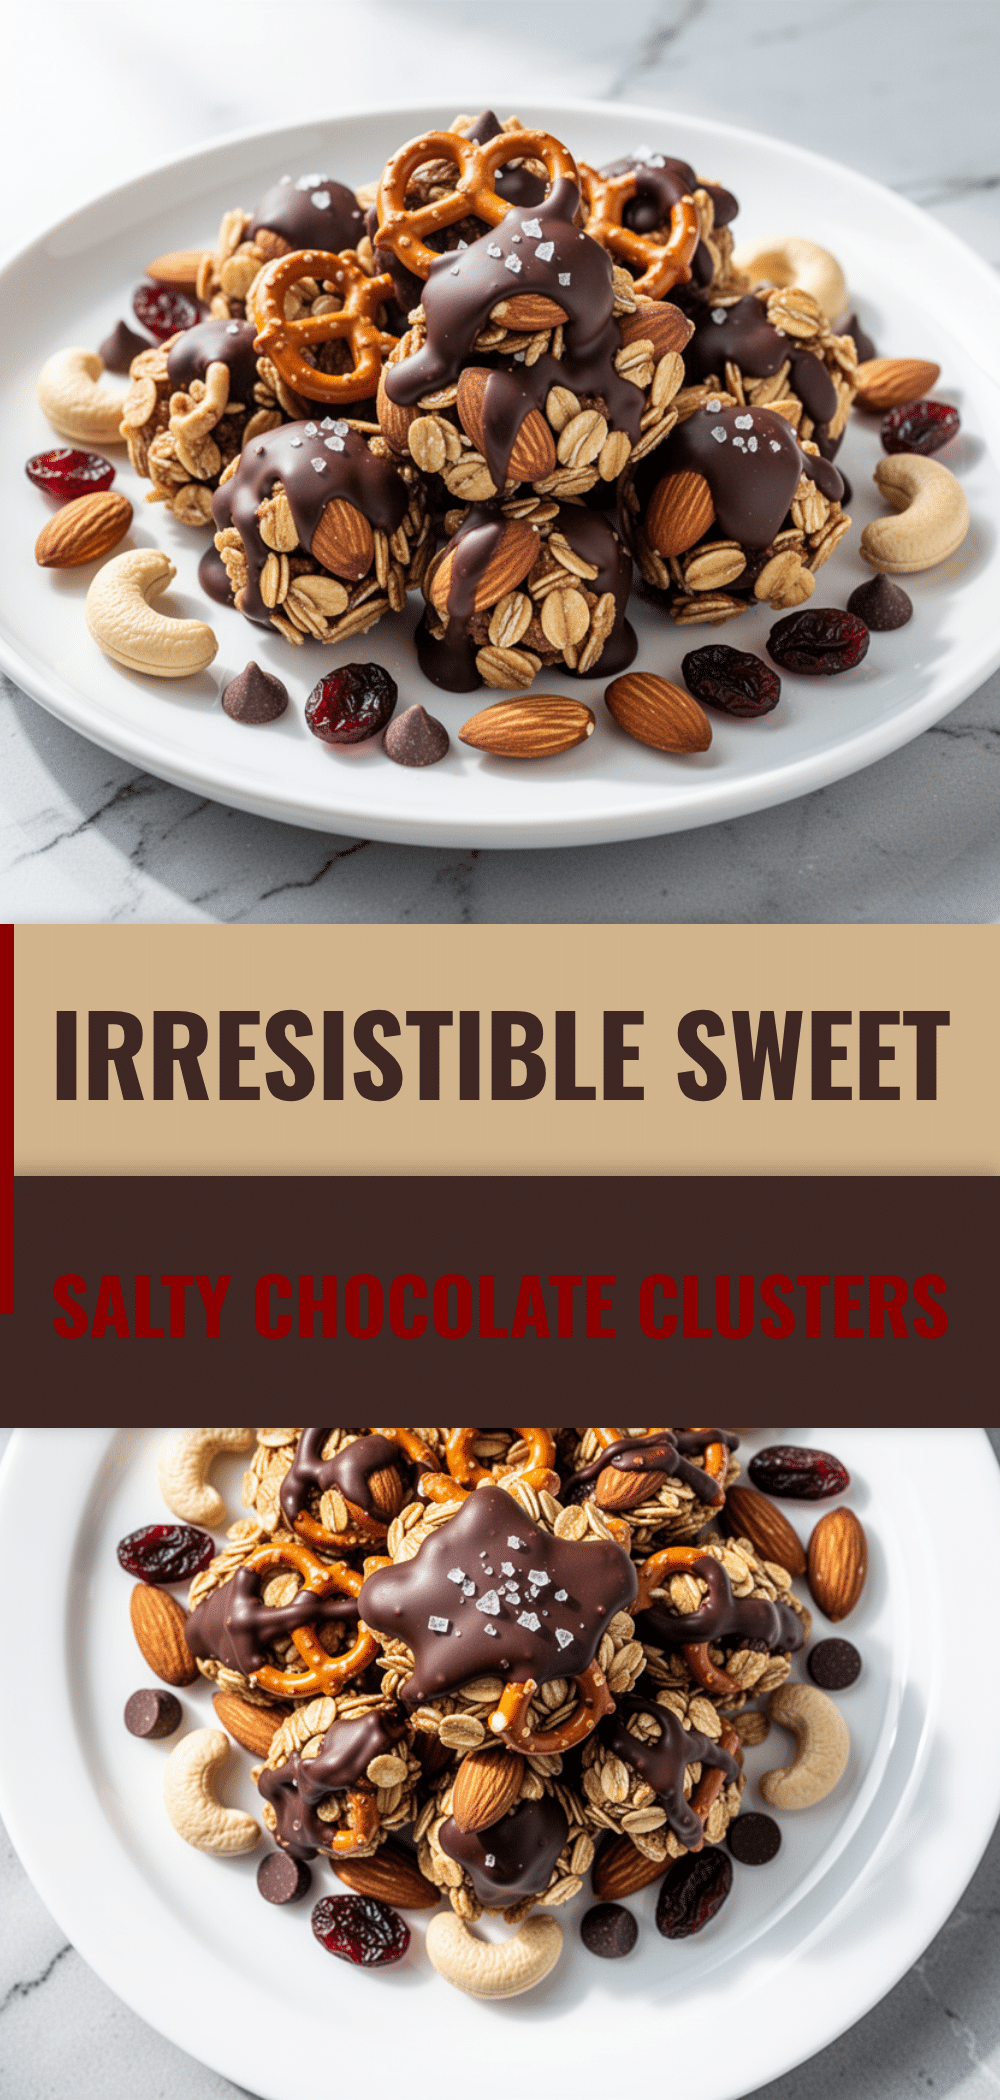
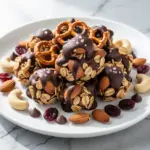
Sweet and Salty Trail Mix Clusters: 3-Ingredient Easy Snack
- Total Time: 22 minutes
- Yield: 8-10 servings 1x
Description
A quick, no-bake snack made with just three core ingredients: chocolate, pretzels, and peanuts. These crunchy, gooey clusters are perfect for late-night cravings, meal prep, or hiking trails.
Ingredients
- 1 cup mini chocolate chips (semi-sweet or dark)
- 1 cup pretzels (mini or broken into small pieces)
- 1 cup roasted peanuts (unsalted or lightly salted)
- 1 teaspoon vanilla extract (optional)
- 1 tablespoon butter (optional, for gloss)
- Pinch of flaky sea salt (for topping)
Instructions
- Break pretzels into bite-sized pieces if necessary. Measure out peanuts and chocolate chips.
- Place chocolate chips and butter (if using) in a microwave-safe bowl.
- Microwave on high for 30 seconds. Remove and stir. If not fully melted, microwave in 15-second intervals, stirring after each, until smooth and glossy. Do not overheat.
- Stir in vanilla extract if using.
- Add pretzels and peanuts to the melted chocolate. Stir gently but thoroughly until every piece is coated.
- Drop spoonfuls of the mixture onto a parchment-lined plate, spacing them out. Yield approximately 8-10 clusters.
- Refrigerate for 15-20 minutes until firm. Alternatively, freeze for 10 minutes if in a hurry.
- Before fully set, sprinkle a tiny pinch of flaky sea salt on top.
- Store in an airtight container.
Notes
Use mini chocolate chips for even melting. If chocolate seizes, add a teaspoon of warm water or cream. For gluten-free, use GF pretzels. For nut-free, use sunflower or pumpkin seeds. Store in the fridge for up to 2 weeks or freeze for 3 months.
- Prep Time: 5 minutes
- Cook Time: 2 minutes
- Category: Snack
- Cuisine: American
Nutrition
- Serving Size: 1 cluster
- Calories: 150
- Sugar: 12
- Sodium: 90
- Fat: 8
- Saturated Fat: 3
- Carbohydrates: 18
- Fiber: 2
- Protein: 4
Keywords: trail mix, no-bake snack, chocolate clusters, easy snack, 3-ingredient recipe, sweet and salty, peanut snack, pretzel snack