I have a confession to make: I used to think breakfast was just fuel. You grabbed a granola bar, maybe a coffee, and pretended you weren’t starving by 10 AM. That was my life for years. Then, one particularly chaotic Sunday morning, my partner decided he wanted “fancy breakfast” but didn’t want to spend two hours flipping pancakes or scrambling eggs in a massive skillet. He asked for sliders. I laughed. I told him sliders are for lunch, maybe dinner, but definitely not breakfast.
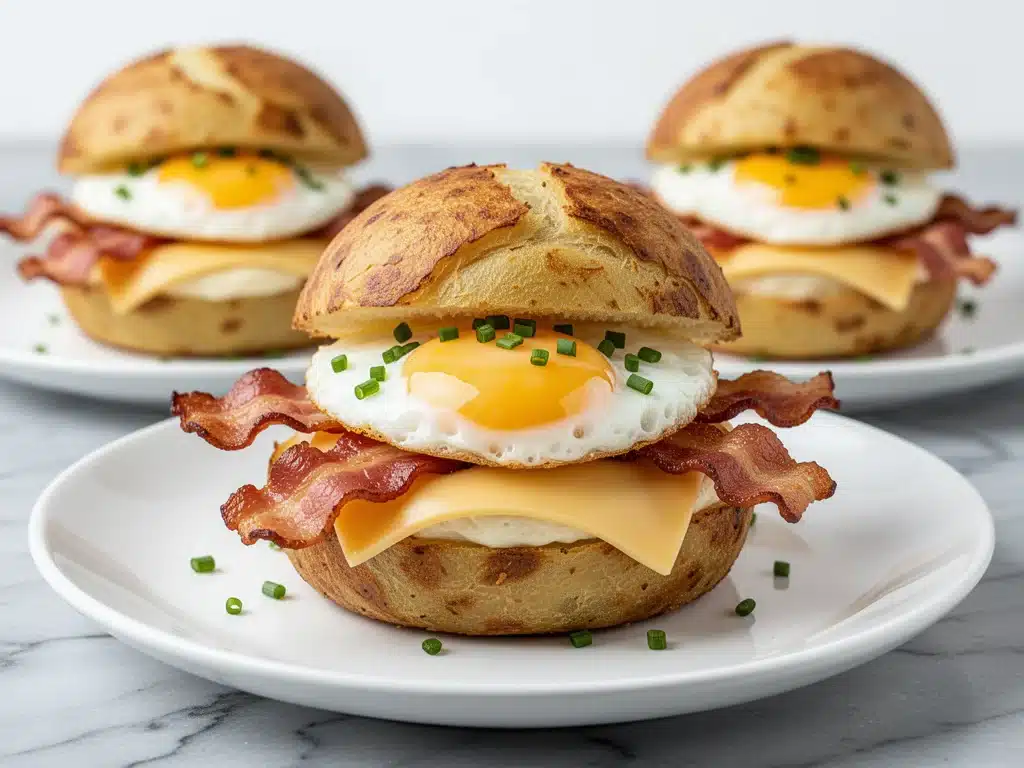
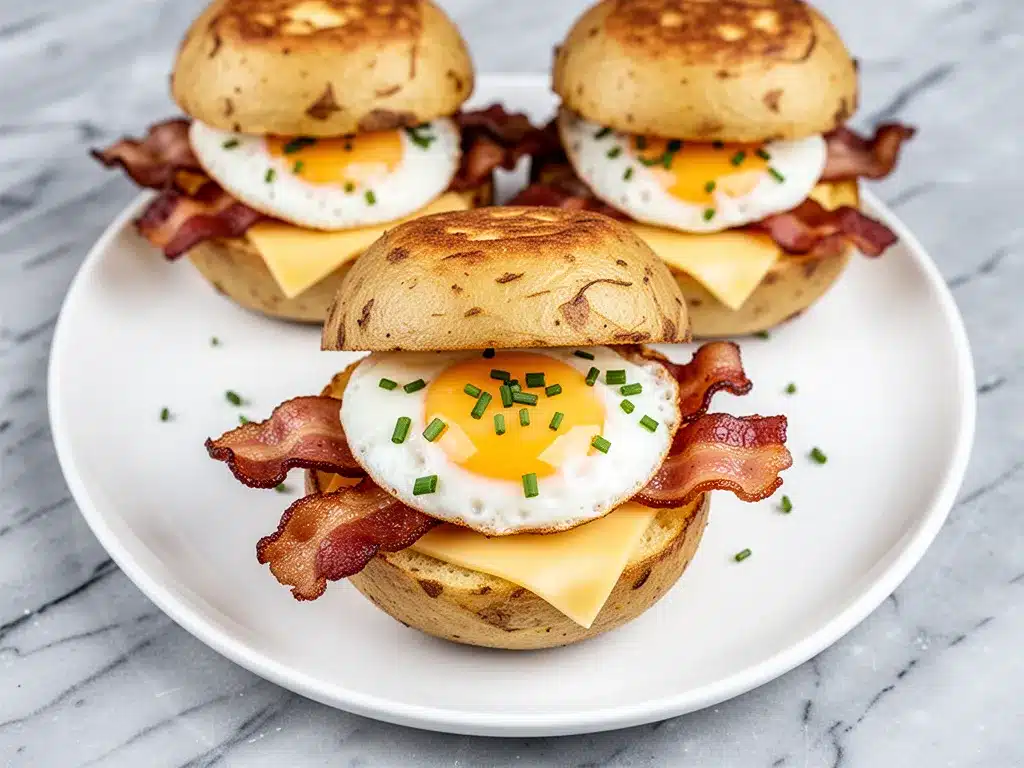
But he looked at me with those hopeful, sleep-deprived eyes, so I dug into the pantry. I had a package of Hawaiian rolls, a pack of bacon that was close to its expiration date, and a dozen eggs. I threw together what I thought would be a ridiculous, greasy mess. What came out of the oven was, frankly, a miracle. The bread was buttery and crisp on the outside, soft on the inside. The bacon was perfectly rendered, the eggs were set but tender, and the cheese had melted into every nook and cranny.
He took one bite and actually stopped talking. That’s the highest compliment I can give. Since that morning, these Crispy Bacon Egg and Cheese Breakfast Sliders have become our holy grail. They’ve survived brunch with in-laws, last-minute game day snacks, and those “I need coffee before I speak” mornings. If you’ve ever struggled to find a breakfast that feels indulgent but actually comes together in under 30 minutes, you need to stop scrolling and start cooking. This recipe has completely changed our weekend routine, and honestly, I’m never going back to plain toast.
Why You’ll Love This Recipe
There are a lot of breakfast options out there. You’ve got your fluffy buttermilk pancakes for when you have time, and your quick cereal for when you don’t. But these sliders sit in that perfect sweet spot of “weeknight feasible” and “weekend special.” Here is why I keep making them on repeat:
- One-Dish Wonder — Seriously, aside from a baking sheet and a small bowl for the butter mixture, there is almost zero cleanup. I mix the egg mixture, assemble the sliders, and dump everything in the oven. No frying pans to scrub, no burnt egg bits stuck to the stove. This is crucial for Sunday mornings when I’d rather be sleeping.
- Texture Perfection — I’ve tried making these in a skillet, and the bread gets soggy. Baking them solves that. The tops get that incredible golden, buttery crispness while the bottoms stay soft but structurally sound. It’s the best of both worlds.
- Meal Prep Friendly — These are the ultimate make-ahead breakfast. You can assemble them the night before, cover them with foil, and pop them in the oven in the morning. While they bake, you can shower, get the kids ready, or just drink your coffee in peace. They reheat beautifully too, which is rare for egg dishes.
- Customizable for Everyone — My daughter loves hers with just cheese and bacon. My husband likes a little spinach added in. My vegetarian friend swaps the bacon for sautéed mushrooms. Because they’re individual sliders, you can customize each one without cooking two separate meals.
- Party-Proof — Need to feed a crowd for a holiday brunch or a potluck? These scale up easily. I’ve made double batches for holiday mornings, and they disappear faster than iced peach green tea lemonade at a summer barbecue. Plus, they’re easy to eat with your hands, which is a huge plus for messy morning faces.
Real talk: these sliders make you look like a breakfast genius with minimal effort. They’re rich, savory, and satisfying without leaving you feeling like a human pancake for the rest of the day.
Ingredients You’ll Need
Here’s the best part: you probably have most of these ingredients already. I’m particular about a few things here, mostly because I’ve learned the hard way that cheap ingredients make for sad sliders. Let’s break down what you need and why it matters.
For the Sliders
Hawaiian sweet rolls (1 package, usually 12 rolls) — This is non-negotiable. The sweetness of the dough balances the saltiness of the bacon and cheese perfectly. You can use king-sized rolls if you want bigger sliders, but standard Hawaiian rolls are the classic choice. Do not use brioche unless you want a different flavor profile; brioche is too eggy and rich on its own.
Eggs (12 large) — You need enough eggs to fill the hollowed-out rolls. I usually buy a dozen just to be safe. Fresh eggs make a difference in the yolk color, but more importantly, they set up nicely in the oven.
Milk or heavy cream (½ cup) — This goes into the egg mixture. It makes the eggs creamy and custard-like. I use half-and-half for richness, but whole milk works fine if that’s all you have. Avoid skim milk; it’ll make the eggs rubbery.
Bacon (8-10 slices, cooked and crumbled) — Use thick-cut bacon if you can find it. It holds up better against the heat and doesn’t turn into crispy dust. Cook it until it’s crisp, then crumble it into bite-sized pieces. If you’re using thin bacon, cook it less so it doesn’t disintegrate.
Shredded cheese (1.5 cups, divided) — Cheddar is the standard, but I love a mix of sharp cheddar and pepper jack for a little kick. You can also use mozzarella for a milder, stretchier melt. Pre-shredded cheese has anti-caking agents that can make the melt slightly grainy, so if you have time, shred a block yourself. It takes 2 minutes and tastes better.
Spinach (optional) (1 cup, fresh or frozen) — I add this for my health-conscious friends, but honestly, it adds a nice color and a bit of bitterness to cut the fat. If using frozen spinach, thaw it and squeeze out ALL the water. Wet spinach is the enemy of good sliders.
For the Topping
Unsalted butter (4 tablespoons, melted) — This is what makes the tops golden and delicious. Melt it in a small bowl or microwave.
Garlic powder (½ teaspoon) — Adds a savory depth that pairs perfectly with the sweet rolls.
Poppy seeds (1 teaspoon, optional) — This is the classic Hawaiian roll topping. It adds a nice visual appeal and a tiny crunch. If you don’t have poppy seeds, sesame seeds work too, or just skip them.
Salt and black pepper — To taste. Remember, the bacon and cheese are already salty, so go easy on the salt in the topping.
Equipment Needed
You don’t need fancy equipment for this. Here’s what I actually use:
Baking sheet — A standard 13×9 inch baking pan works best, or a large half-sheet pan. I prefer the half-sheet pan because it gives the rolls more room to expand slightly without touching too much. If you use a pan, line it with parchment paper for easy cleanup.
Small bowl — For whisking the eggs and milk. Any medium-sized bowl works.
Whisk — Standard kitchen tool. Just make sure your egg mixture is well-combined before pouring.
Pastry brush or spoon — To apply the butter mixture to the tops. A brush gives a more even coat, but a spoon works fine if you’re being lazy.
Aluminum foil — Essential if you’re making these ahead of time or if your oven runs hot. It prevents the tops from burning before the eggs are set.
Cutting knife or serrated bread knife — To slice the tops off the rolls. A serrated knife makes this much easier without squishing the bread.
How to Make It: Step-by-Step
Alright, let’s make these! I’m walking you through exactly how I do it, including the little tricks I’ve picked up over time. It’s easier than you think.
Step 1: Prep Your Oven and Pan (5 minutes)
Preheat your oven to 350°F (175°C). Line your baking sheet or 9×13 pan with parchment paper or lightly grease it with butter or cooking spray. This step is crucial because cheese and butter stick to everything if you don’t prep properly.
Step 2: Slice the Rolls (2 minutes)
Keep the rolls attached at the bottom! Place the entire package of rolls on a cutting board. Using a sharp serrated knife, slice horizontally through the middle of the roll package, separating the tops from the bottoms. Be gentle; you don’t want to tear the bottom layer. Set the tops aside on a plate.
Step 3: Hollow Out the Bottoms (3 minutes)
This is the step most people skip, and it’s the secret to success. Take a small spoon and gently scoop out a little bit of the soft inner bread from the bottom half of each roll. You’re making a little “well” for the eggs and filling. Don’t remove too much, or the bottoms will fall apart. Just create a shallow depression in each roll.
Step 4: Assemble the Base (5 minutes)
Place the hollowed-out bottoms back on the baking sheet. Sprinkle a little bit of shredded cheese into the bottom of each roll. Then, add a pinch of crumbled bacon. If you’re using spinach, add a small handful here too. You’re building the flavor foundation.
Step 5: Make the Egg Mixture (3 minutes)
In your bowl, whisk together the eggs, milk, salt, and pepper until well combined. You want it smooth and slightly frothy. This ensures the eggs cook evenly and don’t have pockets of raw white.
Step 6: Pour and Fill (5 minutes)
Pour the egg mixture over the assembled rolls. Use a spoon to distribute it evenly. Each roll should be filled about ¾ full. Don’t overfill, or the eggs will overflow and burn. The liquid will soak into the bread, which is exactly what you want. Let them sit for 5 minutes while you finish the topping. This helps the bread absorb the liquid so it doesn’t get soggy later.
Step 7: Add the Topping (2 minutes)
In a small bowl, mix the melted butter, garlic powder, and poppy seeds. Brush this mixture generously over the tops of the rolls (the ones you set aside earlier). This is where the flavor and color come from. Be liberal with the butter; it’s what makes them crispy.
Step 8: Bake (20-25 minutes)
Place the tops back on the sliders. If your oven runs hot or you’re concerned about burning, cover the pan loosely with aluminum foil. Bake for 20-25 minutes. You’ll know they’re done when the eggs are set (no jiggle in the center) and the tops are golden brown. If you’re baking them cold from the fridge, add 5-10 minutes to the cooking time.
Step 9: Cool and Serve (5 minutes)
Let them cool for 5 minutes before separating. This allows the eggs to set completely. If you try to pull them apart immediately, they’ll fall apart. Run a knife or spatula between the rolls to separate them, then serve warm.
Expert Tips & Tricks
Here’s everything I’ve learned from making this dozens of times. These tips will save you from my mistakes.
Don’t Skip the Hollowing Out
I know it seems like extra work, but if you don’t make space for the eggs, the tops will float and the bread will be dry. The hollow creates a pocket for the custard, ensuring every bite has the right ratio of bread to egg to cheese.
Cook Your Bacon First
Never put raw bacon in the sliders. It won’t cook through in the baking time, and it will release grease that makes the bread soggy. Cook the bacon until crisp, drain the grease, and crumble it. This ensures perfect texture and flavor.
Let Them Rest
This is the hardest part. You want to eat them immediately. But letting them rest for 5-10 minutes allows the structure to set. Think of it like a cake or a casserole. If you pull them apart too soon, you’ll get a messy, broken mess. Patience pays off.
Customize the Cheese
While cheddar is classic, don’t be afraid to experiment. Swiss and bacon are a dream team. Pepper jack adds heat. Goat cheese adds a tangy twist. Just make sure you’re using a cheese that melts well. Hard cheeses like Parmesan don’t melt well on their own, so mix them with a softer cheese if you want that flavor.
Make Ahead Like a Pro
You can assemble these the night before. Cover the pan tightly with plastic wrap or foil and refrigerate overnight. In the morning, take them out, let them sit at room temperature for 15 minutes while the oven preheats, then bake. They might need an extra 5 minutes in the oven, but it’s worth the convenience.
Variations & Substitutions
Once you’ve nailed the basic version, here’s how you can mix it up. I’ve tried all of these.
Ham and Swiss
Swap the bacon for diced ham and use Swiss cheese. This is a classic breakfast sandwich combination. It’s slightly less salty than the bacon version, so you might want to add a pinch more salt to the egg mixture.
Vegetarian Powerhouse
Skip the bacon and add sautéed mushrooms, onions, and bell peppers. Sauté the veggies first to remove excess moisture, then add them to the rolls. Add spinach and feta cheese for a Mediterranean twist. This is my favorite way to use up leftover veggies.
Spicy Jalapeño
Add diced jalapeños to the egg mixture and use pepper jack cheese. Top with a little hot sauce after baking. This is perfect if you like a kick in your morning meal.
Breakfast Sausage
Use crumbled breakfast sausage instead of bacon. Brown it first, just like the bacon. This version is heartier and more savory. It pairs well with cheddar and apple slices on the side.
Dietary Modifications:
– Gluten-Free: Use gluten-free Hawaiian-style rolls. They hold up well, though they might be slightly denser.
– Dairy-Free: Use dairy-free butter and cheese alternatives. The flavor won’t be exactly the same, but it’s still tasty.
– Egg-Free: This recipe relies on eggs for structure, so it’s not easily egg-free. You could try a tofu scramble mixture, but the texture will be very different.
Serving & Storage
How to Serve:
I usually serve these straight from the baking sheet. They look rustic and inviting. Pair them with fresh fruit, like strawberries or orange slices, to balance the richness. A side of yogurt with honey is also great. For drinks, coffee is obvious, but iced peach green tea lemonade is a refreshing alternative that cuts through the fat nicely.
Storage Instructions:
Store leftovers in an airtight container in the refrigerator for up to 3 days. They keep surprisingly well because the bread stays moist from the egg mixture.
Reheating:
The best method is the oven or toaster oven. Reheat at 350°F for 10-15 minutes until warm. This restores the crispness of the top. You can microwave them, but the bread will get chewy and soft. If you must microwave, do it in short bursts (30 seconds) and don’t overdo it.
Freezing:
You can freeze these, but the texture of the bread changes slightly upon thawing. I recommend freezing the baked sliders in a single layer, then transferring to a freezer bag. Thaw in the fridge overnight and reheat in the oven. They’re still good, just not quite as fresh as day-one sliders.
Nutrition Information
I’m not a nutritionist, but here’s the breakdown if you’re tracking. Keep in mind that these are rich, indulgent sliders, so portion control is key.
Per Serving (based on 1 slider out of 12):
- Calories: 180
- Protein: 8g
- Carbs: 16g
- Fiber: 1g
- Sugar: 4g
- Fat: 9g
- Saturated Fat: 4g
- Cholesterol: 90mg
- Sodium: 350mg
What’s Good:
Decent protein from the eggs and cheese. It’s filling enough to keep you satisfied until lunch.
What to Know:
Higher in sodium due to bacon and cheese. If you’re watching salt, use low-sodium bacon and cheese. The carbs come from the sweet rolls, so if you’re cutting carbs, consider using a low-carb bread alternative, though the texture will be different.
My Take:
Look, this is comfort food. It’s bacon, cheese, and sweet bread. It’s not a diet meal. But it’s way better than fast-food breakfast sandwiches, which are often full of preservatives and unknown ingredients. When I make these, I enjoy one or two and fill the rest of my plate with veggies or fruit. Balance is everything.
Final Thoughts
So that’s my go-to Crispy Bacon Egg and Cheese Breakfast Sliders! I’ve probably talked your ear off at this point, but when you make a recipe this often, you have a lot to say about it. These sliders have saved my mornings more times than I can count. They’re my answer to “what’s for breakfast?” when I want something special but don’t want to stress. My family is happy, I’m happy, and the cleanup is minimal.
Make it yours! Try different cheeses, add veggies, or swap the bacon for sausage. The best recipes are the ones you adapt to your family’s tastes. If you make this, drop a comment and let me know what you think! I love hearing how recipes turn out in your kitchen. And if something doesn’t work, tell me that too—I’m here to help troubleshoot.
Happy cooking! And I hope your kitchen smells half as good as mine does right now.
Frequently Asked Questions
Can I use a different type of bread?
Yes, but Hawaiian rolls are the best choice for their sweetness and soft texture. You can use brioche buns, but they are richer and might make the sliders too heavy. Avoid dense breads like sourdough or whole wheat unless you’re okay with a chewier texture. The sweet roll is what makes these sliders unique.
Can I make these ahead of time?
Absolutely. This is one of their biggest strengths. Assemble the sliders the night before, cover the pan tightly with plastic wrap or foil, and refrigerate. In the morning, you can bake them straight from the fridge, though they may need an extra 5-10 minutes in the oven. This is perfect for busy weeknights or holiday mornings.
Why did my sliders turn out soggy?
Usually, sogginess comes from two things: not hollowing out the bread enough, or adding too much liquid. Make sure you create a good well in the bottom of the rolls so the eggs have space. Also, don’t overfill the rolls with egg mixture. They should be about ¾ full. If you’re using wet veggies like spinach, make sure to squeeze out all the water first.
Can I freeze these sliders?
Yes, you can freeze baked sliders. Let them cool completely, then wrap them individually in plastic wrap and foil, or place them in a freezer-safe bag. They’ll last for up to 3 months. Thaw in the fridge overnight and reheat in the oven at 350°F for 10-15 minutes. The texture of the bread might be slightly softer, but they’re still delicious.
What cheese works best?
Sharp cheddar is the classic choice, but you can use any melty cheese. Swiss, Monterey Jack, Pepper Jack, or even mozzarella work well. For a more complex flavor, try a blend of cheddar and Gruyère. Just avoid hard cheeses like Parmesan or Pecorino as the main cheese, as they don’t melt well on their own.
Can I make these in a muffin tin?
You can, but it’s not ideal. The bread needs to stay connected to bake evenly and hold its structure. If you use a muffin tin, you’ll have to cut each roll into individual pieces, which makes the assembly much messier. The sheet pan method is easier and yields better results.
How do I reheat leftovers?
The oven or toaster oven is best for reheating. It restores the crispness of the top. Microwave reheating works in a pinch, but the bread will become chewy. If you microwave, do it in short bursts (30 seconds) and check frequently to avoid overheating.
Pin This Recipe!
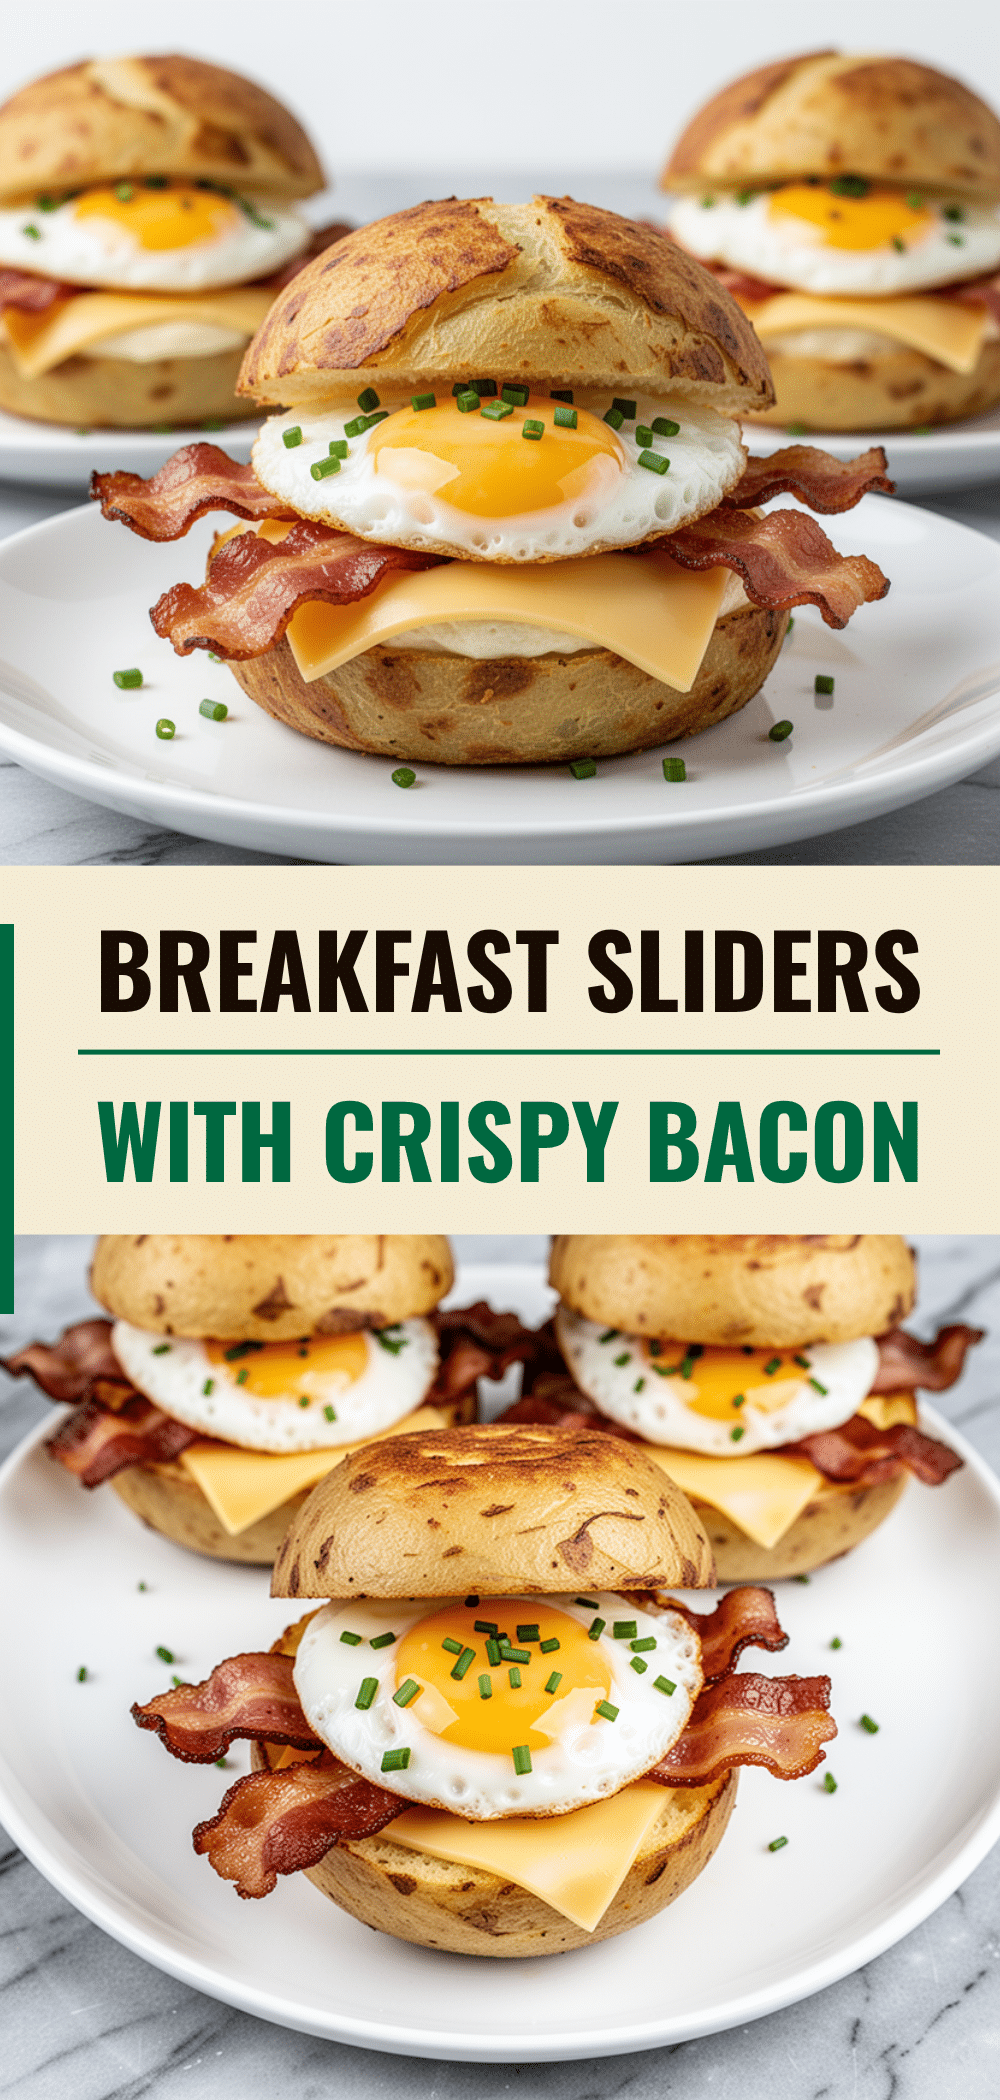
Crispy Bacon Egg and Cheese Breakfast Sliders
- Total Time: 45 minutes
- Yield: 12 servings 1x
Description
Buttery, crispy Hawaiian rolls filled with a creamy egg custard, crumbled bacon, and melted cheese. These sliders are perfect for breakfast, brunch, or meal prep, offering a delicious balance of sweet and savory flavors with minimal cleanup.
Ingredients
- 1 package (12 rolls) Hawaiian sweet rolls
- 12 large eggs
- 1/2 cup milk or heavy cream
- 8–10 slices thick-cut bacon, cooked and crumbled
- 1.5 cups shredded cheese (cheddar, pepper jack, or mozzarella), divided
- 1 cup fresh or frozen spinach (optional)
- 4 tablespoons unsalted butter, melted
- 1/2 teaspoon garlic powder
- 1 teaspoon poppy seeds (optional)
- Salt and black pepper to taste
Instructions
- Preheat oven to 350°F (175°C). Line a 13×9 inch baking pan or half-sheet pan with parchment paper or grease lightly.
- Place the package of Hawaiian rolls on a cutting board. Using a serrated knife, slice horizontally through the middle of the roll package to separate the tops from the bottoms, keeping them attached at the base.
- Gently scoop out a small amount of the soft inner bread from the bottom half of each roll to create a shallow well for the filling.
- Place the hollowed-out bottoms back on the baking sheet. Sprinkle a little shredded cheese into each well, followed by a pinch of crumbled bacon and optional spinach.
- In a medium bowl, whisk together the eggs, milk, salt, and pepper until smooth and slightly frothy.
- Pour the egg mixture evenly over the assembled rolls, filling each about 3/4 full. Let sit for 5 minutes to allow the bread to absorb the liquid.
- In a small bowl, mix the melted butter, garlic powder, and poppy seeds. Brush this mixture generously over the tops of the rolls.
- Place the tops back on the sliders. If desired, cover loosely with aluminum foil to prevent burning.
- Bake for 20-25 minutes, or until the eggs are set and the tops are golden brown. If baking from the fridge, add 5-10 minutes.
- Let cool for 5 minutes before separating and serving warm.
Notes
Do not skip hollowing out the bread to prevent soggy bottoms. Cook bacon fully before adding to ensure crispness. Let sliders rest for 5 minutes after baking to allow eggs to set. Can be assembled the night before and refrigerated.
- Prep Time: 20 minutes
- Cook Time: 25 minutes
- Category: Breakfast
- Cuisine: American
Nutrition
- Serving Size: 1 slider
- Calories: 180
- Sugar: 4
- Sodium: 350
- Fat: 9
- Saturated Fat: 4
- Carbohydrates: 16
- Fiber: 1
- Protein: 8
Keywords: breakfast sliders, bacon egg cheese, hawaiian rolls, meal prep breakfast, easy brunch, one-dish breakfast, crispy breakfast