I have a confession to make. For years, my mornings were a chaotic sprint. I’d wake up, throw on whatever I could find, and rush out the door with a coffee that was already cold. Breakfast? An afterthought. Usually a granola bar eaten while brushing my teeth. But then, life slowed down. My schedule shifted. Suddenly, I had thirty extra minutes in the morning before the kids’ bus arrived.
I could have used that time to sleep in. Instead, I started experimenting with breakfast. I wanted something that felt indulgent—like a weekend brunch at a fancy cafe—but didn’t require me to be up at 5 AM to prep overnight oats or make waffles from scratch. I needed speed. I needed comfort. I needed fluffy buttermilk pancakes that actually tasted like I had my life together, even if I was running on three hours of sleep.
That’s when I discovered the magic of brown butter syrup. I had always thought syrup was just a sweet topping. But browning the butter? It adds this deep, nutty, caramel-like richness that transforms a simple stack of pancakes into something worth waking up for. And the best part? The pancakes themselves come together in about 10 minutes. Yes, ten. From mixing bowl to plate in ten minutes.
I’ve tested this 10-minute weeknight breakfast recipe over a hundred times now. I’ve made them on rainy Sundays, stressful school mornings, and lazy Saturdays. They are consistently fluffy, reliably quick, and absolutely delicious. This isn’t just a recipe; it’s my secret weapon for turning a rushed morning into a moment of joy. If you’ve been stuck in the breakfast rut, trust me—this is the game-changer you need.
Why You’ll Love This 10-Minute Weeknight Breakfast
Let’s be real. Most pancake recipes promise “easy,” but then you need to separate eggs, whip whites, and wait for batter to rest. That’s not easy; that’s a part-time job. This fluffy buttermilk pancakes recipe is different. It’s designed for real life. Here’s why it’s become my absolute favorite morning ritual:
- Stupidly Simple Batter — No special equipment needed. Just one bowl. Mix, pour, cook. I’ve made this batter while half-asleep, and it still turned out perfect. The secret is in the ratio, not the technique.
- 10-Minute Magic — This isn’t a lie. The batter comes together in 3 minutes. The cooking takes 7. That’s it. You can have breakfast ready before your coffee finishes brewing.
- Brown Butter Syrup Upgrade — This is the secret weapon. Most people just pour maple syrup on top. I brown the butter first. It adds a sophisticated, nutty depth that makes even the simplest pancakes feel gourmet. It’s worth the extra 2 minutes.
- Consistently Fluffy — I’ve tried every trick in the book (separating eggs, baking powder vs. soda, resting times). This recipe uses the right balance of leavening agents and buttermilk to guarantee lift every single time. No flat pancakes.
- Pantry Staples — You likely have all these ingredients right now. Flour, sugar, baking powder, salt, milk, butter, eggs. No obscure ingredients to run out for.
- Kid-Approved — My picky eaters devour these. The brown butter syrup is a hit, and the pancakes are soft enough for little hands to grab. It’s one of the few breakfasts that doesn’t result in a negotiation.
This is my go-to when I need dinner to just work. No complicated techniques, no weird ingredients, just reliable, delicious food that makes everyone happy.
Ingredients You’ll Need for Fluffy Buttermilk Pancakes
Here’s the best part: you probably have most of this already. I’m particular about three ingredients here, and I’ll tell you exactly why. This list is short, simple, and effective. No fuss.
For the Pancakes
All-purpose flour (1 ½ cups / 190g) — The base. Don’t use self-rising flour unless you adjust the leavening. All-purpose gives the best texture. Spoon it into the cup and level it off. Don’t scoop, or you’ll pack it down and get dense pancakes.
Sugar (2 tablespoons / 25g) — Just a touch. It helps with browning and adds a hint of sweetness. You don’t want them dessert-sweet; you want them balanced. White sugar works fine. Brown sugar is too moist for this batter.
Baking powder (2 teaspoons / 10g) — The lift. Make sure it’s fresh! If your baking powder is old, your pancakes will be flat. I keep a new can in my pantry specifically for baking. Two teaspoons is the sweet spot for this amount of flour.
Salt (1 teaspoon / 6g) — Flavor enhancer. It sounds counterintuitive to add salt to sweet pancakes, but it makes the sweetness pop. Don’t skip it.
Buttermilk (1 ¼ cups / 300ml) — The secret to tenderness. The acidity reacts with the baking powder to create lift and tenderize the gluten. If you don’t have buttermilk, see my substitution tip below. Full-fat buttermilk is best.
Egg (1 large / 50g) — Structure and richness. Room temperature eggs mix better into the batter, but cold works too. Just don’t overmix.
Melted butter (2 tablespoons / 30g) — Flavor and moisture. Cool it slightly before adding so it doesn’t cook the egg. This is what keeps them soft.
For the Brown Butter Syrup

Unsalted butter (4 tablespoons / 60g) — The star of the show. Use good quality butter here. It makes a huge difference in flavor. Salted butter can work, but reduce the salt in the pancakes if you use it.
Maple syrup (½ cup / 120ml) — Real maple syrup, not “pancake syrup” made from corn syrup. Look for Grade A or Grade B. The darker the syrup, the stronger the flavor. I prefer Grade B for this because it stands up to the brown butter.
Heavy cream (2 tablespoons / 30ml) — Optional, but I recommend it. It stabilizes the syrup and keeps it from separating on the hot pancakes. If you’re out, skip it. It’s still good.
Vanilla extract (½ teaspoon / 2.5ml) — Just a splash. Enhances the nutty flavor of the brown butter. Pure vanilla, not imitation.
Pinch of salt — Balances the sweetness. Crucial.
Common Substitutions
No buttermilk? Add 1 tablespoon of lemon juice or white vinegar to 1 ¼ cups of regular milk. Let it sit for 5-10 minutes until it curdles slightly. It works perfectly.
Dairy-free? Use plant-based milk (like oat or soy) with lemon juice for the buttermilk substitute. Use dairy-free butter for the syrup. The texture might be slightly different, but it’s still delicious.
Gluten-free? Use a 1:1 gluten-free flour blend. Add a teaspoon of xanthan gum if your blend doesn’t include it. The pancakes will be slightly more delicate, so handle gently.
Equipment Needed
You don’t need fancy equipment for this. Here’s what I actually use. Keep it simple.
Large mixing bowl — I use a 4-quart bowl. It needs to be big enough to whisk the dry ingredients and pour in the wet without making a mess. A bowl with a spout is helpful for pouring the batter.
Whisk — Essential for combining ingredients smoothly. A balloon whisk works best. Avoid forks; they don’t aerate the batter as well.
Measuring cups and spoons — Accuracy matters in baking. Use standard measuring cups for dry ingredients and liquid measuring cups for the buttermilk. Level off dry ingredients.
Non-stick skillet or griddle — This is crucial. A heavy-bottomed non-stick skillet heats evenly and prevents sticking. Cast iron works too, but it’s heavier and takes longer to heat. Electric griddles are great for batches, but a skillet is fine for small families.
Spatula — A thin, flexible spatula is best for flipping. It slides under the pancake easily. Don’t use a thick, rigid spatula; you’ll tear the pancake.
Small saucepan — For browning the butter. A small saucepan lets you watch the butter closely and stop it from burning. A wider pan might evaporate too quickly.
Paper towels — Keep these handy to wipe the skillet between batches. It keeps the cooking surface clean and ensures even browning.
How to Make It: Step-by-Step
Alright, let’s make this! I’m walking you through exactly how I do it, including the little tricks I’ve picked up. This 10-minute weeknight breakfast is about speed and simplicity, so let’s get started.
Step 1: Mix the Dry Ingredients (2 minutes)
In your large mixing bowl, whisk together the flour, sugar, baking powder, and salt. Do this quickly. You just want to distribute the leavening agents evenly. No need to over-whisk. Set the bowl aside.
Step 2: Combine the Wet Ingredients (1 minute)
In a separate medium bowl or large measuring cup, whisk the buttermilk, egg, and melted butter together. Make sure the melted butter is cooled slightly so it doesn’t scramble the egg. Whisk until smooth.
Step 3: Combine Wet and Dry (1 minute)
Pour the wet ingredients into the dry ingredients. Gently stir with a spatula or wooden spoon until just combined. Do not overmix! Lumps are okay. In fact, they’re preferred. Overmixing develops gluten, which makes pancakes tough. Stop mixing as soon as you no longer see dry flour.
Step 4: Heat the Skillet (2 minutes)
Place your non-stick skillet over medium heat. Let it heat up for about 2 minutes. To test if it’s ready, flick a few drops of water onto the surface. If they sizzle and evaporate, it’s ready. If they dance around, it’s too hot. If they just sit there, it’s too cold. Aim for a steady sizzle.
Step 5: Cook the Pancakes (3-4 minutes per batch)
Lightly grease the skillet with butter or oil. Use a paper towel to wipe away excess. Pour about ¼ cup of batter for each pancake. Cook until bubbles form on the surface and the edges look set. This takes about 2-3 minutes. Flip carefully with your spatula. Cook the other side for 1-2 minutes until golden brown. Remove to a plate and keep warm in a 200°F oven if making a batch.
Step 6: Make the Brown Butter Syrup (5 minutes)
While the pancakes cook, melt the butter in a small saucepan over medium heat. Swirl the pan occasionally. The butter will foam, then clear, and eventually turn amber with a nutty aroma. This takes 3-4 minutes. Watch it closely! Once it smells nutty and turns golden brown, immediately remove from heat. Stir in the maple syrup, heavy cream, vanilla, and salt. Whisk until smooth.
Step 7: Serve
Stack the pancakes high. Drizzle generously with the warm brown butter syrup. Serve immediately. The syrup will be hot, so be careful. Enjoy!
Expert Tips & Tricks
Here’s everything I’ve learned from making this dozens of times. These tips will save you from my mistakes.
Don’t Overmix the Batter — I can’t stress this enough. Lumpy batter = fluffy pancakes. Smooth batter = flat pancakes. Mix until just combined. If you see a few lumps, leave them. They’ll cook out.
Control the Heat — Medium heat is key. Too hot, and the outside burns before the inside cooks. Too cold, and the pancakes spread out and become greasy. If your first pancake is too dark, lower the heat. If it’s too pale, raise it slightly.
Wipe the Pan — Between batches, wipe the skillet with a paper towel. This removes burnt bits and excess butter, ensuring clean, even browning for the next pancake.
Watch the Brown Butter — Brown butter goes from perfect to burnt in seconds. Once it starts foaming, pay attention. When the foam subsides and you see brown specks at the bottom, it’s done. The smell is your best indicator: it should smell nutty and toasty.
Keep Pancakes Warm — If you’re making a batch for a family, preheat your oven to 200°F. Place cooked pancakes on a baking sheet in the oven while you finish the rest. They’ll stay warm and soft.
Use a Ladle — For consistent pancakes, use a ladle or measuring cup to pour the batter. It ensures uniform size and cooking time.
Variations & Substitutions
Once you’ve nailed the basic version, here’s how you can mix it up. I’ve tried all of these.
Berry Pancakes — Fold in ½ cup of fresh or frozen blueberries into the batter right after mixing. Don’t overmix. They’ll distribute evenly and create pockets of fruit in every bite.
Chocolate Chip Pancakes — Sprinkle chocolate chips on top of the batter immediately after pouring it into the skillet. They’ll sink in slightly as the pancake cooks. Use semi-sweet or milk chocolate.
Banana Pancakes — Mash 1 ripe banana and fold it into the batter. Reduce the sugar by 1 tablespoon since the banana adds sweetness. Delicious and hearty.
Pumpkin Spice Pancakes — Add 2 tablespoons of pumpkin puree and 1 teaspoon of pumpkin pie spice to the wet ingredients. Perfect for fall mornings.
Gluten-Free Version — Use a 1:1 gluten-free flour blend. Add a teaspoon of xanthan gum if needed. The texture will be slightly more delicate, so handle gently.
Dairy-Free Version — Use plant-based milk with lemon juice for buttermilk. Use dairy-free butter for the syrup. The flavor will be slightly different, but still tasty.
Serving & Storage
How to Serve: I usually serve these straight from the skillet. They look rustic and stay warm. But here are other ways I’ve enjoyed them:
- Classic: Just the pancakes and brown butter syrup. Simple and perfect.
- Fancy: Top with whipped cream and fresh berries. Great for weekends.
- Crunchy: Add a sprinkle of toasted pecans or walnuts for texture.
- Spicy: Add a pinch of cayenne to the syrup for a kick.
Side Dishes: These pancakes pair well with crispy bacon, sausage links, or a simple fruit salad. A glass of orange juice or coffee completes the meal.
Storage: Store leftover pancakes in an airtight container in the refrigerator for up to 3 days. Reheat in a toaster or skillet. The syrup can be stored in a jar in the refrigerator for up to 2 weeks. Reheat gently before serving.
Freezing: Pancakes freeze well. Cool them completely, then stack them with parchment paper between each pancake. Freeze in a bag for up to 2 months. Reheat in a toaster.
Nutrition Information
I’m not a nutritionist, but here’s the breakdown if you’re tracking. Per serving (based on 4 servings, 2 pancakes each):
| Nutrient | Amount |
|---|---|
| Calories | 380 |
| Protein | 8g |
| Carbs | 52g |
| Fiber | 2g |
| Sugar | 18g |
| Fat | 15g |
| Saturated Fat | 8g |
| Cholesterol | 65mg |
| Sodium | 450mg |
What’s good: Decent protein from the egg and buttermilk. Calcium from the dairy. Easy to customize with fruits or nuts for added nutrients.
What to know: Higher in calories from the butter and syrup. Contains dairy and gluten. Moderate sodium. Use low-sodium broth if substituting ingredients.
My take: Look, this is comfort food. It’s not a diet recipe. But it’s way better than takeout, costs less, and I know exactly what’s in it. When I want to make it lighter, I use the half-and-half version and load up on vegetables. But usually? I just eat a reasonable portion and enjoy it.
Final Thoughts
So that’s my go-to fluffy buttermilk pancakes recipe! I’ve probably talked your ear off at this point, but when you make a recipe this often, you have a lot to say about it.
This has saved weeknight mornings more times than I can count. It’s my answer to “what’s for breakfast” when I’m tired, don’t want to make a big fuss, and still want something that tastes really good. My kids are happy, my husband’s happy, and I’m happy because I’m not stressed about cooking.
Make it yours! Try different add-ins, swap in your favorite fruits, adjust the sweetness. The best recipes are the ones you adapt to your family’s tastes.
If you make this, drop a comment and let me know what you think! I love hearing how recipes turn out in your kitchen. And if something doesn’t work, tell me that too—I’m here to help troubleshoot.
Happy cooking! And I hope your kitchen smells half as good as mine does right now.
Frequently Asked Questions
Can I use regular milk instead of buttermilk?
You can, but the pancakes will be less tender and fluffy. If you must, add 1 tablespoon of lemon juice or vinegar to 1 ¼ cups of milk. Let it sit for 5-10 minutes. It works okay, but buttermilk is better.
Why are my pancakes flat?
Usually means you overmixed the batter or your baking powder is old. Mix until just combined, and check your leavening agents. Also, make sure your skillet is the right temperature.
Can I make the batter ahead?
Not recommended. Pancake batter loses its leavening power over time. The bubbles escape, and the pancakes become flat. Mix it fresh for the best results.
Why did my brown butter burn?
It’s easy to burn! Watch it closely. Once the foam subsides and you see brown specks, it’s done. If it smells acrid, it’s burnt. Start over—it’s not worth salvaging.
Can I freeze the syrup?
Yes, but it may separate when thawed. Reheat gently and whisk to recombine. It’s better to store it in the fridge for short-term use.
How do I reheat leftovers?
Reheat pancakes in a toaster or skillet. The syrup can be microwaved or reheated on the stove. Add a splash of milk if the syrup thickens too much.
Can I double this recipe?
Absolutely! Double everything and use a larger skillet or cook in batches. The cooking times stay the same. Just make sure your batter bowl is big enough.
Pin This Recipe!


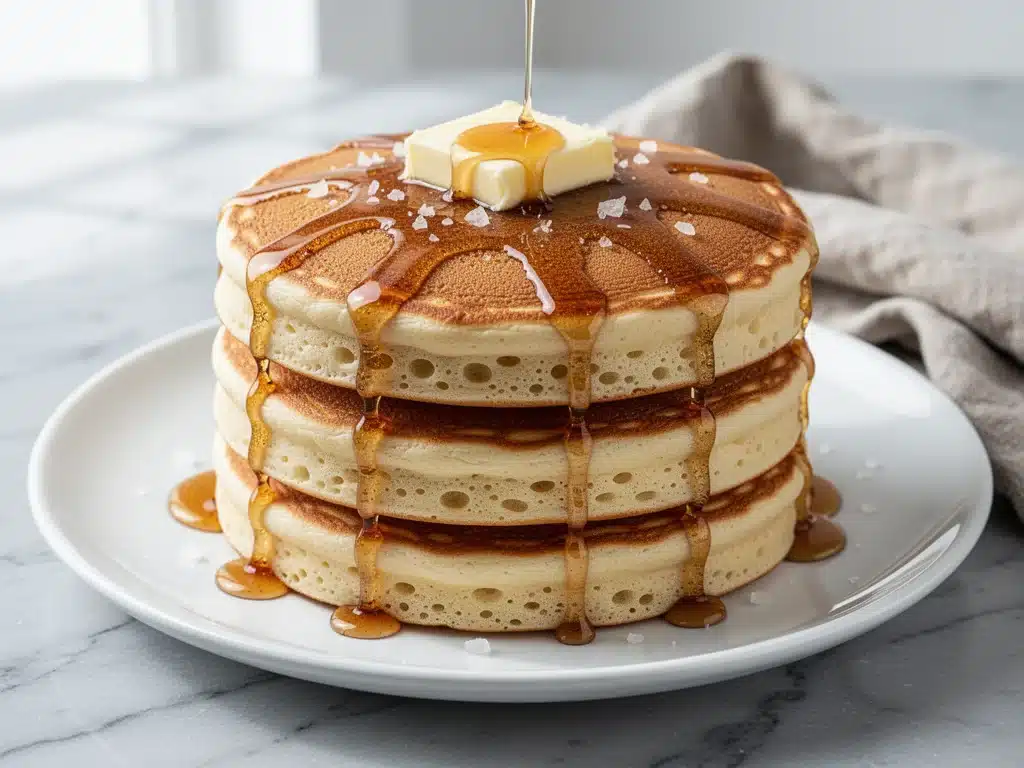
Fluffy Buttermilk Pancakes: 10-Min Weeknight Breakfast
- Total Time: 10 minutes
- Yield: 4 servings 1x
Description
A quick and easy recipe for fluffy buttermilk pancakes made in just 10 minutes, topped with a rich, nutty brown butter syrup. Perfect for busy weeknights using simple pantry staples.
Ingredients
- 1 ½ cups all-purpose flour
- 2 tablespoons sugar
- 2 teaspoons baking powder
- 1 teaspoon salt
- 1 ¼ cups buttermilk
- 1 large egg
- 2 tablespoons melted butter
- 4 tablespoons unsalted butter (for syrup)
- ½ cup maple syrup
- 2 tablespoons heavy cream
- ½ teaspoon vanilla extract
- Pinch of salt (for syrup)
Instructions
- In a large mixing bowl, whisk together the flour, sugar, baking powder, and salt.
- In a separate medium bowl or measuring cup, whisk the buttermilk, egg, and melted butter until smooth.
- Pour the wet ingredients into the dry ingredients and gently stir until just combined. Do not overmix; lumps are okay.
- Heat a non-stick skillet over medium heat for about 2 minutes.
- Lightly grease the skillet with butter or oil.
- Pour about ¼ cup of batter per pancake onto the skillet.
- Cook until bubbles form on the surface and edges look set (2-3 minutes), then flip and cook for another 1-2 minutes until golden brown.
- While pancakes cook, melt butter in a small saucepan over medium heat until it turns amber and smells nutty.
- Remove brown butter from heat and stir in maple syrup, heavy cream, vanilla, and a pinch of salt.
- Serve pancakes stacked high with the warm brown butter syrup drizzled on top.
Notes
Do not overmix the batter to ensure fluffy pancakes. Use fresh baking powder for best results. If you don’t have buttermilk, substitute with milk plus lemon juice or vinegar. Keep cooked pancakes warm in a 200°F oven while making the rest of the batch.
- Prep Time: 3 minutes
- Cook Time: 7 minutes
- Category: Breakfast
- Cuisine: American
Nutrition
- Serving Size: 2 pancakes per servi
- Calories: 380
- Sugar: 18
- Sodium: 450
- Fat: 15
- Saturated Fat: 8
- Carbohydrates: 52
- Fiber: 2
- Protein: 8
Keywords: pancakes, buttermilk pancakes, breakfast, quick breakfast, weeknight dinner, brown butter syrup, fluffy pancakes, easy recipe