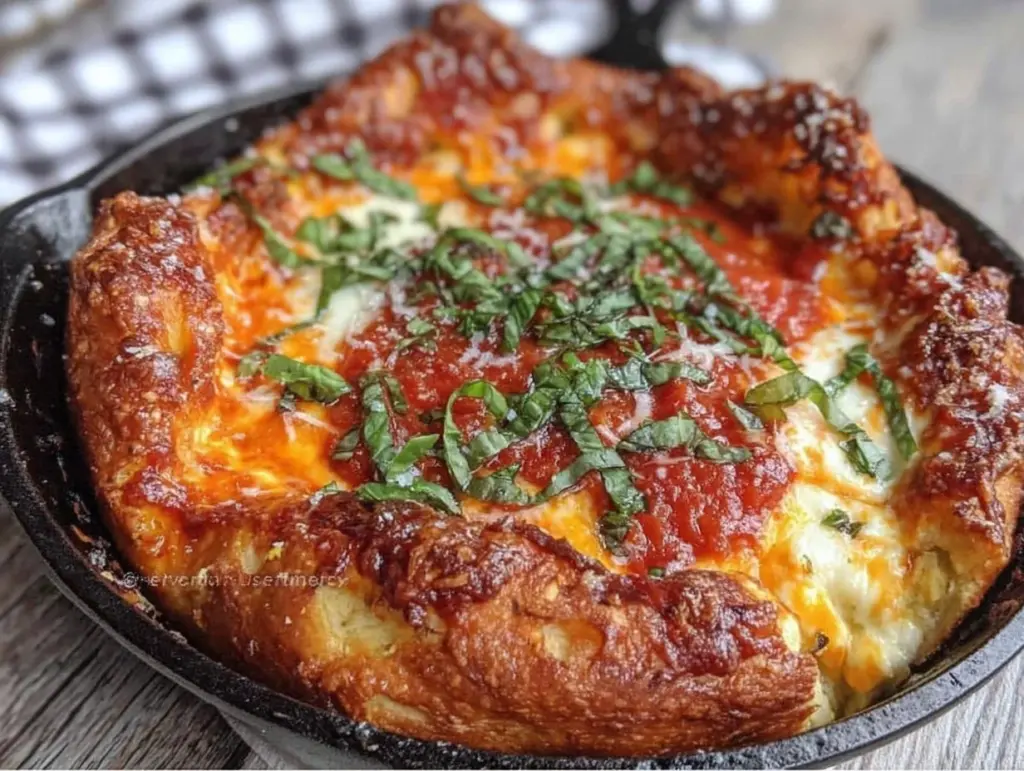
It was July, the kind of sticky, humid summer night where the air feels like a warm towel pressed against your face. I had just come back from the farmers market with a bag of tomatoes that were heavier than they looked, their skins taut and red, smelling like sunshine and earth. I wanted pizza. Not the frozen kind, not the delivery kind, but the kind that has that specific crackle when you pull it from the oven. The kind where the crust shatters slightly before giving way to a chewy center. So, I did what any desperate, hungry home cook does: I fired up the cast iron skillet I’d been neglecting for months.
I’ve made this Crispy Cast Iron Margherita Pizza with Garlic Butter Crust dozens of times since that humid Tuesday. Some nights it’s perfect. Some nights I burn the cheese or undercook the dough. But this recipe? This is the one that stuck. It’s not about fancy equipment or sourcing ingredients from three different countries. It’s about simplicity. It’s about letting high-quality ingredients do the heavy lifting. The garlic butter crust is my secret weapon, turning a simple dough into something aromatic and golden. The fresh basil and mozzarella are non-negotiable because, honestly, you can’t beat what’s in season right now.
If you’ve been looking for a way to use up those farmers market finds, or if you just want a dinner that feels special but doesn’t take all weekend, this is it. I remember the first time I tried making pizza in a cast iron pan. I thought I’d failed because the bottom was dark. Then I took a bite. It was crispy, garlicky, and utterly delicious. I learned then that a little char is a feature, not a bug. This Crispy Cast Iron Margherita Pizza with Garlic Butter Crust is my answer to “what’s for dinner?” when I want something comforting, fresh, and incredibly satisfying. It’s the kind of meal that makes you forget about your phone and just eat.
Why You’ll Love This
Let’s be real. Making pizza from scratch usually sounds like a lot of work. You have to knead, wait, proof, stretch, and then worry about the oven temperature. But this method changes the game entirely. Here is why this Crispy Cast Iron Margherita Pizza with Garlic Butter Crust has earned a permanent spot in my weekly rotation:
- Restaurant-Quality Crust at Home — The secret is the cast iron. It holds heat like a beast, creating that deep, blistered, crispy bottom that you usually only get at a pizzeria. I tested this against a standard baking sheet, and the difference was night and day. The skillet creates a steamy environment that puffs the edges while the direct contact crisps the base.
- Garlic Butter Crust Magic — Most people brush oil on the pan. I brush a mixture of melted butter and minced garlic. It sounds simple, but it transforms the entire eating experience. The edges get golden and savory, almost like a breadstick, but better. It adds a layer of flavor that plain oil just can’t achieve.
- Ready in Under 30 Minutes — Yes, really. If you buy pre-made dough or make a quick no-rise dough, you’re looking at 15 minutes of prep and 10 minutes of cooking. This is perfect for those weeknights when you’re tired, hungry, and don’t want to order takeout. It’s faster than waiting for a delivery driver.
- Showcases Peak Season Produce — This recipe is designed to highlight what’s fresh. When tomatoes are ripe in summer, they shine. In winter, you might swap for roasted peppers or mushrooms. The Crispy Cast Iron Margherita Pizza with Garlic Butter Crust is a canvas for seasonal ingredients. It encourages you to shop local and eat fresh.
- Minimal Cleanup — You’re cooking in one pan. One pan! No separate pots for sauce, no extra trays for cheese. Just the skillet. After the meal, you scrape the bits, wash the pan, and you’re done. It’s efficient cooking for busy lives.
This is my go-to when I want to impress my family without spending hours in the kitchen. It feels fancy, but it’s actually quite humble. And honestly, the smell of garlic butter hitting hot cast iron? That alone is worth the effort.
Key Ingredients
When you’re making a Margherita pizza, there’s nowhere to hide. The ingredients need to be good. Here’s what I use and why it matters. I stick to these measurements for a consistent 12-inch pizza.
Pizza Dough (1 lb / 450g) — I usually buy this from my local bakery or make a quick 24-hour rise dough at home. If you’re short on time, a high-quality refrigerated dough ball works great. Avoid the dry, pre-packaged ones if you can help it; the texture is just too dense. Look for dough that feels soft and pliable.
San Marzano Tomatoes (1 can, 28 oz / 800g) — Real talk: don’t use regular canned tomatoes. San Marzanos are grown in the volcanic soil near Naples, Italy. They are sweeter, less acidic, and have thicker flesh. Crush them by hand for a rustic texture. If you can’t find them, high-quality plum tomatoes are the next best option. Drain the excess liquid so your pizza doesn’t get soggy.
Fresh Mozzarella (8 oz / 225g) — Use the fresh balls packed in water, not the pre-shredded bags. Shredded cheese has anti-caking agents that prevent it from melting smoothly. Slice the fresh mozzarella and pat it dry with paper towels. This step is crucial. Wet cheese = soggy pizza. I always squeeze the excess moisture out before adding it to the pie.
Fresh Basil Leaves (1 large handful / approx. 15-20 leaves) — Wait to add the basil *after* baking or in the last minute of cooking. If you bake it too long, basil turns black and bitter. Look for leaves that are vibrant green and fragrant. If you’re growing your own, this is the time to use it. It’s the ultimate “make while it’s at its best” ingredient.
Unsalted Butter (3 tbsp / 45g) — This is for the garlic butter crust. Salted butter works, but you’ll need to adjust the salt elsewhere. Unsalted gives you control over the flavor. Melt it gently; don’t brown it. You want pure buttery flavor, not nutty.
Garlic (2 cloves / 1 tsp minced) — Fresh garlic only. Jarred garlic has a metallic taste that clashes with the delicate tomato sauce. Mince it finely so it distributes evenly in the butter. If you’re sensitive to raw garlic, you can cook the butter with the garlic for 30 seconds before brushing it on the pan to mellow the flavor.
Extra Virgin Olive Oil (1 tbsp / 15ml) — Drizzle this over the top after baking. It adds a fruity, peppery finish that ties everything together. Use a good quality oil here; it’s one of the first flavors you’ll taste.
Sea Salt (1/2 tsp / to taste) — Flaky sea salt is best for finishing. It adds texture and bursts of saltiness that balance the sweetness of the tomatoes and cheese.
Tools Needed
You don’t need a pizza stone or a peel for this. Just a few basic tools. Here’s what I use:
12-Inch Cast Iron Skillet — This is the star of the show. It needs to be oven-safe. If you have a smaller skillet, you’ll need to make two smaller pizzas. A larger skillet might leave the edges too thin. I use a Lodge 12-inch, and it’s been my trusty companion for years.
Rolling Pin or Hands — I prefer using my hands to stretch the dough for a more rustic shape, but a rolling pin works if you want uniform thickness. Just don’t overwork it.
Pastry Brush — For applying the garlic butter to the rim of the skillet. A silicone brush is easiest to clean.
Spatula — A thin, flexible spatula helps you slide the pizza out of the hot skillet without breaking the crust. Be careful; the handle gets hot!
Sharp Knife or Pizza Cutter — For slicing. A pizza cutter is cleaner, but a sharp chef’s knife gives you more control if the crust is very crispy.
Cooking Instructions
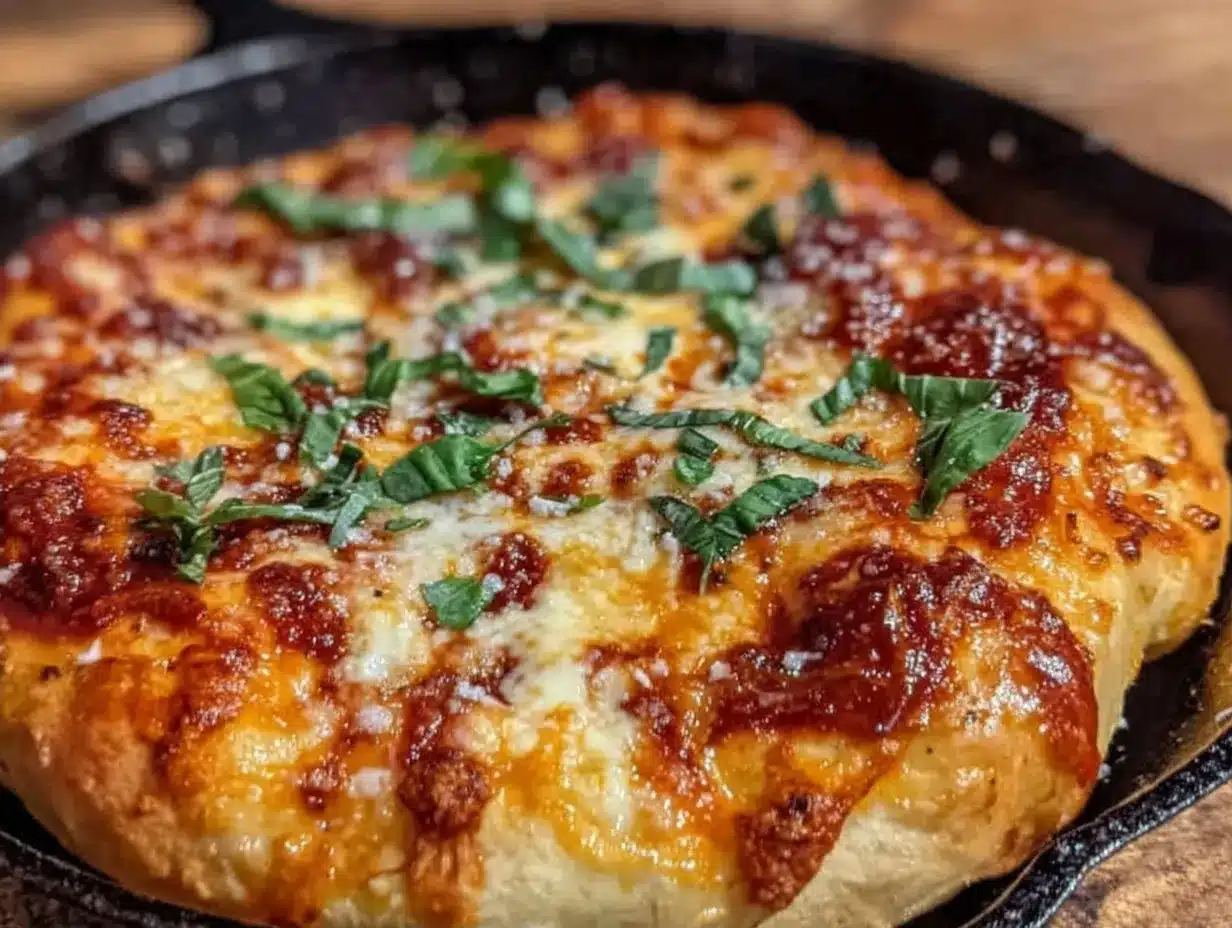
Let’s get into the kitchen. This process is straightforward, but timing is everything. Here is exactly how I make this Crispy Cast Iron Margherita Pizza with Garlic Butter Crust.
Step 1: Prep the Dough and Sauce (10 minutes)
Preheat your oven to 500°F (260°C). Place your cast iron skillet in the oven while it heats up. This ensures the pan is screaming hot when the dough hits it. While the oven heats, crush your San Marzano tomatoes by hand in a bowl. Add a pinch of salt and a drizzle of olive oil. Stir. Don’t cook the sauce; it will cook on the pizza. If you have fresh mozzarella, slice it and pat it dry with paper towels. Squeeze out as much water as possible. This prevents a watery pizza.
Step 2: Make the Garlic Butter (2 minutes)
Melt the 3 tablespoons of butter in a small microwave-safe bowl or saucepan. Stir in the minced garlic. Set aside. You want this warm and liquid, not hot. If it’s too hot, it might burn the garlic when it hits the pan.
Step 3: Stretch the Dough (5 minutes)
Carefully remove the hot skillet from the oven using oven mitts. Brush the inside rim of the skillet with half of the garlic butter. This will create that garlicky, crispy edge. Place the dough ball in the center of the hot pan. It will sizzle immediately. This is good! It starts the cooking process. Use your fingers to press the dough outwards, working from the center to the edges. Rotate the pan as you stretch to keep it circular. Don’t worry about perfect circles; rustic is better. If the dough springs back, let it rest for a minute, then try again. Stretch it to about 1/4 inch thickness.
Step 4: Assemble and Bake (12-15 minutes)
Spoon the crushed tomatoes onto the dough, spreading it in a thin, even layer. Leave a small border for the crust. Scatter the dried mozzarella slices over the top. Drizzle the remaining garlic butter over the edges of the crust. Place the skillet back in the oven, on the middle rack. Bake for 12-15 minutes. Watch closely. You want the crust to be deep golden brown and the cheese to be bubbly and slightly charred. The bottom should be crisp. If the top is browning too fast but the bottom isn’t crisp, move the skillet to a lower rack for the last few minutes.
Step 5: Finish and Serve (3 minutes)
Remove the skillet from the oven. Immediately tear the fresh basil leaves over the hot pizza. The residual heat will wilt them slightly and release their oils. Drizzle with extra virgin olive oil and sprinkle with flaky sea salt. Let it cool in the pan for 2-3 minutes. This lets the cheese set slightly so it doesn’t slide off when you slice. Slide the pizza onto a cutting board or serve directly from the skillet. Slice and enjoy while it’s hot and crispy.
Total Time Breakdown: 10 minutes prep, 2 minutes garlic butter, 5 minutes stretching, 12-15 minutes baking, 3 minutes finishing. Total: ~30 minutes.
Expert Tips
Here’s everything I learned from making this too many times, so you don’t have to make the same mistakes.
The Game-Changers
Hot Pan, Cold Dough — This is the most important tip. The skillet must be fully preheated. If you put dough in a cold pan, it will stick and steam instead of crisp. The shock of the cold dough hitting the hot iron is what creates the rise and the char.
Pat That Cheese Dry — I cannot stress this enough. Fresh mozzarella is 50% water. If you don’t remove that water, your pizza will be a soup factory. Slice, pat, squeeze, pat again. It takes an extra minute, but it’s worth it.
Don’t Over-Sauce — A thin layer of sauce is better than a thick layer. Too much sauce weighs down the dough and makes it soggy. You want to taste the crust, not just sauce.
Common Problems & Solutions
Sticky Dough — If your dough sticks to your hands, wet them slightly with water. Dough sticks when it’s dry; water acts as a barrier. Don’t add more flour to your hands, or you’ll toughen the crust.
Burnt Bottom — If the bottom burns before the top is done, your oven rack is too low. Move it to the middle or upper-middle. Also, ensure your skillet is well-seasoned. A poorly seasoned pan can stick and burn unevenly.
Soggy Crust — This usually happens if the dough isn’t stretched thin enough or if the sauce is too wet. Make sure your sauce is drained and your dough is uniform.
Pro Tricks
The Steam Trick — If your crust isn’t getting enough lift, place a small cup of water in the bottom of the oven (not in the skillet) while baking. The steam helps the dough rise before it sets.
Garlic Control — If you’re worried about the garlic burning, mix the garlic into the butter and let it sit for 10 minutes before brushing it on. The heat of the pan will cook it gently.
Recipe Variations
Once you’ve nailed the basic version, here’s how to mix it up. The Crispy Cast Iron Margherita Pizza with Garlic Butter Crust is a perfect base for creativity.
Prosciutto and Arugula — Add thin slices of prosciutto and a handful of arugula after baking. The heat of the pizza wilts the arugula and warms the prosciutto. It’s elegant and salty.
Mushroom and Thyme — Sauté sliced mushrooms with thyme and garlic before adding them to the pizza. This is great for autumn when mushrooms are fresh from the market.
Roasted Red Pepper — Swap the fresh tomatoes for jarred or roasted red peppers. Add some feta cheese instead of mozzarella. It’s tangy and sweet.
Spicy Calabrian Chili — Mix chopped Calabrian chili paste into the tomato sauce for a subtle heat. It pairs beautifully with the garlic butter crust.
Vegan Version — Use a vegan dough, cashew-based mozzarella, and omit the garlic butter (use olive oil instead). Top with fresh basil and nutritional yeast. It’s surprisingly good.
Gluten-Free — Use a high-quality gluten-free pizza dough. Note that GF dough behaves differently and may need a slightly longer bake time. The garlic butter crust still works!
Serving & Storage
Serving: I serve this straight from the skillet for a rustic feel. It pairs well with a simple arugula salad with lemon vinaigrette to cut through the richness. A glass of chilled white wine or a cold beer is perfect here. For sides, consider my crispy sheet pan breakfast potatoes if you’re making a brunch pizza, or a light watermelon feta salad for a summer meal.
Storage: Leftovers keep well in the refrigerator for up to 3 days. Store them in an airtight container. Reheat in a cast iron skillet or toaster oven to restore crispiness. The microwave will make the crust chewy and soft, so avoid it if you care about texture.
Freezing: This pizza does not freeze well after baking. The mozzarella becomes grainy and the crust loses its crispness. However, you can freeze the dough ball for up to 3 months. Thaw overnight in the fridge before using.
Nutrition Informacoes
I’m not a nutritionist, but here’s the breakdown. This is comfort food. It’s indulgent. But it’s also made with real ingredients.
Per serving (1/8 of pizza): Calories: 280, Protein: 12g, Carbs: 35g, Fiber: 2g, Fat: 10g, Sodium: 450mg.
My Take: This is not diet food. It’s cheese, dough, and butter. But it’s better than takeout because you know exactly what’s in it. The fresh basil and tomatoes add vitamins, and the cast iron cooking method requires less oil than deep frying. Enjoy it as a special weeknight treat or a weekend feast.
Final Thoughts
Making a Crispy Cast Iron Margherita Pizza with Garlic Butter Crust is more than just dinner. It’s a ritual. It’s about slowing down, smelling the garlic, and watching the cheese bubble. It’s about using what’s fresh and making something beautiful with your hands. I hope this recipe brings you as much joy as it has brought me. If you make it, I’d love to hear how it turns out. Drop a comment below with your variations or just let me know if your family loved it.
Happy cooking!
FAQs
Q: Can I use store-bought pizza dough?
A: Absolutely. I do it all the time. Look for a high-quality ball from the refrigerated section, not the dry can. Let it come to room temperature for 30 minutes before stretching to make it easier to work with.
Q: Why did my pizza stick to the pan?
A: This usually happens if the skillet wasn’t hot enough when the dough went in, or if the pan wasn’t well-seasoned. Always preheat the empty skillet. Also, ensure you brushed the pan with garlic butter or oil before adding the dough.
Q: Can I make this in a regular baking sheet?
A: You can, but you won’t get the same crispy bottom. The cast iron provides direct heat conduction that creates the char. If you must use a baking sheet, preheat it and use the broiler for the last minute to get some color.
Q: What cheese can I use if I can’t find fresh mozzarella?
A: Low-moisture mozzarella works, but it won’t melt as creamily. You can also use a mix of mozzarella and provolone for extra flavor. Just avoid pre-shredded cheese.
Q: How do I store leftover garlic butter?
A: Store it in an airtight container in the fridge for up to a week. Reheat gently before using. You can also freeze it in ice cube trays for future pizzas.
Q: Can I add other toppings?
A: Yes! This crust is versatile. Try adding sliced onions, mushrooms, or even breakfast leftovers for a brunch pizza. Just keep the toppings light so the crust stays crispy.
Pin This Recipe!
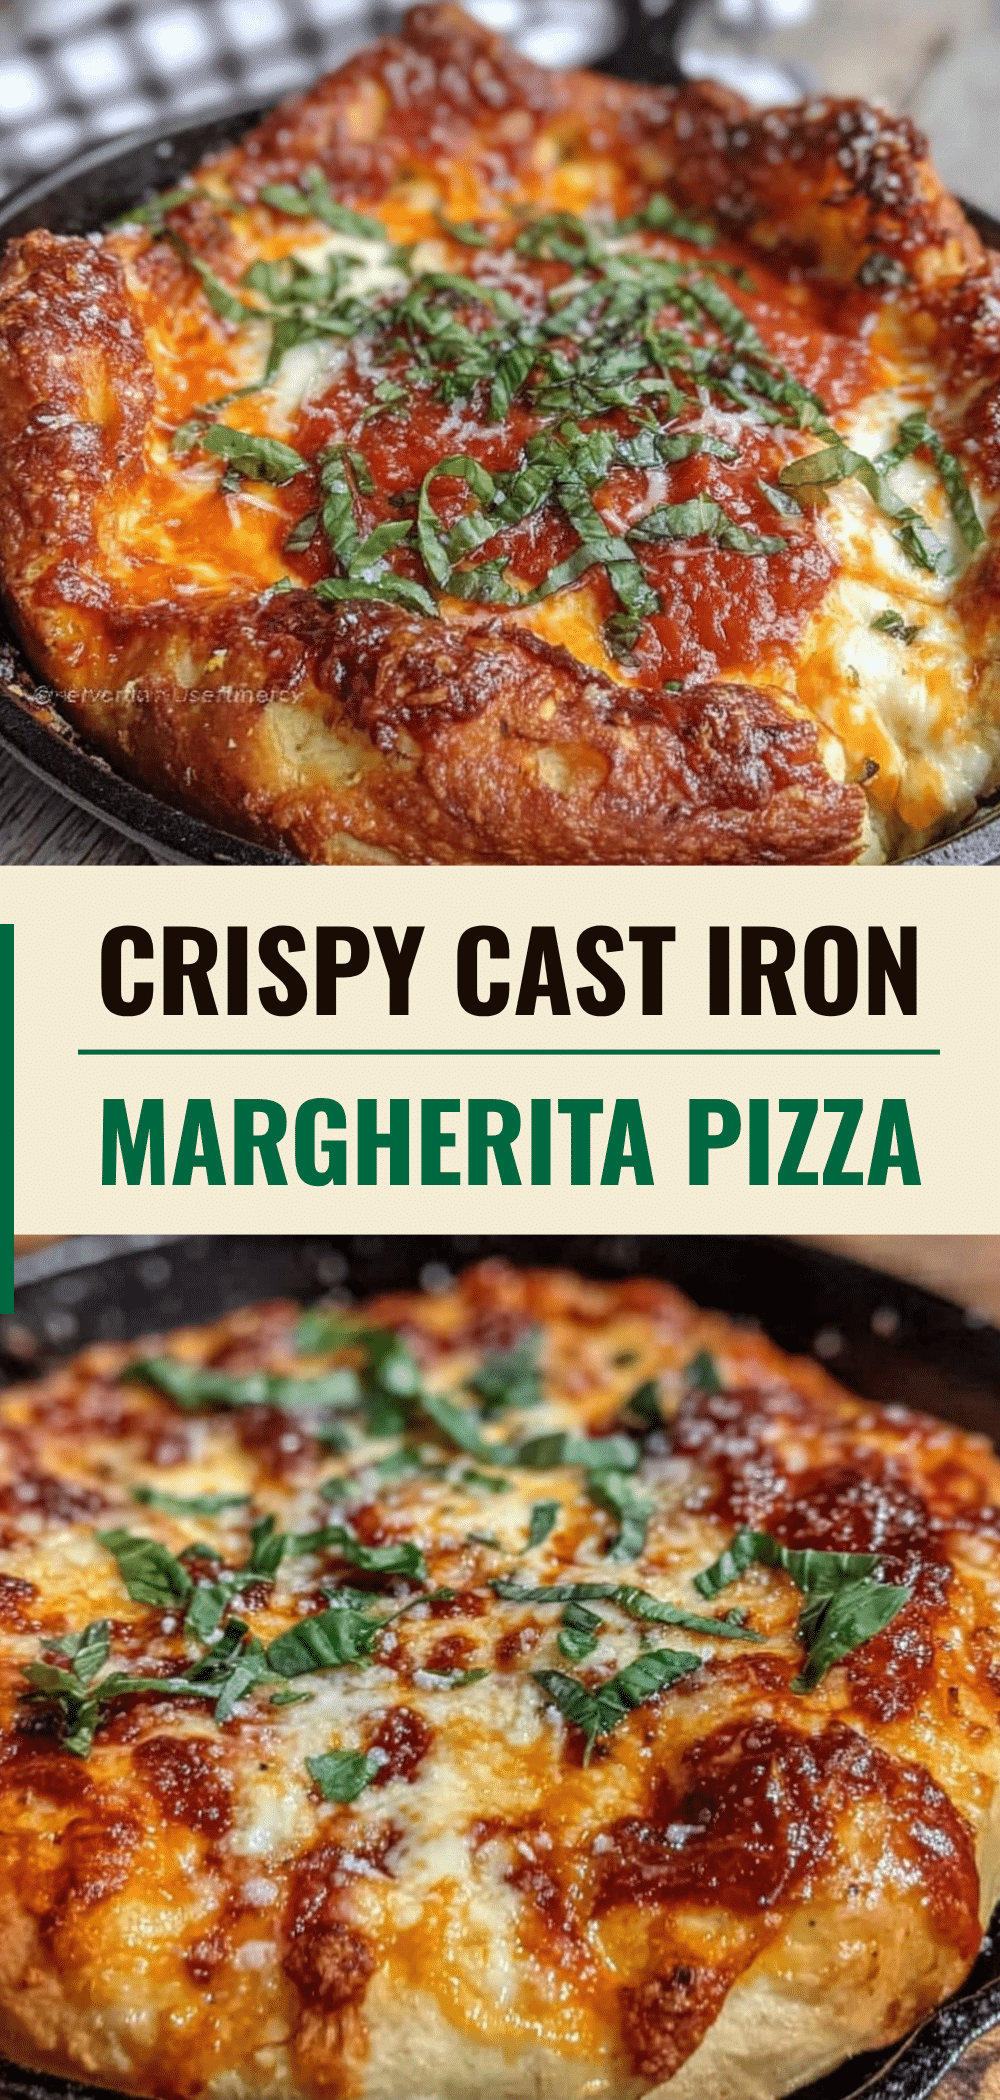

Crispy Cast Iron Margherita Pizza with Garlic Butter Crust
- Total Time: 32 minutes
- Yield: 4 servings 1x
Description
A restaurant-quality Margherita pizza made in a cast iron skillet for a crispy, charred crust, featuring a secret garlic butter edge, fresh San Marzano tomatoes, and fresh mozzarella.
Ingredients
- 1 lb (450g) pizza dough
- 1 can (28 oz / 800g) San Marzano tomatoes
- 8 oz (225g) fresh mozzarella cheese
- 1 large handful fresh basil leaves (approx. 15–20 leaves)
- 3 tbsp (45g) unsalted butter
- 2 cloves garlic, minced
- 1 tbsp extra virgin olive oil
- 1/2 tsp sea salt, plus more to taste
- Pinch of salt for tomato sauce
Instructions
- Preheat oven to 500°F (260°C) with the cast iron skillet inside to heat up.
- Crush San Marzano tomatoes by hand in a bowl; add a pinch of salt and a drizzle of olive oil. Do not cook the sauce.
- Slice fresh mozzarella and pat dry with paper towels to remove excess moisture.
- Melt butter in a small bowl or saucepan and stir in minced garlic to create garlic butter.
- Carefully remove the hot skillet from the oven. Brush the inside rim with half of the garlic butter.
- Place dough in the center of the hot pan; it will sizzle. Press and stretch dough to about 1/4 inch thickness.
- Spread crushed tomatoes thinly over the dough, leaving a border for the crust.
- Scatter dried mozzarella slices over the sauce. Drizzle remaining garlic butter over the crust edges.
- Bake for 12-15 minutes until crust is deep golden brown and cheese is bubbly and slightly charred.
- Remove from oven and immediately tear fresh basil leaves over the hot pizza.
- Drizzle with extra virgin olive oil and sprinkle with flaky sea salt.
- Let cool in the pan for 2-3 minutes before slicing and serving.
Notes
Ensure the skillet is fully preheated to prevent sticking and ensure crispiness. Pat mozzarella dry to avoid a soggy pizza. If the bottom burns, move the rack to the middle or upper-middle position. Leftovers can be stored in the fridge for up to 3 days and reheated in a skillet or toaster oven.
- Prep Time: 17 minutes
- Cook Time: 15 minutes
- Category: Main Course
- Cuisine: Italian
Nutrition
- Serving Size: 1/8 of pizza
- Calories: 280
- Sugar: 4
- Sodium: 450
- Fat: 10
- Saturated Fat: 6
- Carbohydrates: 35
- Fiber: 2
- Protein: 12
Keywords: pizza, cast iron, margherita, garlic butter, homemade pizza, quick dinner, Italian food, crispy crust