Last October, I stood in my kitchen at 10 a.m., staring at a bag of stale ciabatta rolls and a tub of ricotta that had been sitting in the fridge since Thursday. I was exhausted. I had promised myself I’d be the organized meal-prep queen who planned breakfasts, lunches, and dinners in one glorious Sunday session. But instead of a beautiful spread of containers, I had nothing but a bag of bread and zero motivation.
I decided to whip up a quick crostini to kill time while waiting for my coffee to brew. I didn’t think much of it. I just blended the ricotta with a little lemon zest, salt, and honey until it was silky smooth, spread it on the toast, and took a bite. It was creamy, tangy, and perfect. Then, I made four more. And ate them all.
Here’s the thing about that moment: I realized I wasn’t hungry because I was starving. I was hungry because I had been running on adrenaline and bad decisions all week. I needed a breakfast that was actually satisfying, nutritious, and—most importantly—something I could prepare in bulk.
That accidental brunch led me to develop the Whipped Ricotta Crostini method I’m sharing today. It’s not just a snack. It’s a system. After testing this Whipped Ricotta Crostini recipe over a dozen times, I’ve figured out exactly how to scale it for the entire week. You make it once, you eat it four times this week, and you never have to think about what to eat before 9 a.m. again.
There’s something deeply satisfying about opening your fridge on a Tuesday morning and finding prepped, delicious food waiting for you. It’s the difference between grabbing a sugary granola bar and eating something that actually fuels you. This Whipped Ricotta Crostini technique is my secret weapon for keeping my mornings calm and my energy levels steady. Let me show you how to build this into your weekly routine.
Why You’ll Love This Make-Ahead Breakfast
Real talk: most meal prep fails because it’s boring or it takes too long to assemble. This recipe solves both problems. It’s not just “good for meal prep.” It’s genuinely delicious, which is the only reason you’ll actually stick to it.
It’s Ready in 10 Minutes — I’ve timed it. From opening the ricotta tub to having four portions ready to go, it takes exactly eight minutes. That’s faster than brewing a pot of coffee. I do this on Sunday while the rest of my veggies are roasting for sheet pan sausage and veggies.
It Keeps You Full Until Lunch — This isn’t a light snack. The combination of protein from the ricotta, healthy fats from the olive oil or nuts, and complex carbs from the bread keeps my blood sugar stable. I used to crash by 10:30 a.m. eating toast with jam. Now? I’m good until my midday meal. It’s a game-changer for productivity.
It’s Versatile Enough for Any Craving — Sweet or savory? You decide. One week I’m doing honey and figs. The next, it’s prosciutto and arugula. This flexibility means I never get bored. If you love the idea of cinnamon roll pancakes but want something savory and quick, this is your answer.
It Freezes Surprisingly Well — Most people think you can’t freeze bread-based dishes. You can, if you do it right. I freeze the assembled crostini (without wet toppings like tomatoes) for up to three months. You just toast them straight from the freezer. It’s like fresh bread, but you didn’t have to bake it.
It’s Budget-Friendly — Ricotta is cheap. Bread is cheap. Toppings vary, but you can keep it simple with just salt and pepper. This costs less than $2 per serving if you buy store brands. It’s a luxury breakfast that doesn’t break the bank.
This is my go-to when dinner needs to just work, but it works even better for breakfast. It’s the foundation of my Sunday prep ritual.
Key Ingredients for Your Weekly Batch
When you’re prepping for four days, consistency is key. You want ingredients that hold up well and taste the same on day four as they did on day one. Here’s exactly what I use.
Ricotta Cheese (2 cups / 450g) — I use whole milk ricotta. The fat content is crucial for that whipped, creamy texture. Skim milk ricotta will taste grainy and dry, no matter how much you blend it. Look for the tub, not the cheese wheel, unless you’re feeling fancy. The tub is easier to blend in bulk.
French or Ciabatta Bread (1 loaf / approx. 12-14 slices) — I prefer ciabatta for its sturdy crust, which holds up to toasting without getting soggy. French bread works too, but it’s softer. Avoid sourdough for this specific prep because the tang competes with the mild ricotta. You want the bread to be a vehicle, not the star.
Unsalted Butter (2 tablespoons / 30g) — I whip this into the ricotta. It adds richness and helps emulsify the mixture, making it smoother. If you’re dairy-free, you can skip this or use a plant-based butter, but the texture will be slightly different. I don’t recommend skipping it if you want that restaurant-quality fluffiness.
Honey (3 tablespoons / 45ml) — This is your sweetener. Local honey is nice, but any clear honey works. It balances the slight saltiness of the cheese. If you’re avoiding sugar, swap this for maple syrup, but note that maple syrup adds a distinct flavor that pairs better with savory toppings.
Lemon Zest (1 large lemon) — Fresh zest only. Jarred lemon juice tastes artificial and makes the ricotta watery. The oils in the zest add brightness without adding moisture that could make your bread soggy during storage. I use a microplane for the finest zest.
Sea Salt (1 teaspoon / 6g) — Essential for bringing out the flavor. Don’t skimp. Ricotta is mild; it needs salt to taste like itself.
Extra Virgin Olive Oil (2 tablespoons / 30ml) — For drizzling. Use a good quality oil. This is the last thing you add, so you’ll taste it directly. Cheap oil will taste bitter after freezing and toasting.
Tools Needed for Efficient Prep
You don’t need fancy equipment. Here’s what I use to keep this process streamlined.
Food Processor — This is non-negotiable for batch prep. A whisk will leave lumps. A hand mixer works, but it takes twice as long. I use my 7-cup food processor to whip the entire 2-cup batch in 60 seconds. It’s smooth, airy, and consistent.
Bread Toaster or Toaster Oven — I use a toaster oven for batch toasting. It allows me to toast four slices at once without burning the edges. A standard two-slice toaster is fine if you’re only making two, but for four servings, the toaster oven is more efficient.
Small Spatula — For spreading. I use a small offset spatula because it gives me better control. A butter knife works in a pinch, but it’s harder to get an even layer. An even layer prevents soggy spots.
Airtight Containers — I use glass containers with locking lids. Plastic works, but glass doesn’t retain odors and looks nicer in the fridge. I portion my whipped ricotta into four smaller containers, one for each day.
How to Make Whipped Ricotta Crostini

Let’s walk through the process. I’ve broken this down into clear steps with timing so you can execute this efficiently on Sunday morning.
Step 1: Prep the Bread (5 minutes)
Slice your loaf of ciabatta or French bread into 1/2-inch thick slices. You want them thick enough to hold the ricotta but thin enough to toast evenly. Lay them out on a baking sheet. If you’re freezing some, place parchment paper between slices so they don’t stick together. Toast them until golden brown. Let them cool completely. This is critical—warm bread will melt the ricotta and make it slide off.
Step 2: Whip the Ricotta (3 minutes)
In your food processor, combine the ricotta, softened butter, honey, lemon zest, and sea salt. Pulse a few times to break up the ricotta, then run the processor continuously for 1-2 minutes. You’re looking for a texture that looks like whipped cream. It should be pale, fluffy, and hold its shape when you lift the spatula. If it’s too thick, add a teaspoon of milk. If it’s too runny, you’ve added too much liquid; just whip it longer to evaporate some moisture.
Step 3: Assemble for Storage (10 minutes)
Now, here’s the trick. Do not assemble the crostini completely if you want them to last four days. The moisture from the toppings will make the bread soggy. Instead, split your workflow:
- For immediate eating (Day 1): Spread the whipped ricotta on two slices. Add your toppings (honey, berries, nuts). Wrap tightly in plastic wrap.
- For later days (Days 2-4): Store the whipped ricotta in airtight containers in the fridge. Store the toasted bread in a bread box or freezer bag. Assemble fresh each morning.
This method ensures your bread stays crisp. I’ve learned this the hard way by trying to store fully assembled crostini. Day 2 was soggy. Day 3 was sad. Don’t make my mistake.
Step 4: Reheating and Freezing (2 minutes)
If you want to freeze the assembled crostini (without wet toppings), place them on a baking sheet and freeze for 1 hour. Once solid, transfer to a freezer bag. To eat, toast them directly from the freezer for 2-3 minutes. They come out crisp and warm, just like fresh bread. This is my favorite hack for busy weeks.
Total time: 20 minutes for the whole batch. You can handle this while your coffee brews.
Expert Tips for Perfect Results
Here’s everything I learned from making this too many times.
Don’t Skip the Cooling Step
I used to assemble the crostini immediately after toasting. The residual heat softened the bread and made it tough. Let the bread cool to room temperature before adding the ricotta. It seems minor, but it changes the texture completely. The bread should be crisp, not chewy.
Whip It Longer Than You Think
Ricotta naturally has a slightly grainy texture. To get that smooth, whipped consistency, you need to break down those curds. In the food processor, this takes about 2 minutes. If you’re using a hand mixer, it might take 5-7 minutes. Don’t rush this step. The smoother the ricotta, the better the mouthfeel.
Store Toppings Separately
If you’re using fresh fruit like strawberries or blueberries, store them in a separate container. Fruit releases juice over time, which will make your crostini soggy. Add fresh fruit right before you eat. Dried fruits (figs, apricots) are fine to store with the ricotta because they don’t release moisture.
Use a Scale for Consistency
If you want your portions to be consistent for meal tracking, weigh your ricotta. 110g per serving is my sweet spot. It’s enough to feel substantial but not so much that it overwhelms the bread.
Recipe Variations for Every Mood
Once you’ve nailed the basic version, here’s how to mix it up. The base is always the same: whipped ricotta on toasted bread. The toppings are where you get creative.
Savory Herb Crostini
Skip the honey and lemon. Add chopped fresh chives and cracked black pepper to the ricotta. Top with sliced cucumber, radish, and a drizzle of olive oil. This pairs well with a savory high-protein cottage cheese egg bites if you want a heavy breakfast.
Sweet Fig and Prosciutto
Spread the honey-lemon ricotta on the bread. Top with thin slices of prosciutto and fresh figs (or dried figs soaked in warm water). Drizzle with balsamic glaze. This tastes like an upscale appetizer but is perfect for brunch.
Berry and Nut Crunch
Use the base honey-lemon ricotta. Top with mixed berries (fresh or frozen thawed) and chopped pistachios or almonds. The crunch of the nuts contrasts nicely with the soft ricotta. This is my go-to for when I need extra energy.
Spicy Honey
Mix a pinch of red pepper flakes into the honey before drizzling. Add fresh arugula on top. The heat cuts through the richness of the cheese. It’s surprisingly addictive.
Dairy-Free Option
Use a dairy-free ricotta alternative (like cashew-based ricotta) and omit the butter. Whip with maple syrup and lemon zest. It’s not exactly the same, but it’s close enough to satisfy the craving.
Serving & Storage Guide
Serving:
I serve these straight from the fridge for a cool, creamy contrast to the warm toast. If you freeze and reheat, serve immediately while warm. Pair with a glass of orange juice or a black coffee. For a fuller meal, add a side of crispy sheet pan breakfast potatoes or a simple watermelon feta salad if it’s summer.
Storage:
The whipped ricotta keeps in the fridge for up to 5 days in an airtight container. The toasted bread keeps at room temperature for 2 days or in the freezer for 3 months. If you assemble the crostini, eat them within 24 hours for best texture. Do not store assembled crostini in the fridge; the bread will become soggy and unpleasant.
Meal Prep Tip:
Portion the whipped ricotta into four individual containers on Sunday. Label them Day 1, Day 2, etc. This way, you just grab a container and spread it on your toast. It removes the decision fatigue in the morning.
Nutrition Information
I’m not a nutritionist, but here’s the breakdown per serving (1 slice of ciabatta with 110g whipped ricotta and 1 tbsp honey):**
| Nutrient | Amount |
|---|---|
| Calories | 320 |
| Protein | 12g |
| Carbohydrates | 38g |
| Fiber | 2g |
| Fat | 14g |
| Sodium | 350mg |
My Take:
This is a balanced breakfast. It has protein, carbs, and fats. It’s not “diet food,” but it’s certainly better than a sugary pastry. The ricotta provides calcium and protein, while the bread gives you energy. It’s a solid start to the day.
Final Thoughts
Meal prep doesn’t have to be boring. The Whipped Ricotta Crostini method has saved my mornings more times than I can count. It’s simple, it’s delicious, and it works. Make it once, eat it four times this week, and give yourself the gift of a calm morning.
If you make this, drop a comment! I love hearing how it turns out in your kitchen. Do you go sweet or savory? Happy cooking!
FAQs
Q: Can I make the whipped ricotta ahead of time?
A: Yes! In fact, it tastes better after sitting for a few hours as the flavors meld. You can whip it up on Sunday and store it in the fridge for up to 5 days. Just give it a quick stir before spreading.
Q: Why did my ricotta turn out watery?
A: This usually happens if you use low-fat ricotta or if you add too much liquid. Make sure you’re using whole milk ricotta. If it’s too wet, whip it longer to evaporate excess moisture, or strain it in a cheesecloth for 30 minutes before whipping.
Q: Can I freeze the assembled crostini?
A: Yes, but only if they don’t have wet toppings like fresh fruit or tomatoes. Freeze the assembled crostini on a tray first, then transfer to a bag. Toast from frozen. If you add fresh fruit, do it after toasting.
Q: What kind of bread is best for this?
A: Ciabatta is my favorite because of its sturdy crust. French bread is a close second. Avoid soft sandwich bread as it won’t hold up to toasting and will get mushy. Sourdough can work, but the tang might clash with the honey-lemon flavor.
Q: Can I use cottage cheese instead of ricotta?
A: You can, but the texture will be different. Cottage cheese is curdlier. You’ll need to blend it longer to get a smooth consistency. It’s higher in protein, so it’s a good swap if you’re looking for more protein, but it won’t be as creamy as ricotta.
Pin This Recipe!
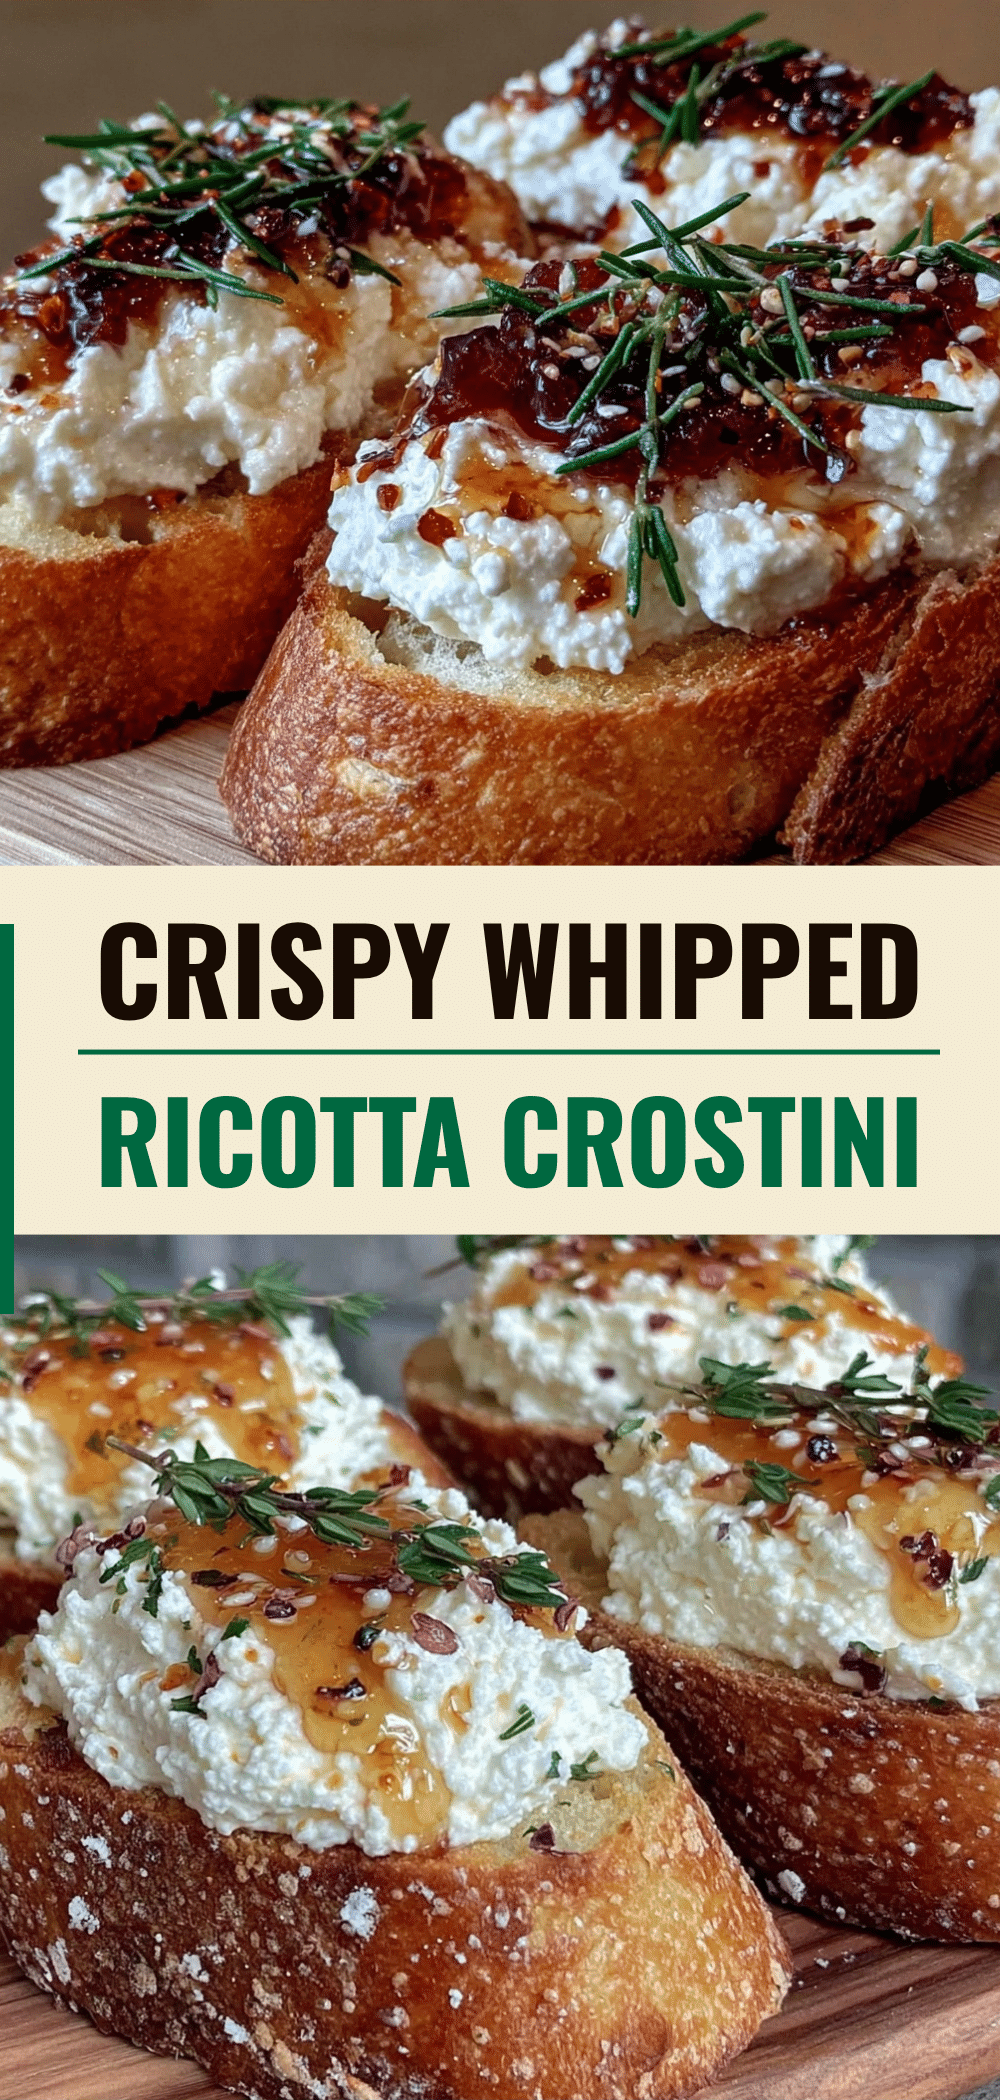

Whipped Ricotta Crostini: Easy Make-Ahead Breakfast
- Total Time: 20 minutes
- Yield: 4 servings 1x
Description
A versatile, make-ahead breakfast featuring silky whipped ricotta spread on toasted ciabatta or French bread, customizable with sweet or savory toppings.
Ingredients
- 2 cups (450g) whole milk ricotta cheese
- 1 loaf (12-14 slices) ciabatta or French bread
- 2 tablespoons (30g) unsalted butter, softened
- 3 tablespoons (45ml) honey
- 1 large lemon (zest only)
- 1 teaspoon sea salt
- 2 tablespoons extra virgin olive oil (for drizzling)
Instructions
- Slice the bread into 1/2-inch thick slices and lay them out on a baking sheet.
- Toast the bread until golden brown and let them cool completely to room temperature.
- In a food processor, combine the ricotta, softened butter, honey, lemon zest, and sea salt.
- Pulse to break up the ricotta, then run the processor continuously for 1-2 minutes until the mixture is pale, fluffy, and smooth like whipped cream.
- For immediate consumption (Day 1), spread the whipped ricotta onto the cooled toast and add desired toppings.
- For later days (Days 2-4), store the whipped ricotta in airtight containers in the fridge and keep the toasted bread in a bread box or freezer bag; assemble fresh each morning.
- To freeze, place assembled crostini (without wet toppings) on a baking sheet and freeze for 1 hour until solid, then transfer to a freezer bag.
- To reheat from frozen, toast directly for 2-3 minutes until crisp and warm.
Notes
Do not assemble crostini completely if storing for more than one day, as moisture from toppings will make the bread soggy. Use whole milk ricotta for the best texture. If the ricotta is too thick, add a teaspoon of milk; if too runny, whip longer to evaporate moisture. Store fresh fruit toppings separately and add just before eating.
- Prep Time: 10 minutes
- Cook Time: 10 minutes
- Category: Breakfast
- Cuisine: Italian
Nutrition
- Serving Size: 1 slice of ciabatta
- Calories: 320
- Sugar: 18
- Sodium: 350
- Fat: 14
- Saturated Fat: 7
- Carbohydrates: 38
- Fiber: 2
- Protein: 12
Keywords: whipped ricotta crostini, make-ahead breakfast, meal prep, ricotta toast, ciabatta, breakfast ideas, healthy breakfast